
As with ESXi 6.5, VMware Workstation 14 has introduced support for the new NVMe storage controller. The new NVMe storage controller allows ones to take advantage of the ultra fast NVMe backed datastores afforded by today’s NVMe drives. If you have upgraded for a previous version of VMware Workstation and want to make use of the new storage controller, how do we go about doing this? The process of changing boot drive to NVMe storage controller in VMware Workstation 14 is not quite as straightforward as it is in VMware ESXi. Let’s take a look at how to change boot drive to NVMe storage controller in VMware Workstation 14 and the steps involved to get up and running with the new NVMe storage controller in place.
Change to NVMe Storage Controller in VMware Workstation 14
VMware Workstation in general doesn’t give us as much control over the storage controller via the Workstation interface as we get in the vSphere client with ESXi, etc. It requires some low level edits to change existing drives to NVMe that we don’t have to do in vSphere. The process to change to NVMe storage controller in VMware Workstation 14 involves just a few steps including the below:
- Change Hardware compatibility to VMware Workstation 14.x
- Add a new hard disk to your virtual machine of type NVMe
- Make sure VMware Tools is at the current version level
- Allow drivers for the NVMe hard disk to be loaded
- Edit the VMX file to change references to the existing LSI SAS controller to NVMe
Let’s take a look at the first thing we need to do – Change Hardware Compatibility.
Upgrade Hardware Compatibility in VMware Workstation 14
The first thing we need to do is upgrade the hardware compatibility of the virtual machine so it can take advantage of the new features offered in VMware Workstation 14 such as NVMe hard disk support. To begin making these changes, simply right-click on the virtual machine in question and choose Change Hardware Compatibility.
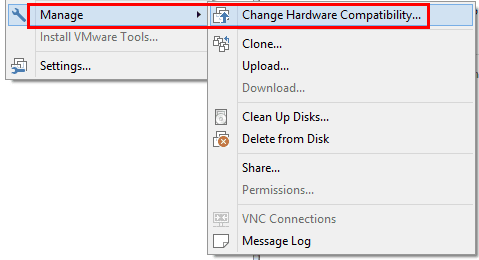
Change Hardware Compatibility Level VMware Workstation 14
The Change Hardware Compatibility Wizard begins.
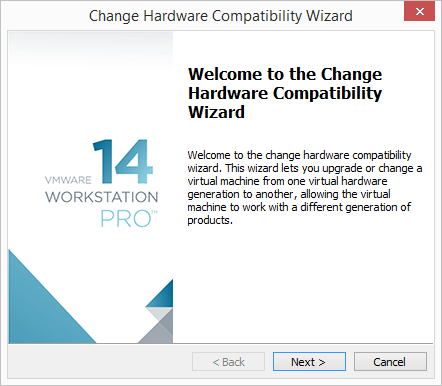
Change Hardware Compatibility Level wizard begins
Here, we want to change the Hardware compatibility to Workstation 14.x.
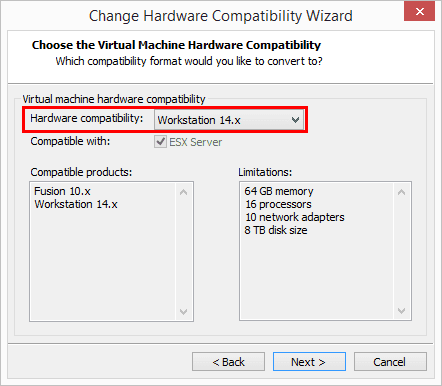
Setting the Hardware Compatibility Level to VMware Workstation 14.x
To be safe, you can choose to Create a new clone of this virtual machine to make sure you have an original copy of the virtual machine and its configuration before altering compatibility. However, I am simply choosing to Alter this virtual machine without creating a clone.
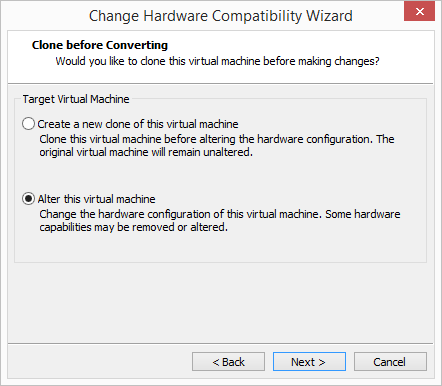
Choose to clone for backup before changing
Here we have a summary of sorts where we see the changes that will be made before the configuration is changed. Click Finish.
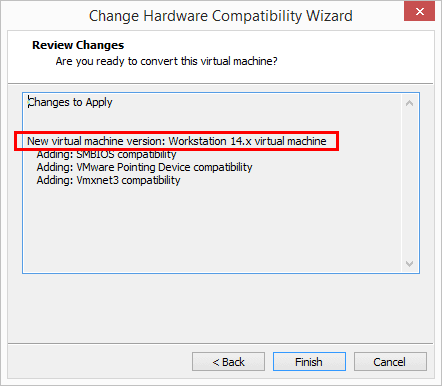
Confirm Hardware Compatiblity changes to apply
Once we hit finish, we see the changes are applied. Click Close.
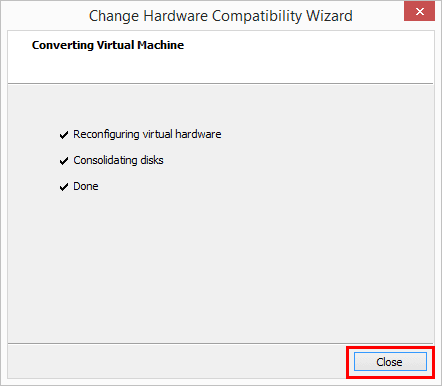
VMware Workstation 14 Hardware Compatibility changes are applied
Add a New NVMe Hard Disk in VMware Workstation 14
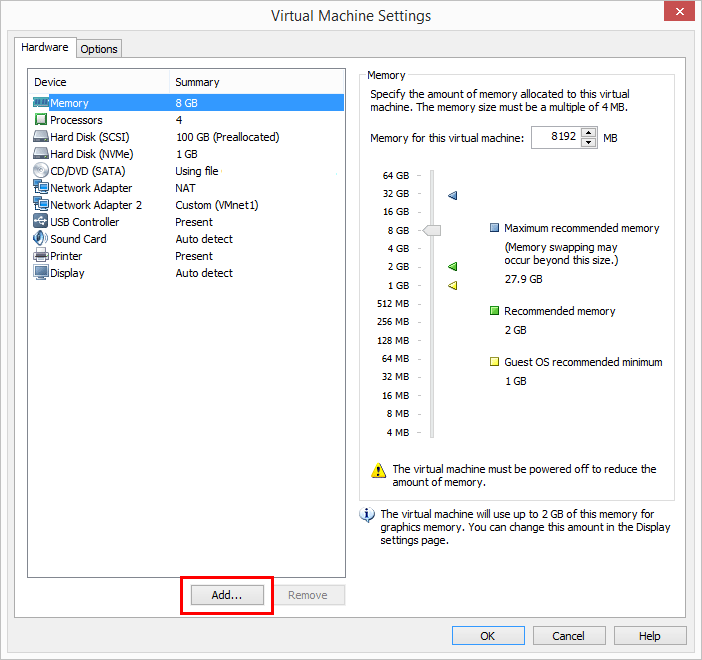
Now that we have upgraded our hardware compatibility, we can add an NVMe hard disk to the virtual machine. Simply right-click the virtual machine and choose Settings. In settings, click the Add button at the bottom.
Start the Add Hardware Wizard
This begins the Add Hardware Wizard. We choose Hard Disk since we want to add a new NVMe hard disk.
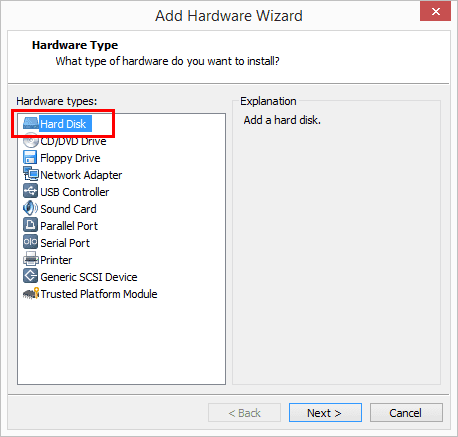
Choose to Add a Hard Disk
Select NVMe.
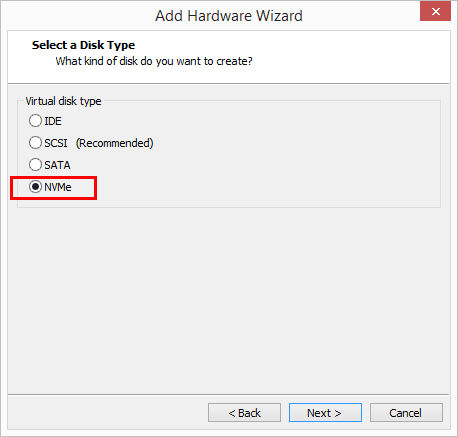
Choose NVMe Hard Disk
Here, choose to create a new virtual disk. Since in this case, we are trying to get our boot drive changed over to the NVMe hard disk, we need to get the driver installed. The quickest way to do that is to create a tiny new NVMe hard disk and allow the driver to install. Then, we will change our boot drive over to the new NVMe controller.
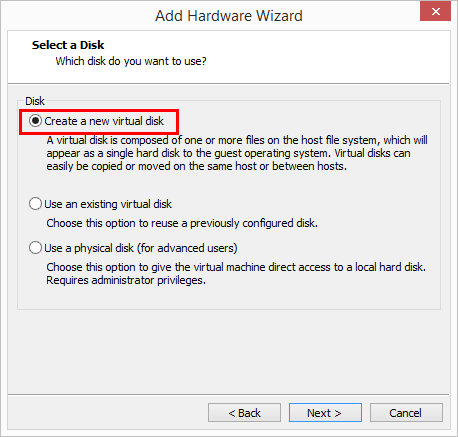
Create a new hard disk
Again, I am creating a tiny new 1GB disk.
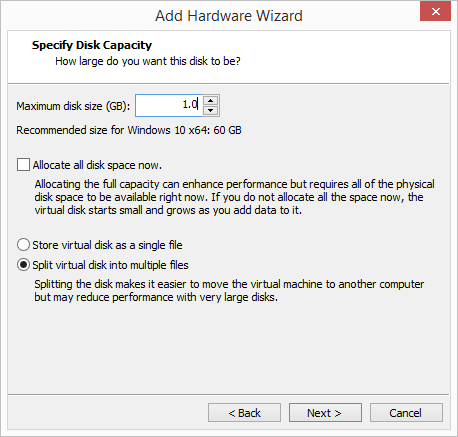
Choose to create a small hard disk to install the driver
Name the new NVMe hard disk and click Finish.
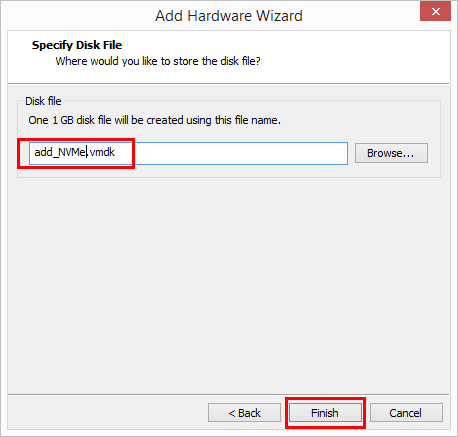
Name the hard disk and finish
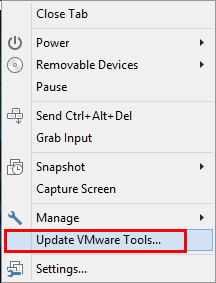
Upgrade VMware Tools in VMware Workstation 14
To upgrade VMware Tools, we simply right-click the workstation and choose the Update VMware Tools option.
Start the VMware Tools update
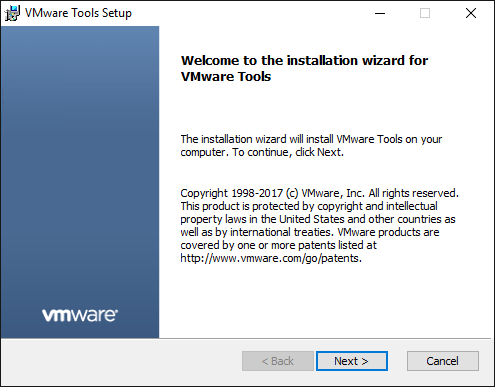
Simply walk through the “next, next, finish” of VMware Tools install.
In the virtual machine guest the VMware Tools update begins
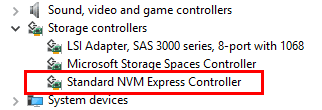
Note in Windows device manager, you should see the new Standard NVM Express Controller appear.
New NVMe controller should be installed
Edit the Virtual Machine VMX file to change to NVMe storage controller
Note, below, we see the current storage controller configuration for the boot drive. The standard lsisas1068 controller is shown in the VMX. We need to remove these configuration lines. ***Note*** be sure to take a backup of the VMX file first.
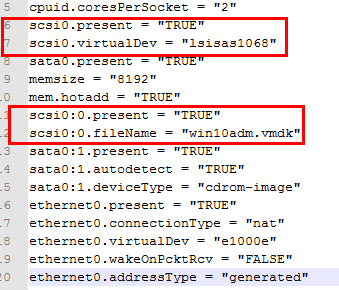
Remove the LSI SAS references
Below are the configuration lines present for the NVMe drive we added. We will use these as a starting point to change the boot drive to NVMe.

Note the NVMe configuration lines in the VMX
Below, we have “flip flopped” the boot drive numbering with the new drive so that the boot drive is at the 0:0 slot on the controller.
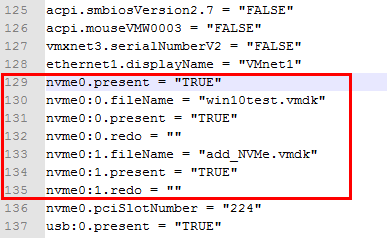
Add the NVMe configuration lines for the boot drive
Save the VMX file and remove the virtual machine from inventory.
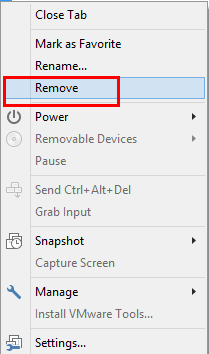
Remove the virtual machine from inventory
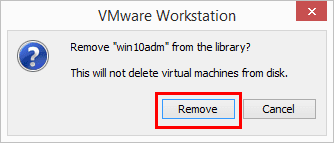
Confirm removal of virtual machine
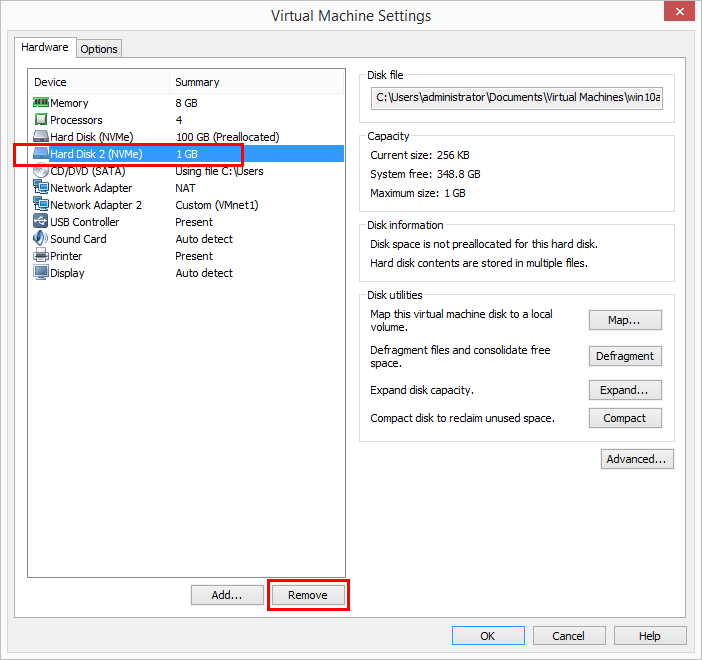
Now, add the virtual machine back to your VMware Workstation 14 inventory and we can remove the secondary hard disk that we added to install the NVMe driver.
After this point, we are good to boot our virtual machine and enjoy the new speed and functionality of the NVMe controller driving our boot disk!
Thoughts
The new features and functionality with VMware Workstation 14 include the ability to use the new NVMe storag controller. VMware Workstation is a little more locked down from the interface perspective in controlling the storage controller driving a hard disk. However, with just a few steps, we can edit the VMX file to change our boot disk to the new NVMe storage controller without much hassle.


0 Comments