
There is still many use cases for various organizations to use physical servers in their environments. There may be hardware devices or other applications that require physical hardware to interface with. Performance of other applications may be so bleeding edge that it can only run on true physical hardware. Whatever, the case, you business-critical physical servers need to be backed up along with your virtual environments. You may also have the path to move forward with P2V of a longstanding physical server. How can you easily go about getting the server P2V’ed in any number of different formats? In our post today, we will highlight the physical server backup features found in Vembu BDR Suite along with P2V capabilities that are some of the best around.
Physical Server Backup and P2V with Vembu
Vembu BDR Suite, currently at version 4.0.2 provides some really great features and capabilities not only in the realm of your virtual environments, but also the physical servers you have in your data center as well. Vembu features really great technology that allows you to easily migrate data between any number of formats and technologies, instantly. It is some of the best I have seen in a backup solution.
Part of this capability is made possible by what Vembu calls the VembuHIVE file system. With VembuHIVE, the formatting between various hypervisors is done instantly for each backup that is taken. This can be backups of virtual environments or physical Windows Servers.
Physical Server Backup with Vembu
The physical server backup provided by Vembu is easily done all from within the Vembu BDR Suite console. Let’s walk through the process to configure a backup of a physical Windows Server with Vembu BDR Suite.
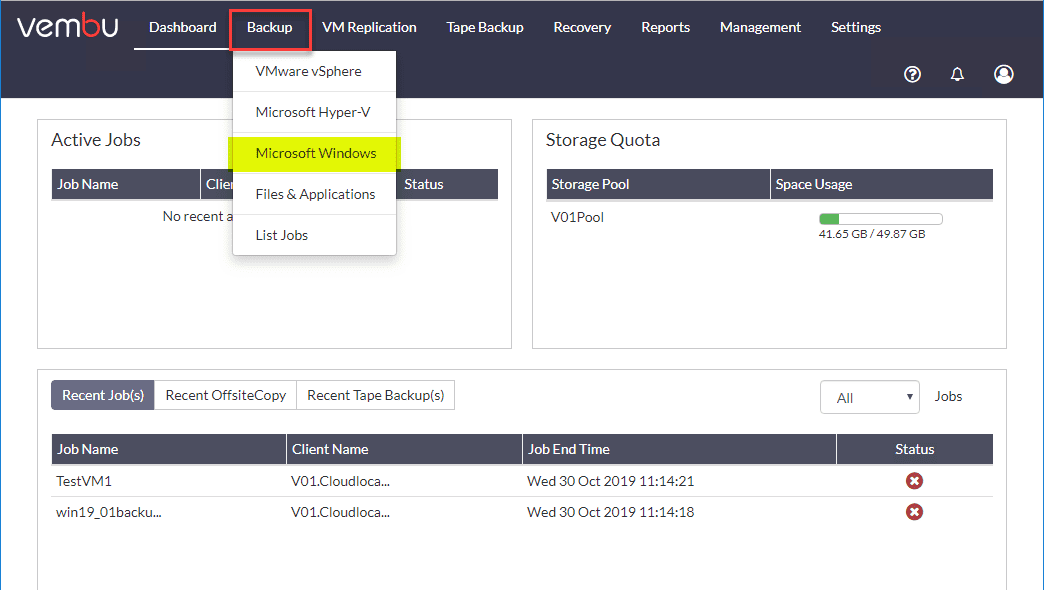
Here we are using the latest Vembu BDR Suite 4.0.2 in the lab. Choose Backup > Microsoft Windows.
Next, you are asked to populate the name of the Windows Server for Vembu to make its connection as well as connection credentials. If you don’t already have the credentials populated, you can click Add Credentials to do that.
If you notice in the screen below, the prerequisites hyperlink. If you click this, you will be taken to a very thorough Vembu KB on the requirements for Vembu to connect to your server to push the VIS agent (Vembu agent for backing up physical Windows Servers). The link here is:

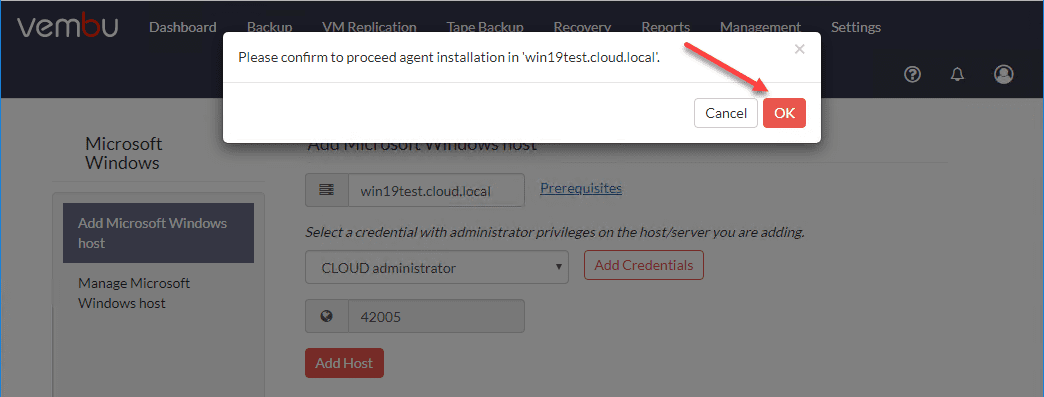
Confirm you wan to proceed with the agent installation on your remote Windows Server.
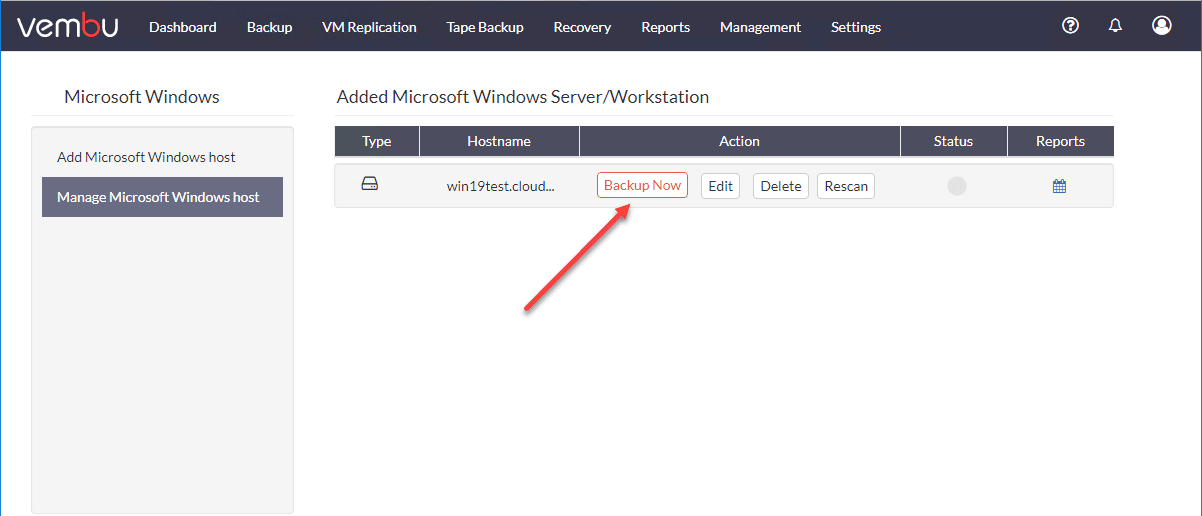
The server is now added to the Vembu BDR Suite console. Click the Backup Now button to launch the backup wizard for creating a new backup job.
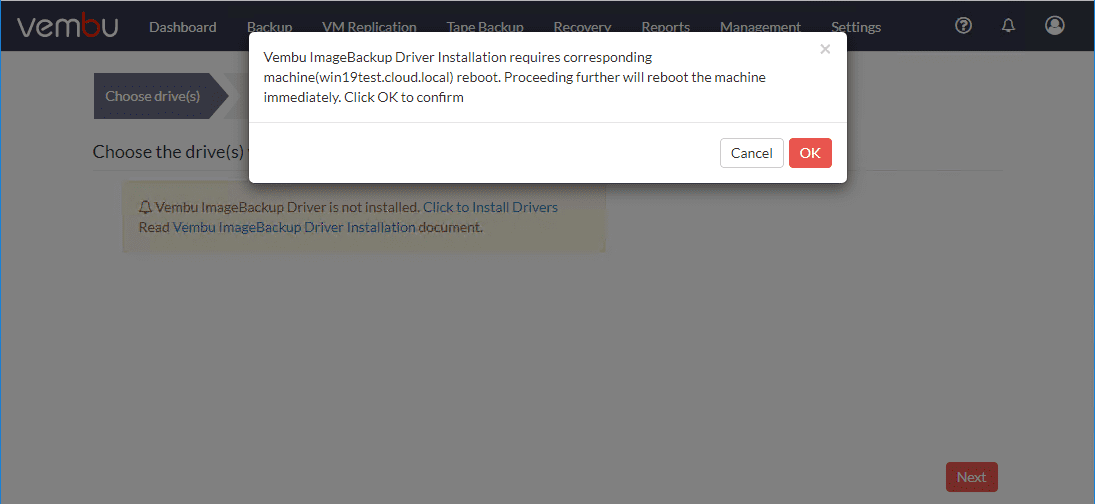
Vembu requires that its Vembu ImageBackup Driver is installed on your Windows Server host. Simply click the Install Drivers to initiate the driver install.
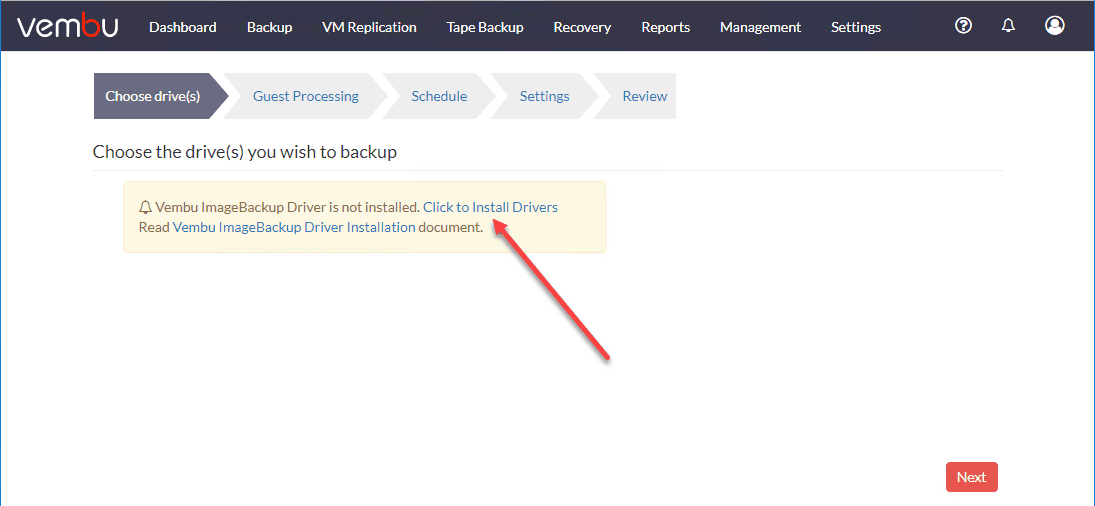
This does require the server to be rebooted. If you click OK the server will be rebooted in the process.
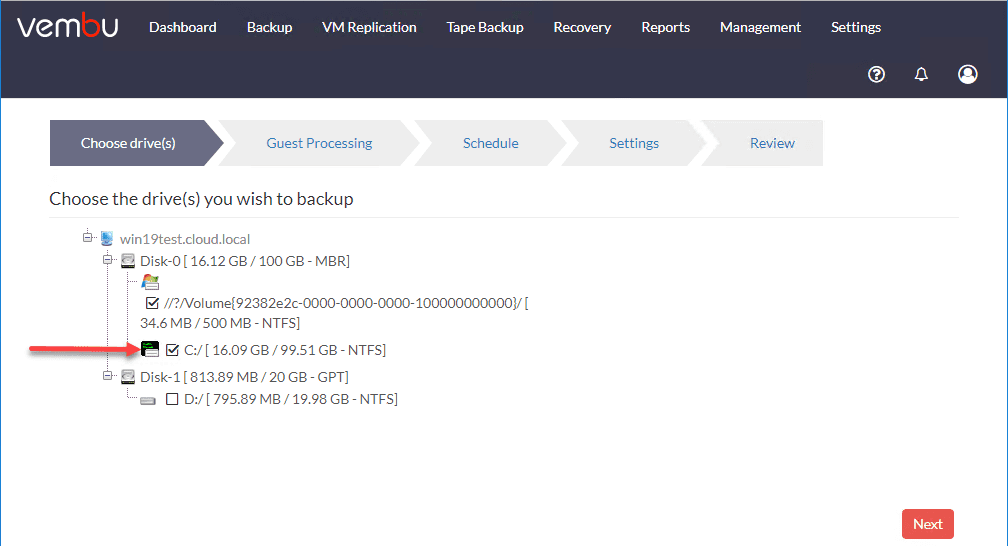
After the driver is installed, you can click the Backup Now button again and you will begin the backup wizard. Choose the drives you want to backup. When backing up the Windows OS, you will need to backup the small System Reserved partition along with the OS partition.
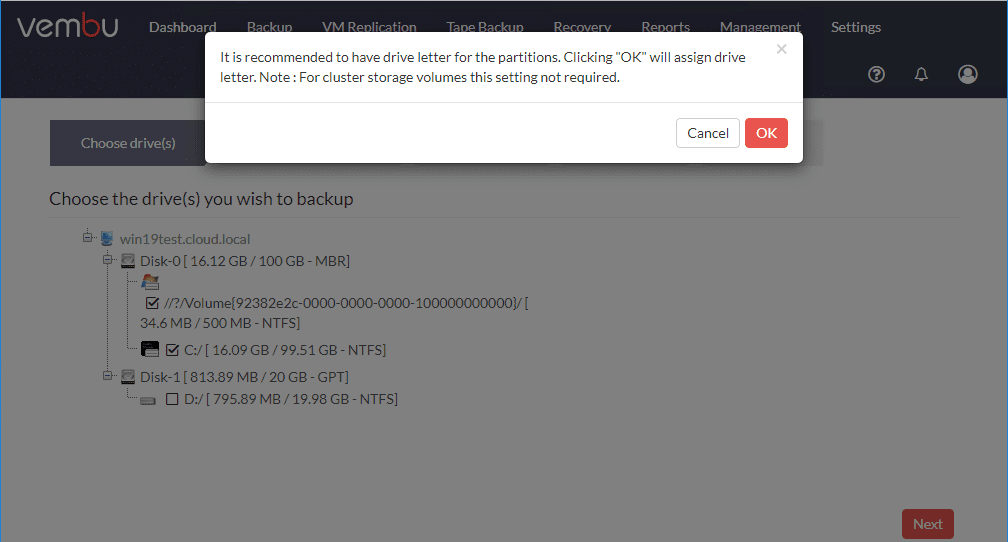
Vembu will assign a drive letter to the system reserved partition for backup purposes.
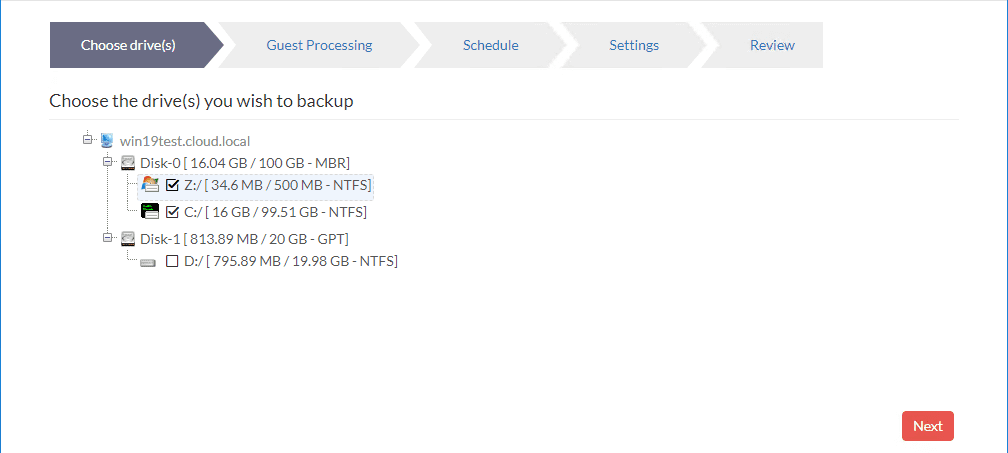
Drive letter is now assigned and ready to move forward.
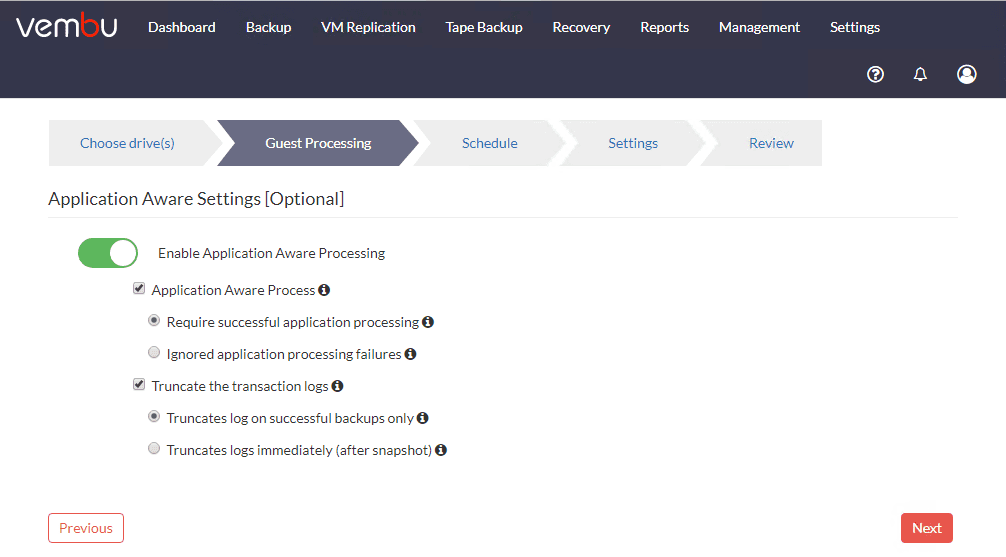
Choose your guest processing settings. This allows you to have application aware processing enabled for the backup job. This ensures applications like SQL Server are backed up in a consistent state.
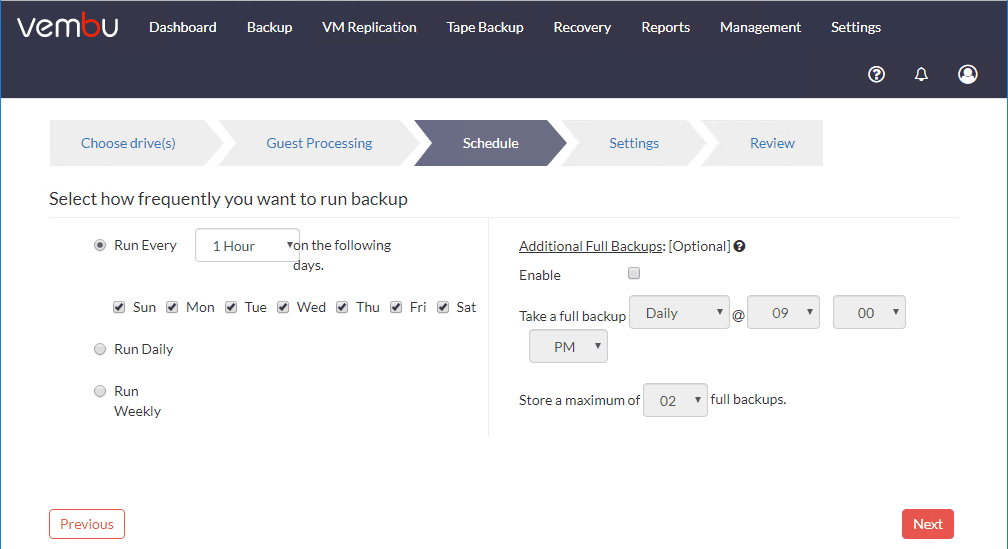
Setting the schedule for the job. You can also specify additional full backups.
The Settings screen allows you to configure options for Retention, backup storage, and Encryption.

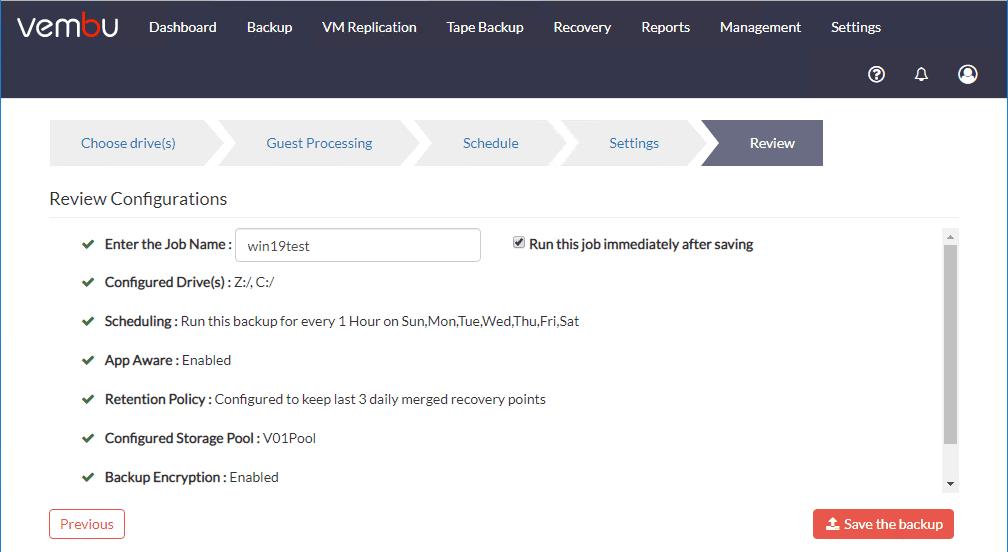
Review your settings and Save the Backup. You can also place a check next to the Run this job immediately after saving.
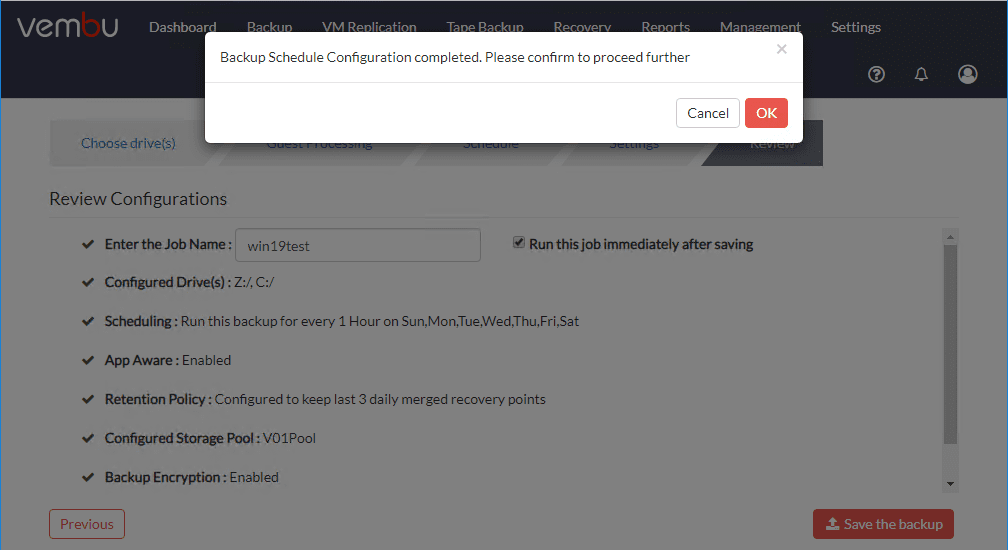
Click OK to proceed with the backup job creation.
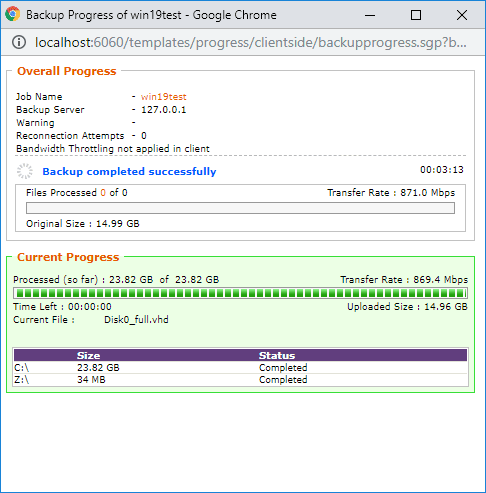
The backup job kicks off and begins copying data.

After only a few short minutes, the backup job is complete.
Physical Server P2V with Vembu
Now that we have a good backup of the server with Vembu, let’s look at the options for P2V we get. Choose the Recovery menu. The win19test machine is my physical Windows Server. Note the Restore and Mount options. You get these same options for any Vembu backup you have saved.
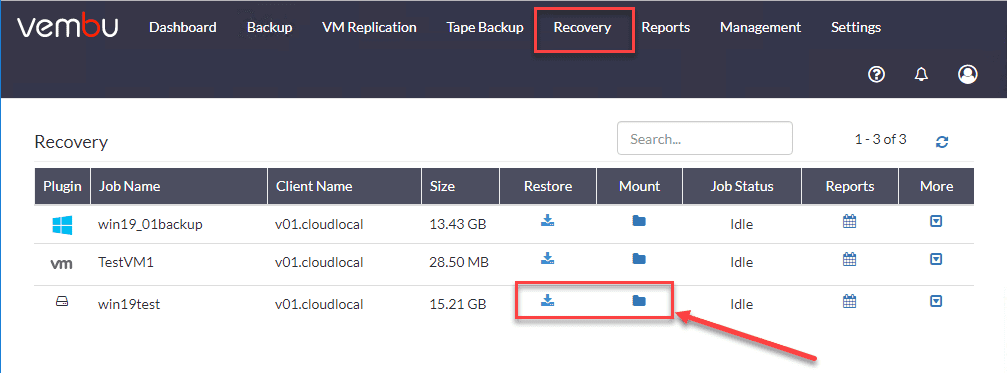
The options for Restore include:
- Quick VM Recovery
- Disk/Partition Recovery
- File Level Recovery
- Disk Management Mount
- Download
Vembu provides some of most flexible and easy to work with options for recovery among its competitors.

Alternatively, when it comes to P2V options, the Mount option provides a great way to have your backup of a physical Windows Server instantly converted to the format you need. Click Yes to mount your backup.

When you click Yes, Vembu instantly exposes your backup as the following virtual image types:
- IMG
- VHD
- VHDX
- VMDK

As an example, if I click into the VMDK folder, I see VMDKs for each backup run that has ran contained in the mounted backup. I can literally copy this to my virtual storage and create a VM to mount as the VM I want to use as the P2V copy.

Wrapping Up
Physical Server Backup and P2V with Vembu is super easy. While the it requires an agent, the administration and installation of this is made easy as it can be done from the Vembu BDR Console.
Vembu has one of the slickest and easiest conversions of backups into different formats that I have seen. There is no time for conversion. The converted backups are always instantly available as the different file types for use with different hypervisors. Be sure to check out Vembu BDR Suite and the fully-featured trial version that will let you play around with the cool backup and conversion features in your lab.


0 Comments