
VMware is doing great work to consolidate many of the new cloud-centric technologies and solutions with the on-premises versions and bringing these features and interfaces to a unified stance. The new vRealize Automation 8 is a great example of this work that is coming to fruition. VMware has brought the same codebase and features that are found in the vRealize Automation Cloud solution since the beginning of 2019 down to the now realized, vRealize Automation 8 product that sports a bold new look and workflow all the way around the beautiful new HTML 5 interface. I was super anxious to get this up and running in the lab environment. Finally, I got the opportunity to put the solution into the lab. Let’s take a look at the vRealize Automation 8 Installation and Configuration and take a look at the new installation experience with VRA 8.
New vRealize Automation 8 Easy Installer from ISO
If you are familiar with installing the latest VMware vCenter Server appliances in your virtual environment, you will note the new “Easy Installer” from VMware to get the vRealize Automation 8 appliance installed is very familiar. In fact, it sports the exact same look and feel as the vCenter Server installation, Upgrade, Migration process. So, VI admins are going to feel right at home with the installation process with the so-called easy installer.
Simply mount the extracted ISO for your vRealize Automation 8 installation package. Then run <drive letter>:\vrlcm-ui-installer\win32\installer.exe file for the easy installer.
vRealize Automation 8 Architecture and VM Layout
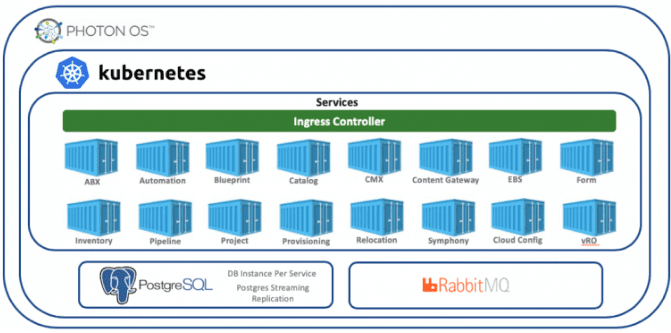
Let’s talk briefly about the architecture of vRealize Automation 8. It has been completely overhauled underneath the hood. Now it runs on top of a totally “microservices” architecture that is all contained inside a Photon OS platform. Kubernetes runs the microservices containers that run the pieces and parts of VRA 8.
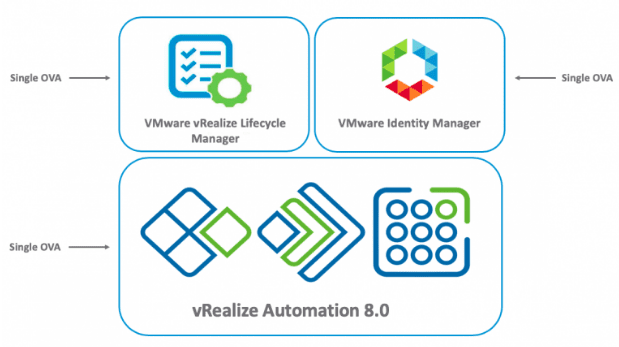
When you install the solution from the Easy Installer, you will be installing the following three VMs:
- VMware vRealize Lifecycle Manager
- VMware Identity Manager
- vRealize Automation 8
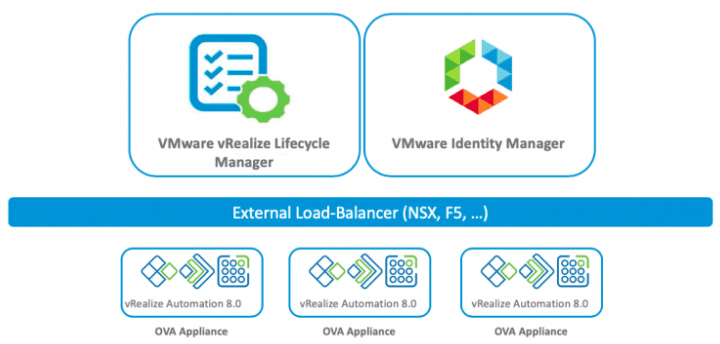
If you want a high-availability solution with VRA 8, you can install a cluster of three VMs with vRealize Automation 8.
vRealize Automation 8 Install and Configuration
Let’s look at the the actual vRealize Automation 8 install and configuration to get a feel for what the process using the Easy Install from the ISO looks like.
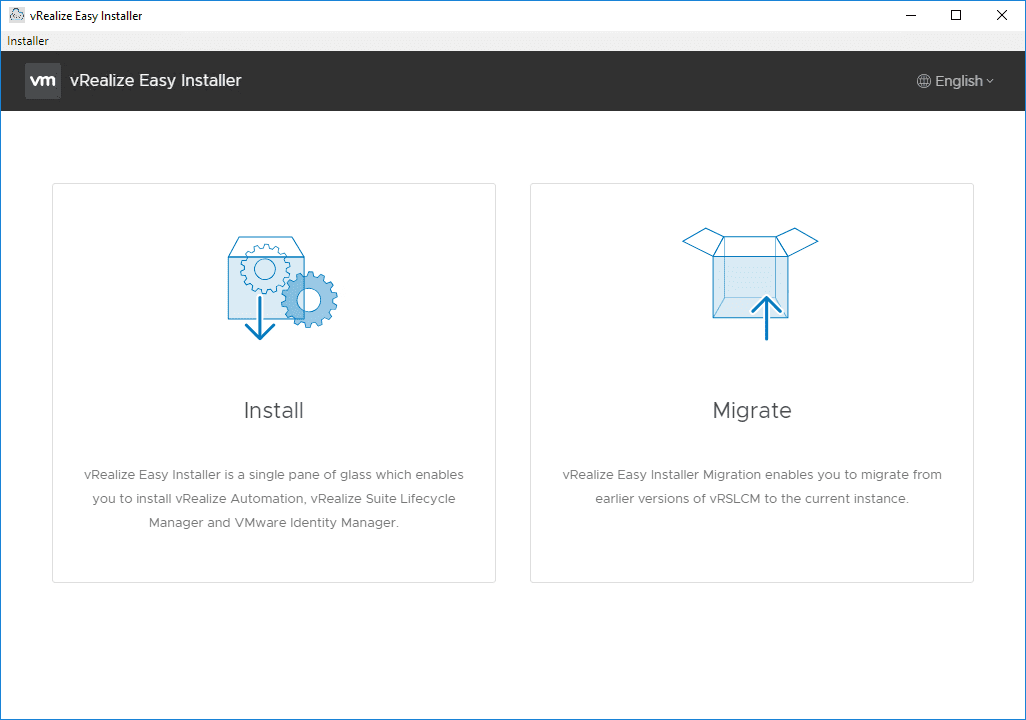
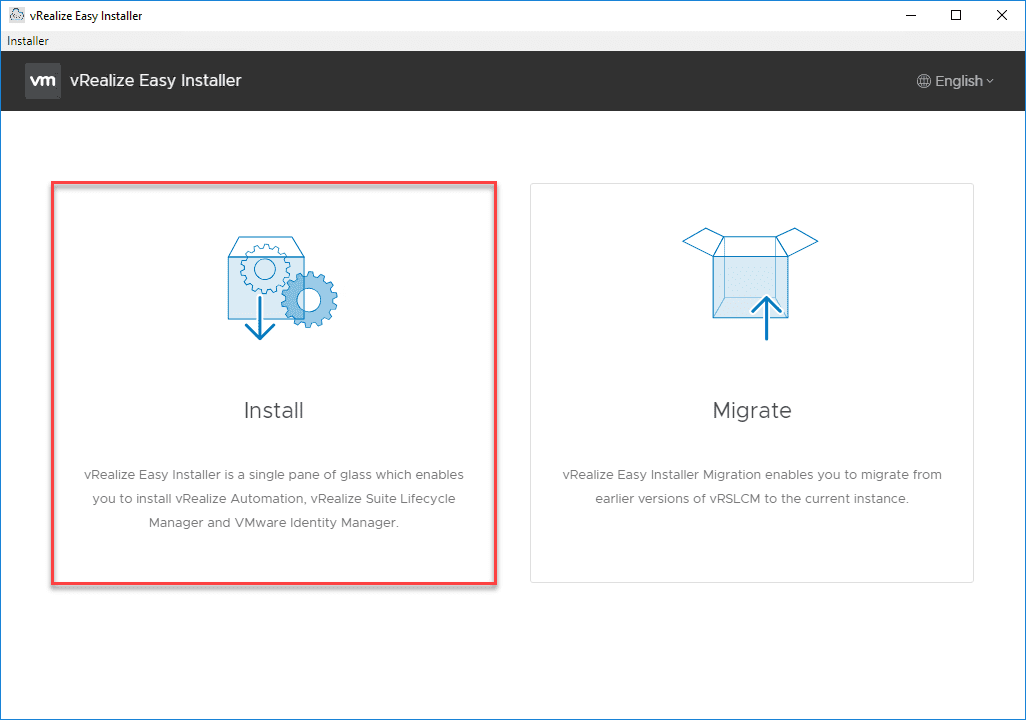
After you launch the executable referenced above, you will see the very familiar looking installer (vCenter Server installation). There are two options:
- Install
- Migrate
Here, I am choosing the Install option since I am installing a brand new instance.
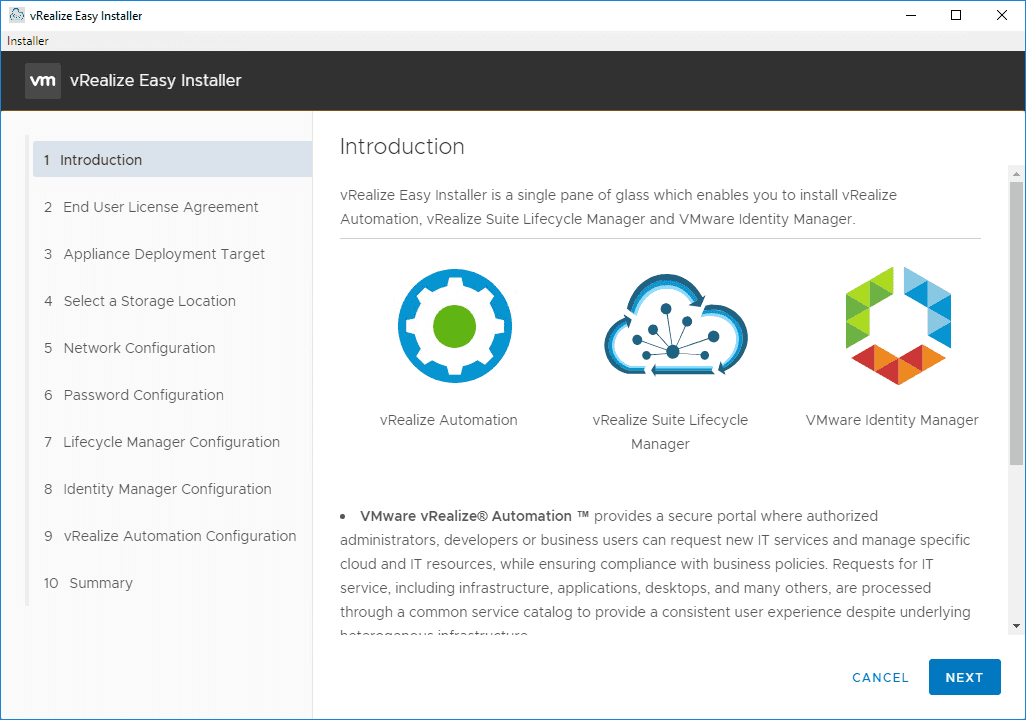
This launches the wizard of the Easy Installer. First, you will see the Introduction page that gives good descriptions of the components being installed including vRealize Automation, vRealize Lifecycle Manager, and VMware Identity Manager.
As with all installers, accept the EULA presented.

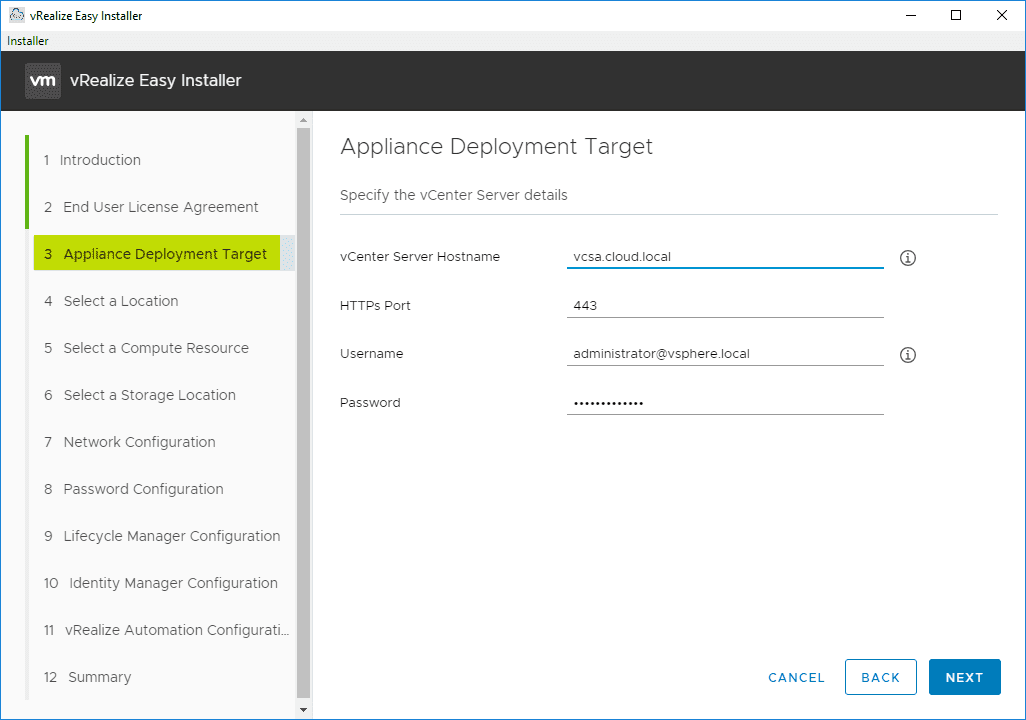
Next, configure the vSphere environment you want to use to install the appliances into, whether this is your management cluster or another resource cluster.
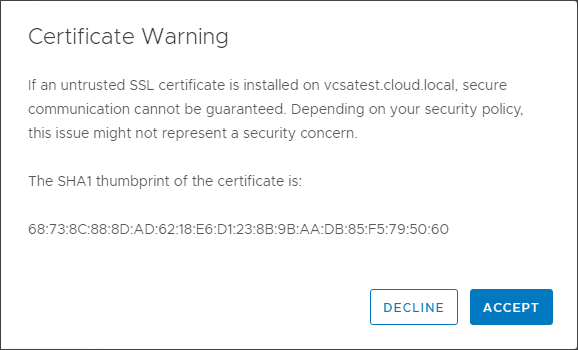
Accept the certificate warning presented from your vCenter Server if this isn’t trusted.
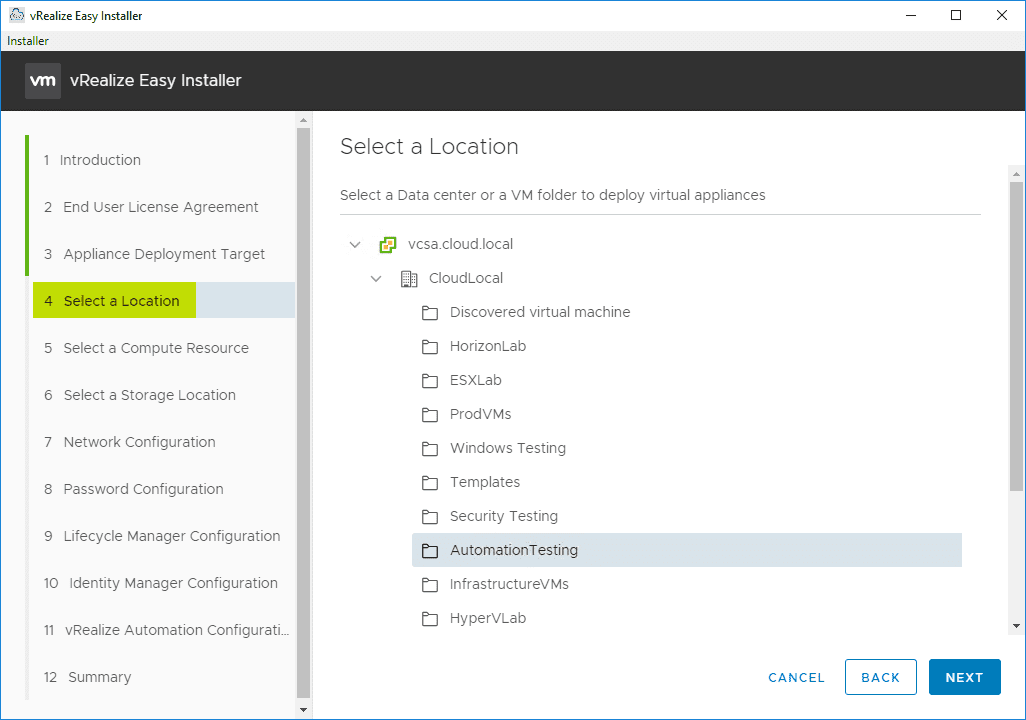
Select the location (folder) to place your appliances during the installation.
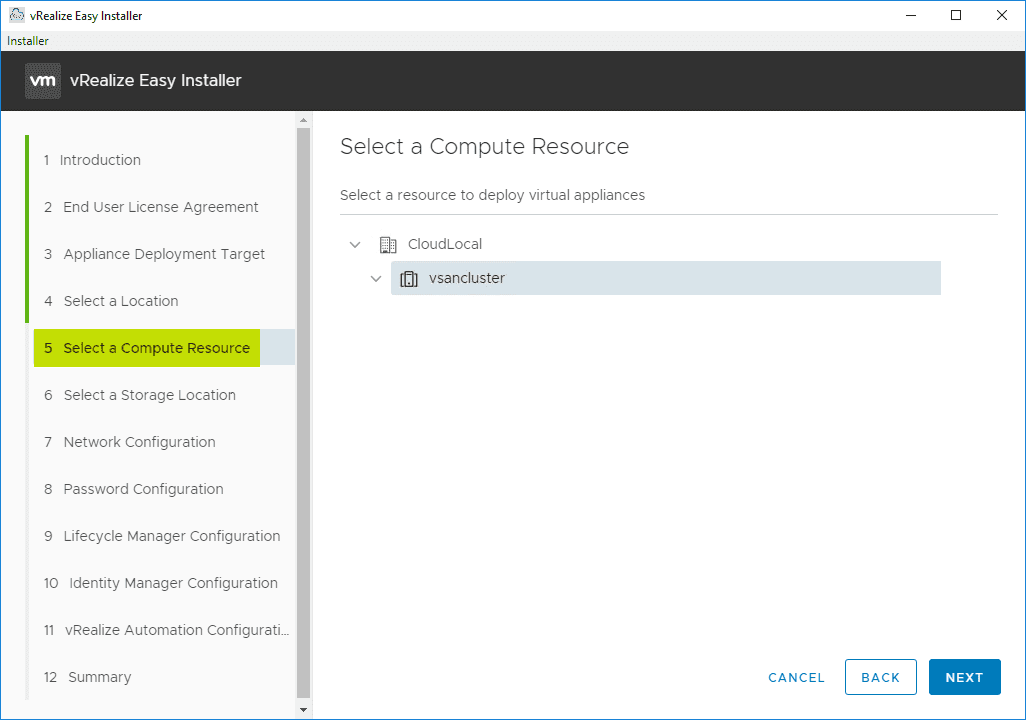
Select your compute resource.
Select storage. You can select your datastore as well as whether you want to use the Enable thin disk mode option.

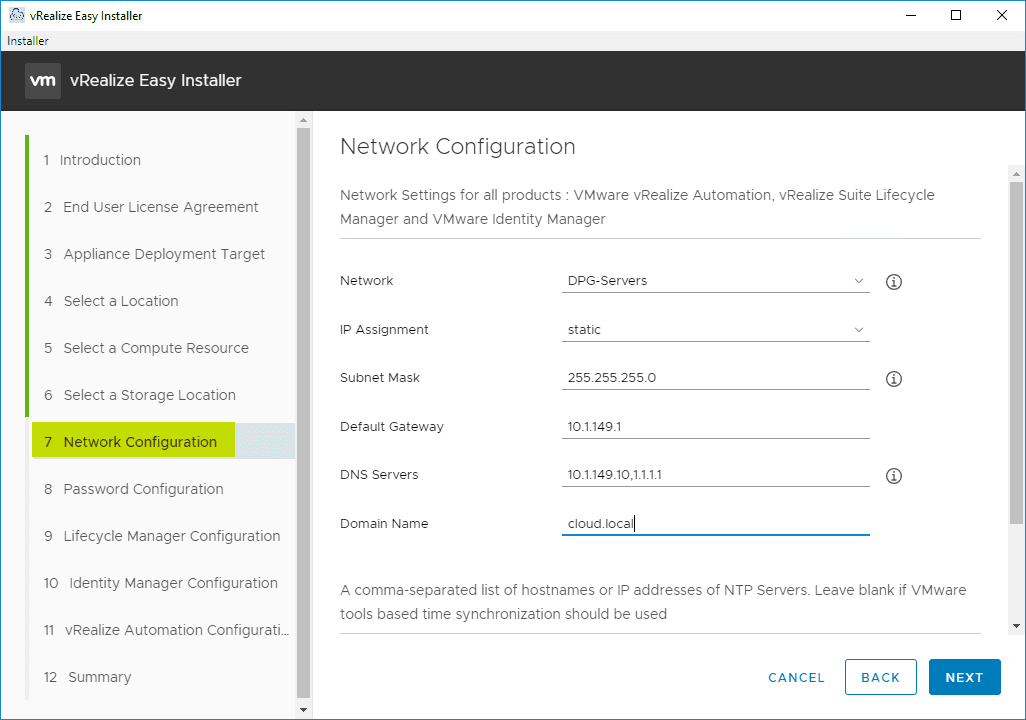
Network configuration involves selecting your port group, IP assignment method, gateway, subnet, DNS, domain name, and NTP.
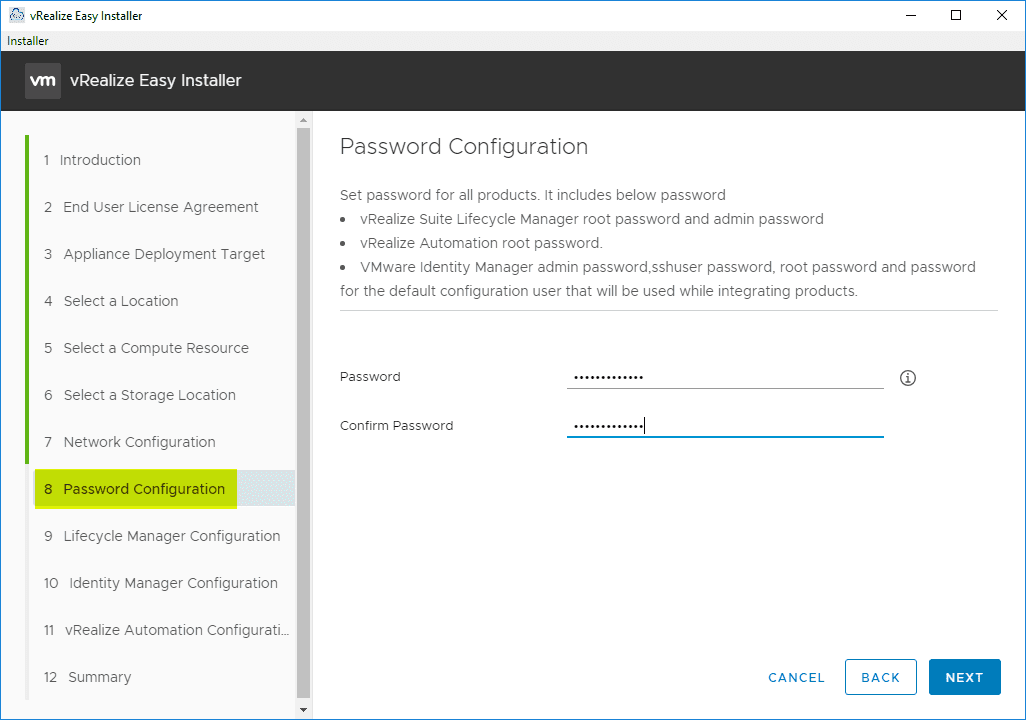
Configure the admin password that will be set on all appliances.
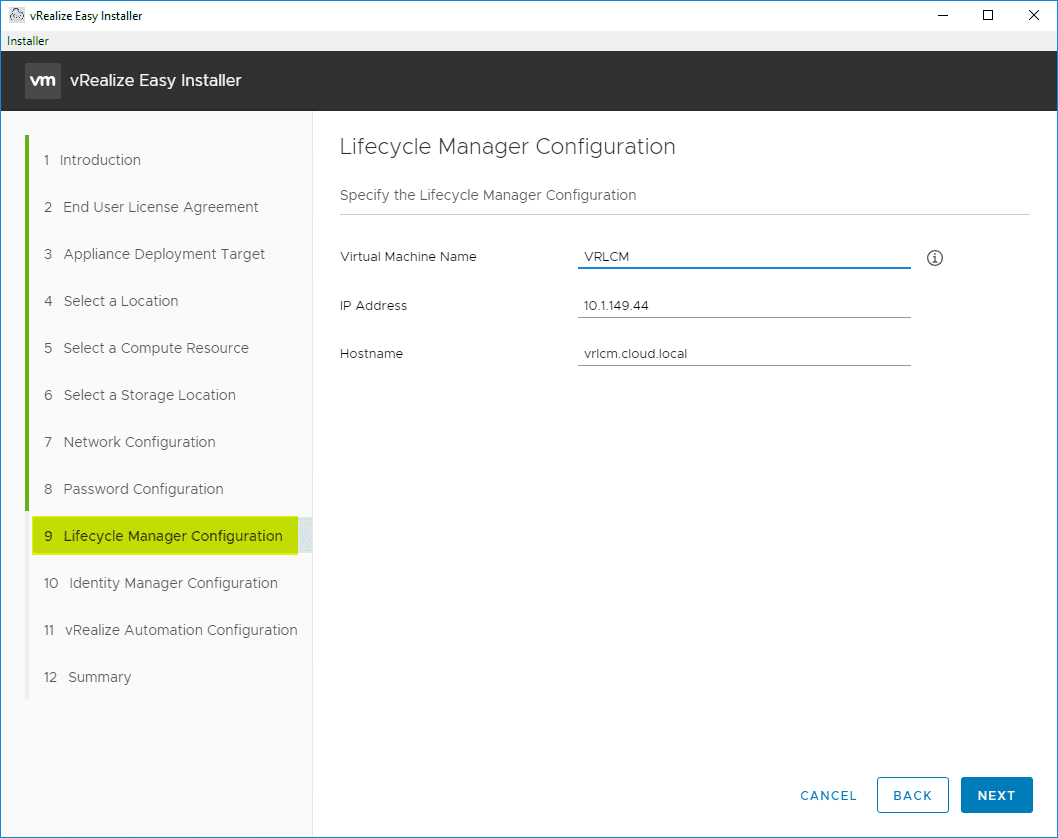
Lifecycle Manager Configuration – name your VM, set the IP address and hostname.
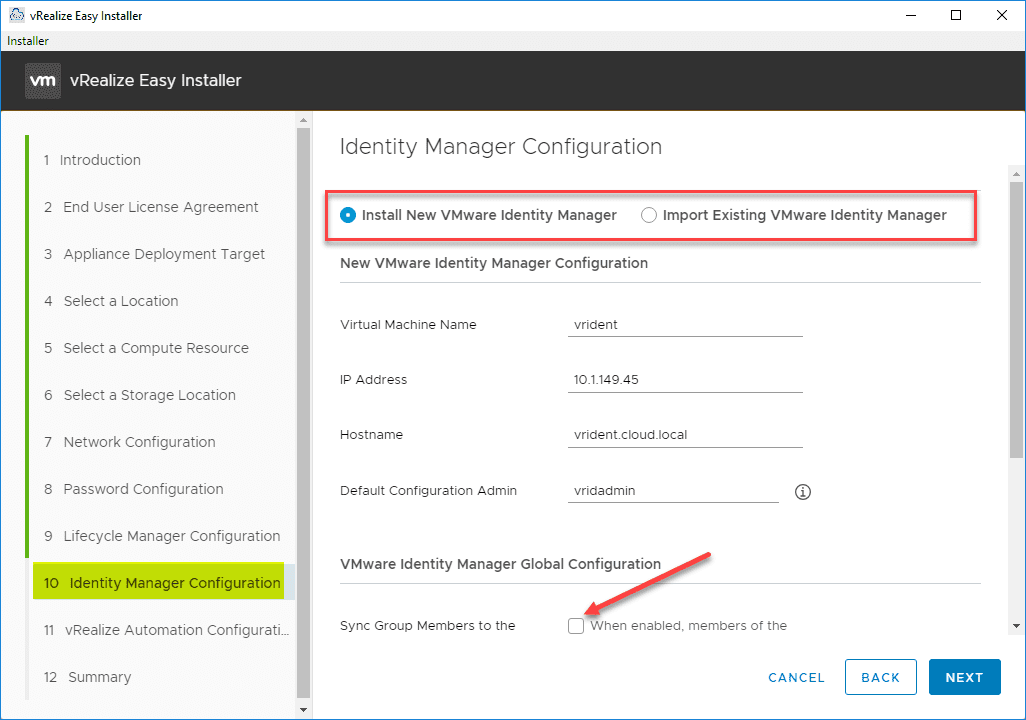
Identity Manager Configuration – Select whether you want to install new or import existing VMware Identity Manager, VM name, IP address, hostname, default configuration admin, and also you can set the option to Sync Group Members with Active Directory automatically.
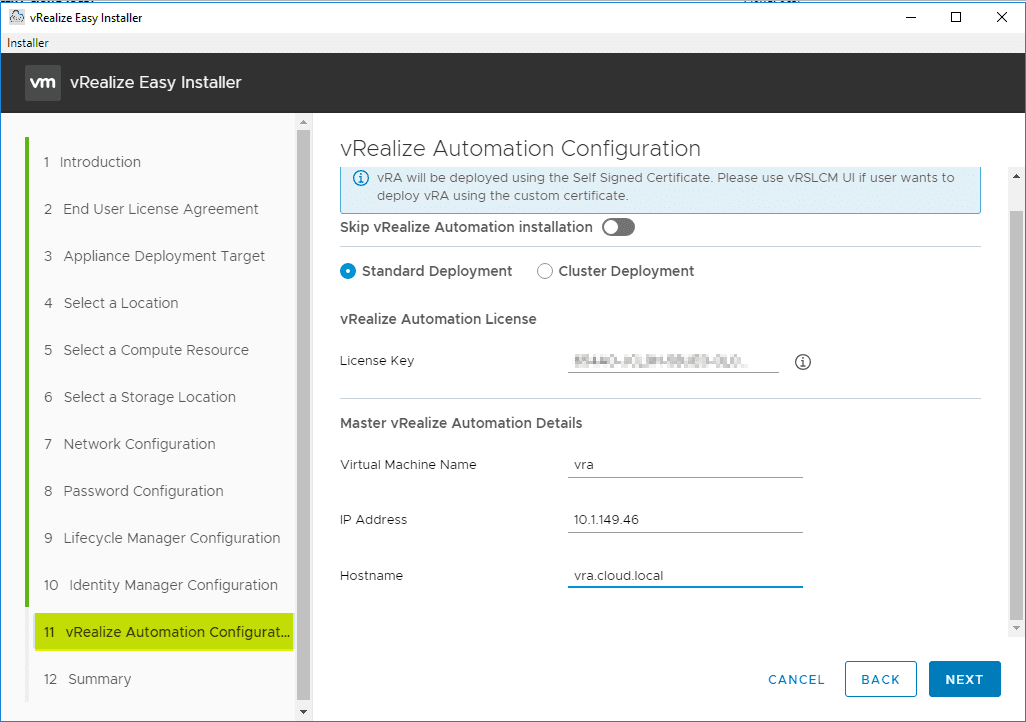
vRealize Automation Configuration – Provide the license key, VM name, IP address, and hostname.
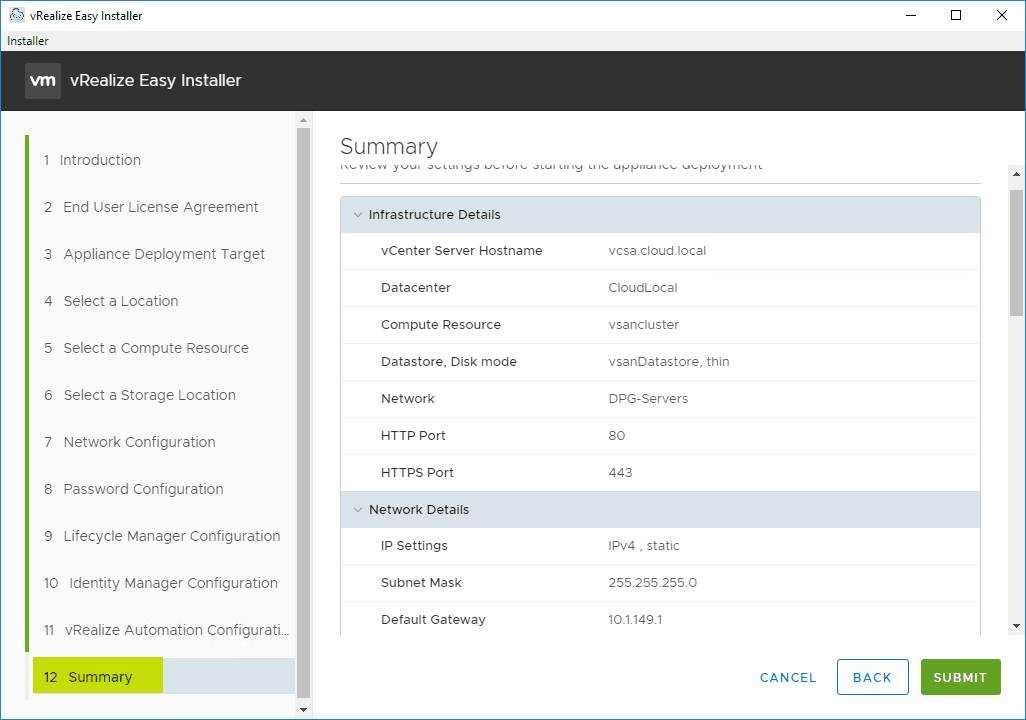
Now, you are ready to review the summary of your configuration choices and then hit Submit when you are ready to begin the installation.
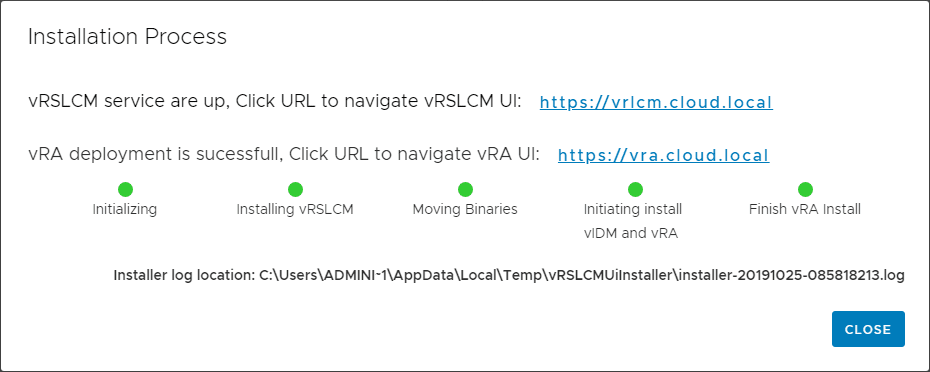
The Installation Process window will progress as the installer works its way through the process.
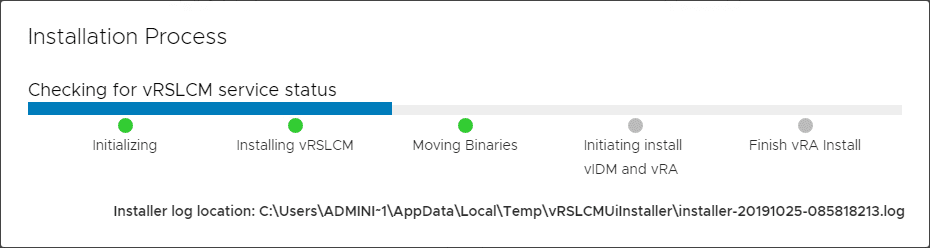
After a while, you should see all the “dots” turn green and the installation finishes.
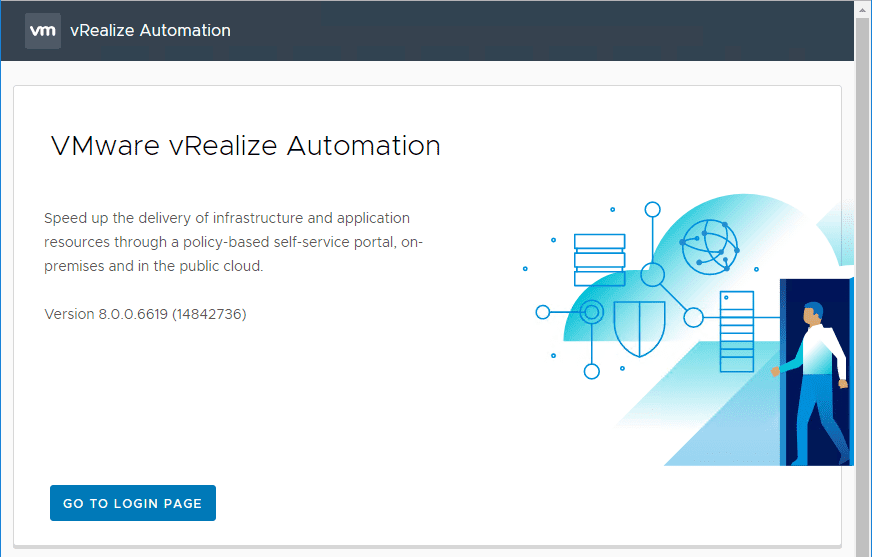
If you navigate to your new vRealize Automation 8 page in a browser which is just your host name for the URL, you should see the prompt to navigate to the Login Page. From here you can begin configuring your appliance.
Wrapping Up
The vRealize Automation 8 Install and Configuration is made very easy by the new Easy Install process via the ISO installer. In no time at all, I was able to get the three appliances deployed – VMware Lifecycle Manager, Identity Manager, and vRealize Automation 8. Stay tuned for further articles using VRA 8 in the home lab for various projects.


0 Comments