Windows 10 has a ton of features baked into the OS; one such feature is the Clipboard History which some find mighty useful, others not so much.
It has been around for about a year but in case you haven't used it, here's a tutorial.
The Windows Clipboard stored a single entry for the longest time. Whenever you put something into the clipboard, all what was stored in it was erased. If you wanted the clipboard to store multiple entries, you had to use third-party programs like Clipboard Master.
The Clipboard History feature unlocks multiple save slots to store multiple items in the clipboard for later use. The feature is available in recent versions of Windows 10 but it is disabled by default.
How to enable Clipboard history in Windows 10

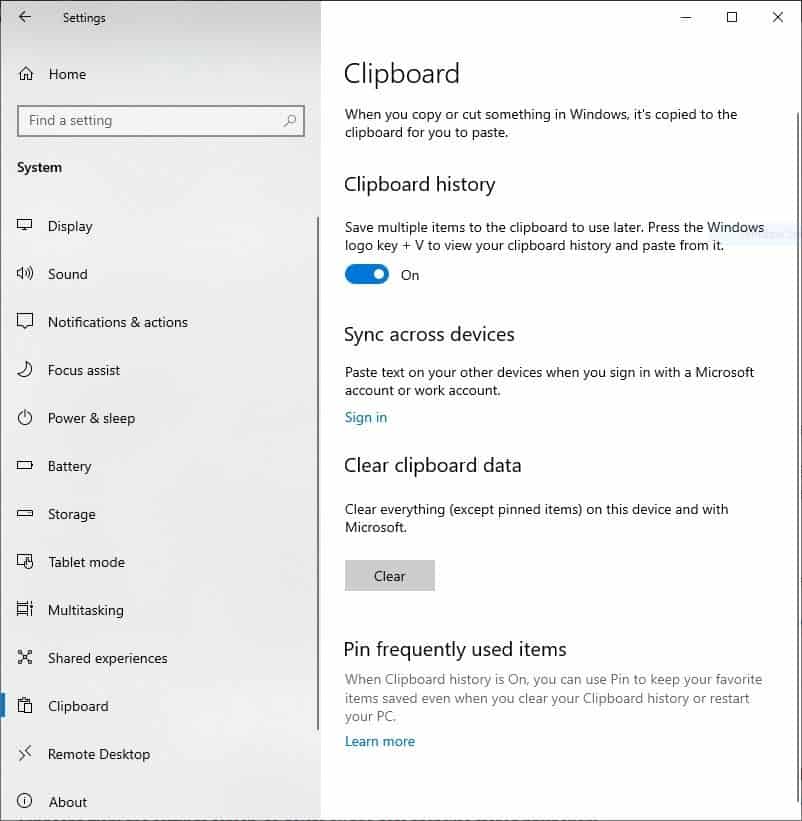
- Open the Settings app and navigate to the System screen.
- Locate the Clipboard option on the side-bar, and click on it.
- The right-pane should display the corresponding options. The Clipboard History option has a toggle beneath it which you can click to enable or disable depending on its state.
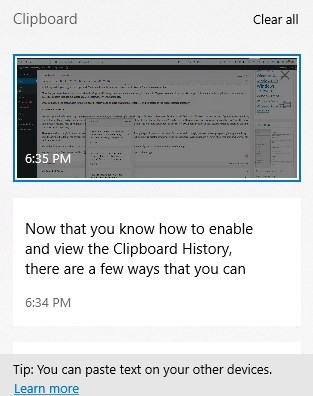
Now that you have enabled the feature, it's time to test it to find out how useful it is. To do so, use the following shortcut: press the Windows and V keys together. A pop-up window will appear on the screen.
It should be empty now because you just enabled it and have not copied something to the clipboard yet. The popup confirms that the history feature is enabled.
Try copying something to the clipboard, e.g. a line from this guide. Now open the Clipboard History panel again and you should see the copied text now on the screen. Try copying something else and it should also be visible on the panel along with the older content.
This can be very useful in case you accidentally copied something else to the clipboard but don't want to type it again. In fact, text is not the only content that is stored in the history. It also works with images that you copy to the clipboard. That's really handy but that's just about it. You can't use it to recover files that you copy to the Clipboard or other data.

Now that you know how to enable and view the Clipboard History, there are a few ways that you can use it. To paste content from the history place the cursor in the application that you want to paste the content into, e.g. Firefox, Chrome, Word, Excel, or any location that accepts text input.
Once you have done that switch to the Clipboard History pane and left-click on the content. It will be pasted at the cursor location instantly.
Advanced Options
You can optionally choose to sign in to your Microsoft Account to save the Clipboard History to the cloud. The option for this is available at the Clipboard settings screen. If you choose to enable it, the history will be synced across other devices that you sign in to.
So, you can copy something to the clipboard on your PC and sync it with your phone or another Windows PC or device that you use.
Personally I don't use this as clipboard content may contain important data. Speaking of which, you can manually clear the clipboard by clicking the X next to each entry or use the Clear Clipboard option in the Settings screen to delete all the data that was stored previously.
Have you noticed the pin icon next to each entry in the Clipboard History? You can use it to pin specific items to the panel. It is a little odd though, because in most programs pinning something puts the item at the top of the screen. Pinned items in Clipboard History are instead saved from being deleted when you clear the clipboard. Well, I suppose it works like a real board where you pin and remove stuff.
I love this feature but I wish that the panel would stay in the background instead of automatically closing when I switch to another app.


0 Comments