
When you install Windows 10 anew on a PC, or run it for the first time if it comes pre-installed with the computer, you create the first user account during that process.
This is the main account on the system and configured to be an administrator account by default, but it is not the only one that is available out of the box.
Windows 10 creates two additional user accounts automatically which are both inactive by default. They are:
- Guest account
- Administrator account
The first is a guest account which Microsoft designed for users who access the device but don't have a permanent account on it.
Guest accounts are severely limited as it is not possible to install software or hardware, or modify system settings.
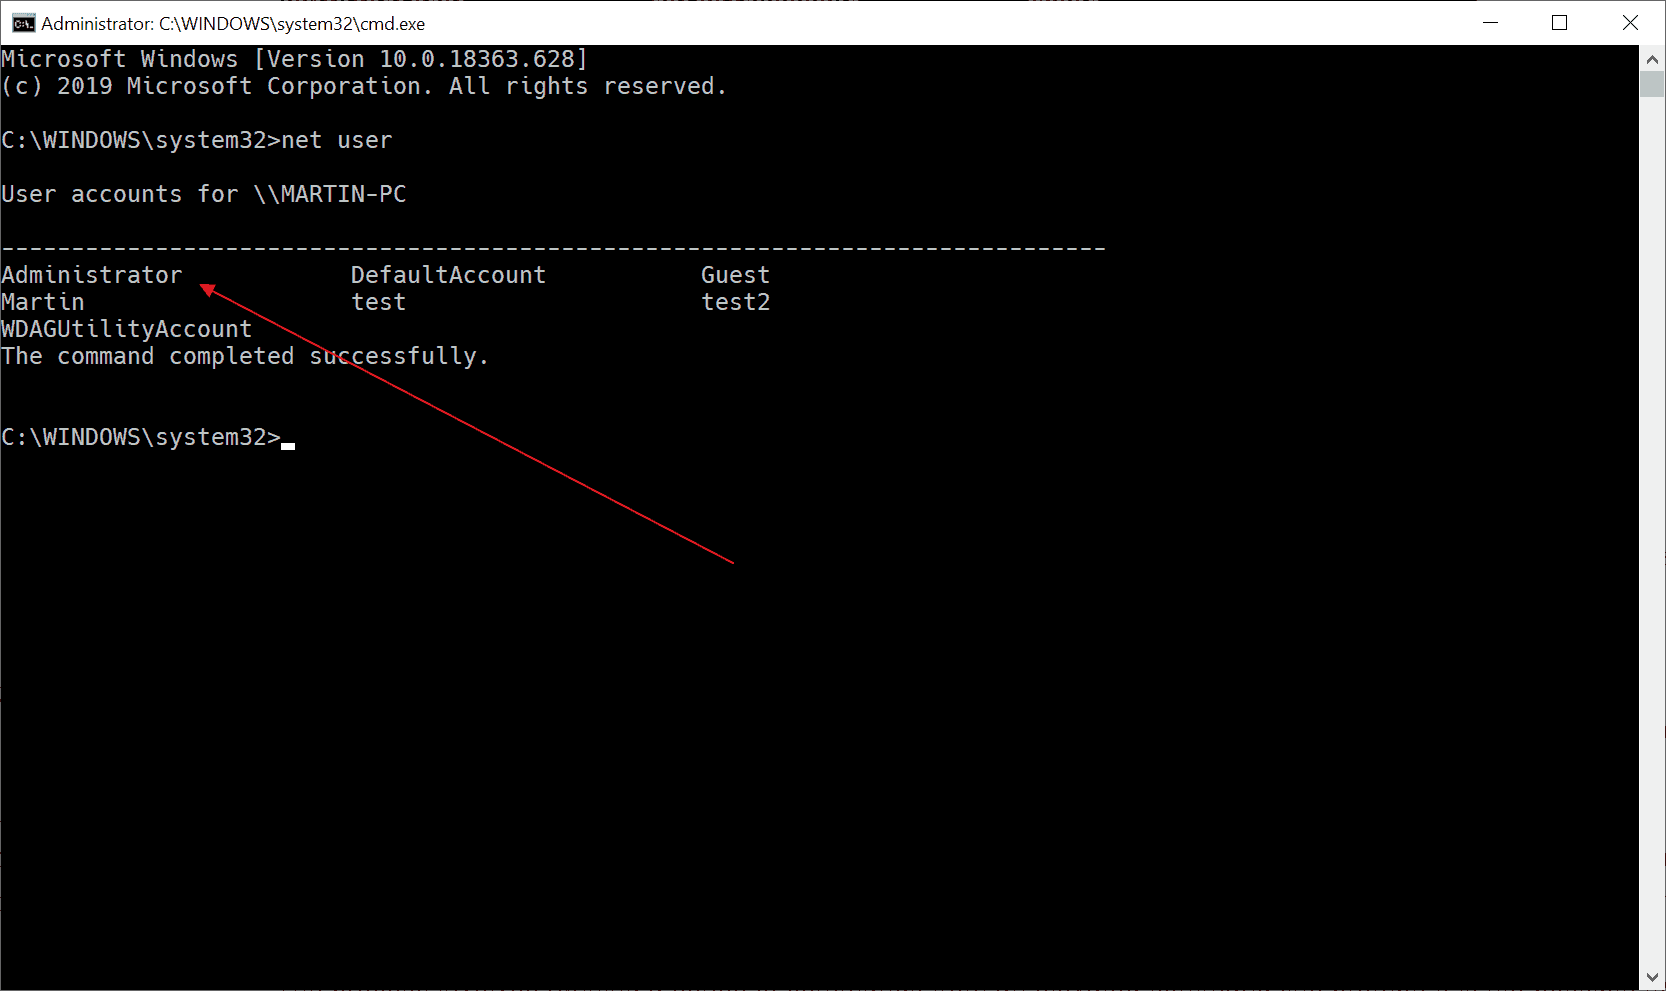
Tip: run the command net user from the command prompt or PowerShell to get a list of all user accounts on the Windows 10 machine (inactive and active).
The administrator account
The second account that you find preinstalled on any Windows 10 device is the Administrator account.
It is also inactive by default and needs to be enabled before it can be used. While not required at all, it is often used for troubleshooting or administrative purposes when it is enabled.
A core difference between the administrator account of the user and the built-in administrator account is that the former receives UAC prompts while the latter does not. The first user account that is created by the actual user of the system on first start is an unelevated administrator account while the built-in Administrator account is an elevated account.
It is relatively easy to enable or disable accounts on Windows 10 devices provided that you have access to an admin account. You cannot make user account changes if you sign in with a regular account and don't have access to an admin account on the system.
The process involves running a series of commands from an elevated command line prompt. It is not possible to activate the default Administrator account on Windows 10 devices using the account related options found in the Settings application as default accounts are not listed there at all.
Enable the Administrator account
To enable the Windows 10 administrator account do the following (note: this works in older versions of Windows as well):
- Tap on the Windows-key. This should open the start menu or bring you to the Start Screen interface depending on how Windows 10 is configured on the system.
- Type cmd and wait for the results to be displayed.
- Right-click on the Command Prompt result (cmd.exe) and select "run as administrator" from the context menu. Alternatively, hold down the Shift-key and the Ctrl-key before you start cmd.exe.
- Run the command net user to display a list of all user accounts on the system. You should see Administrator listed as one of the accounts.
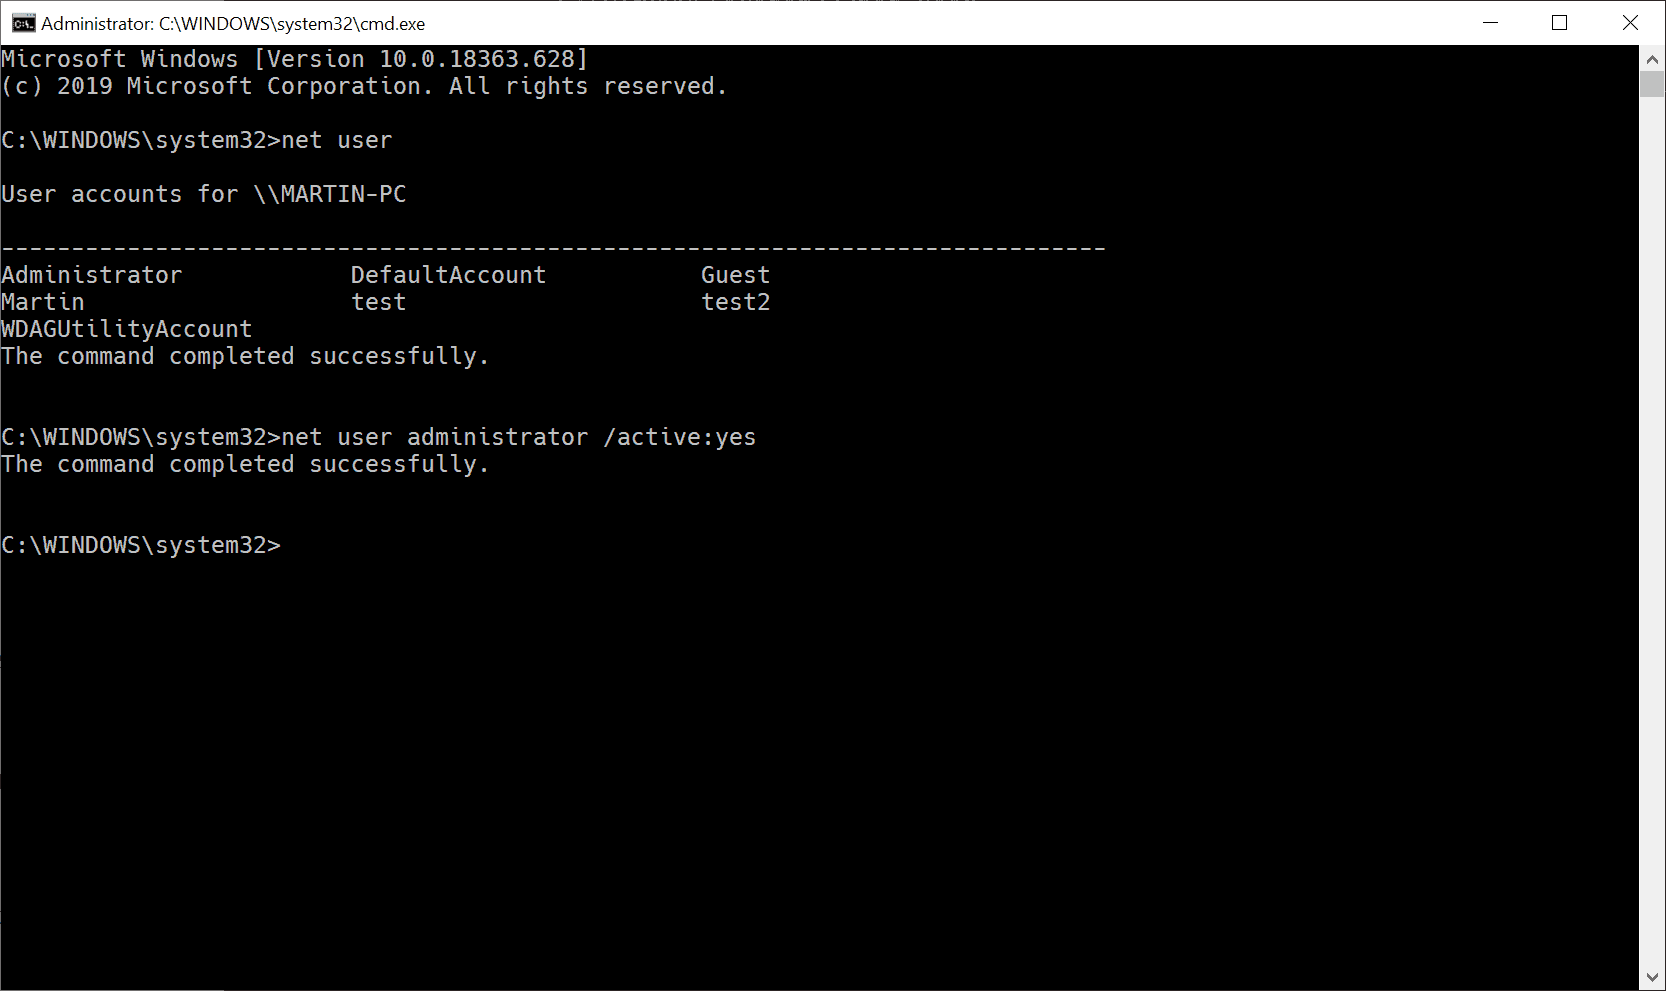
- To activate the inactive administrator account, run the command net user administrator /active:yes
- Windows returns "The command completed successfully" if the operation is successful. Check the spelling and that you are in an elevated command prompt interface if you get error messages.
- If you want to enable the guest account as well run the command net user guest /active:yes
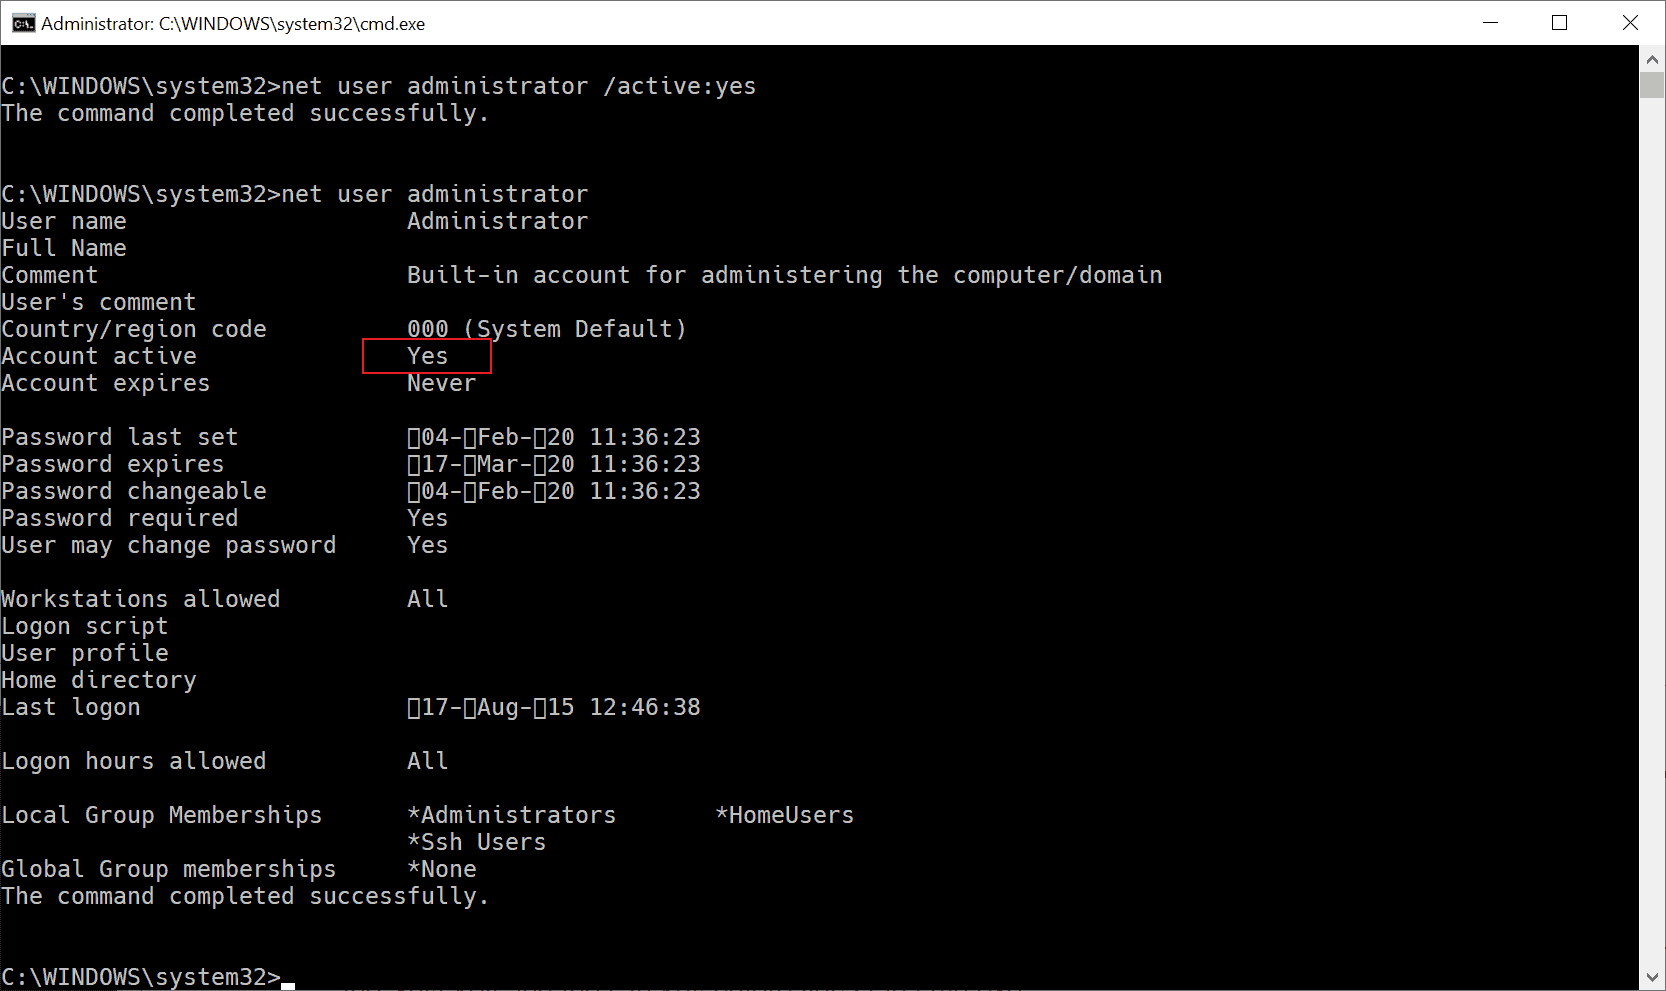
Verify that the account is activated by running net user administrator from the command line prompt. Check "account active" to verify the status of the account. Repeat the process for the guest account if you activated it as well.
Change the password of the admin account
The administrator account is active after you run the commands mentioned above which means that you can sign in to the system using it. It is not password protected by default which means that anyone with local access to the system can use it to sign in. While that is comfortable, it may also be a security risk.
It is highly recommended to protect it with a password. This can also be done using the command line:
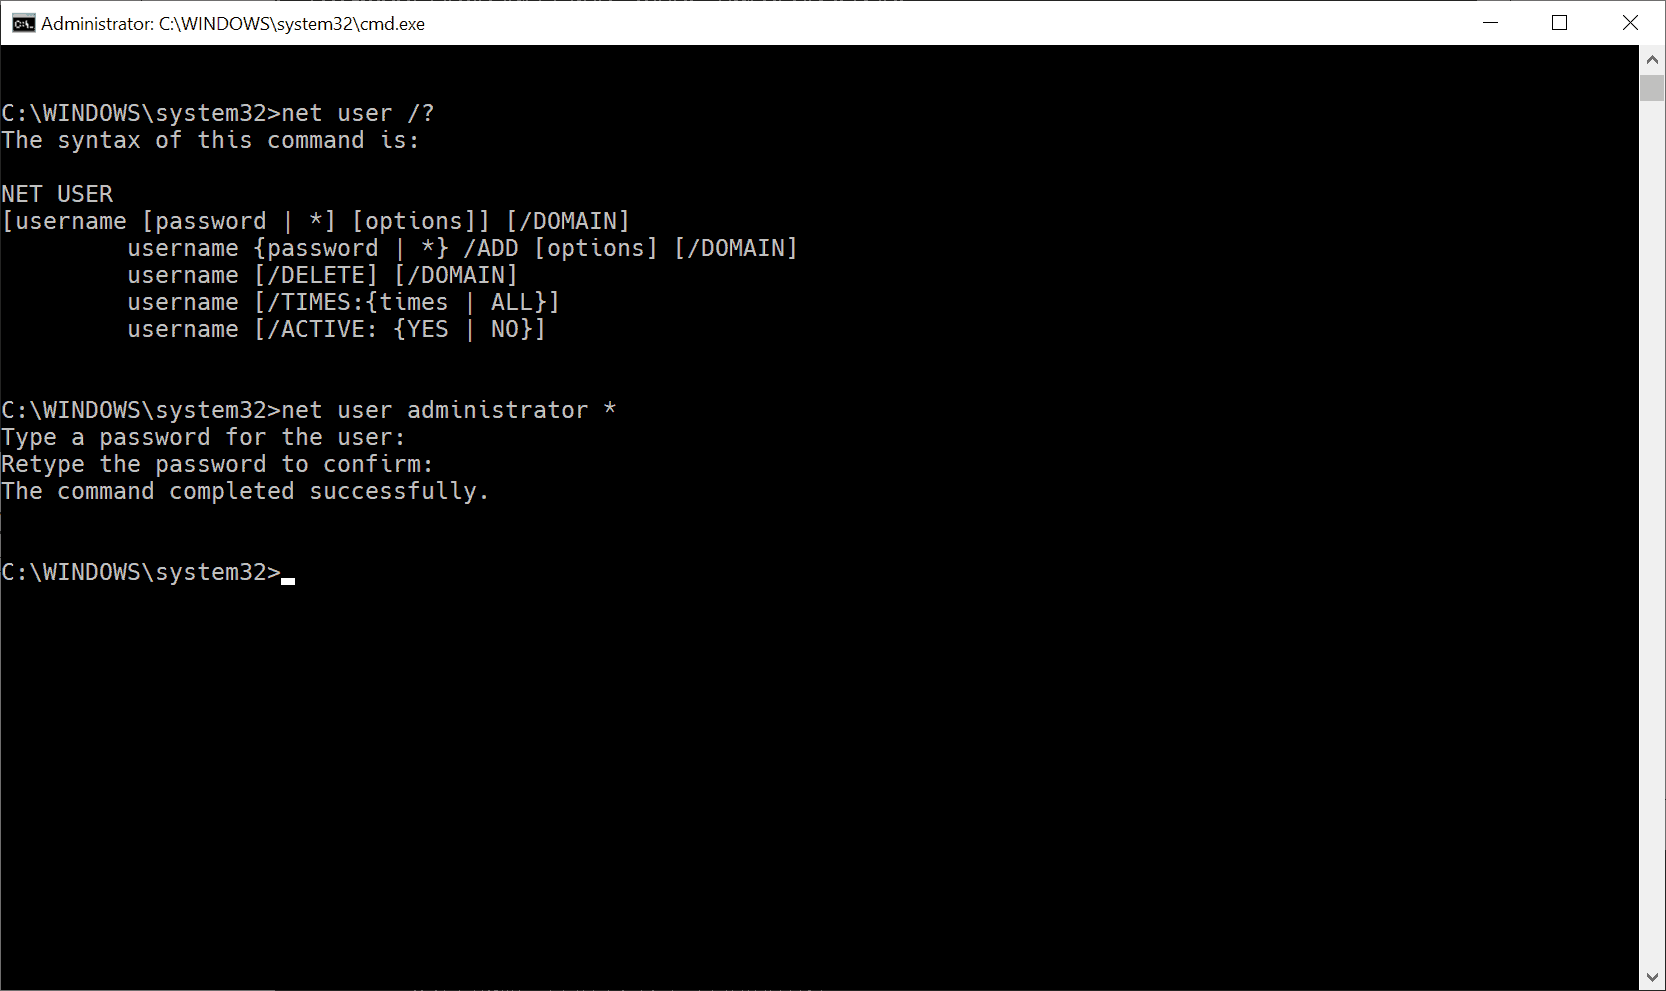
- Type net user administrator * and hit enter.
- You get a password prompt. Type the desired password and again when you are asked to type it a second time for confirmation. The password is not displayed at all as you type.
Disable the administrator account
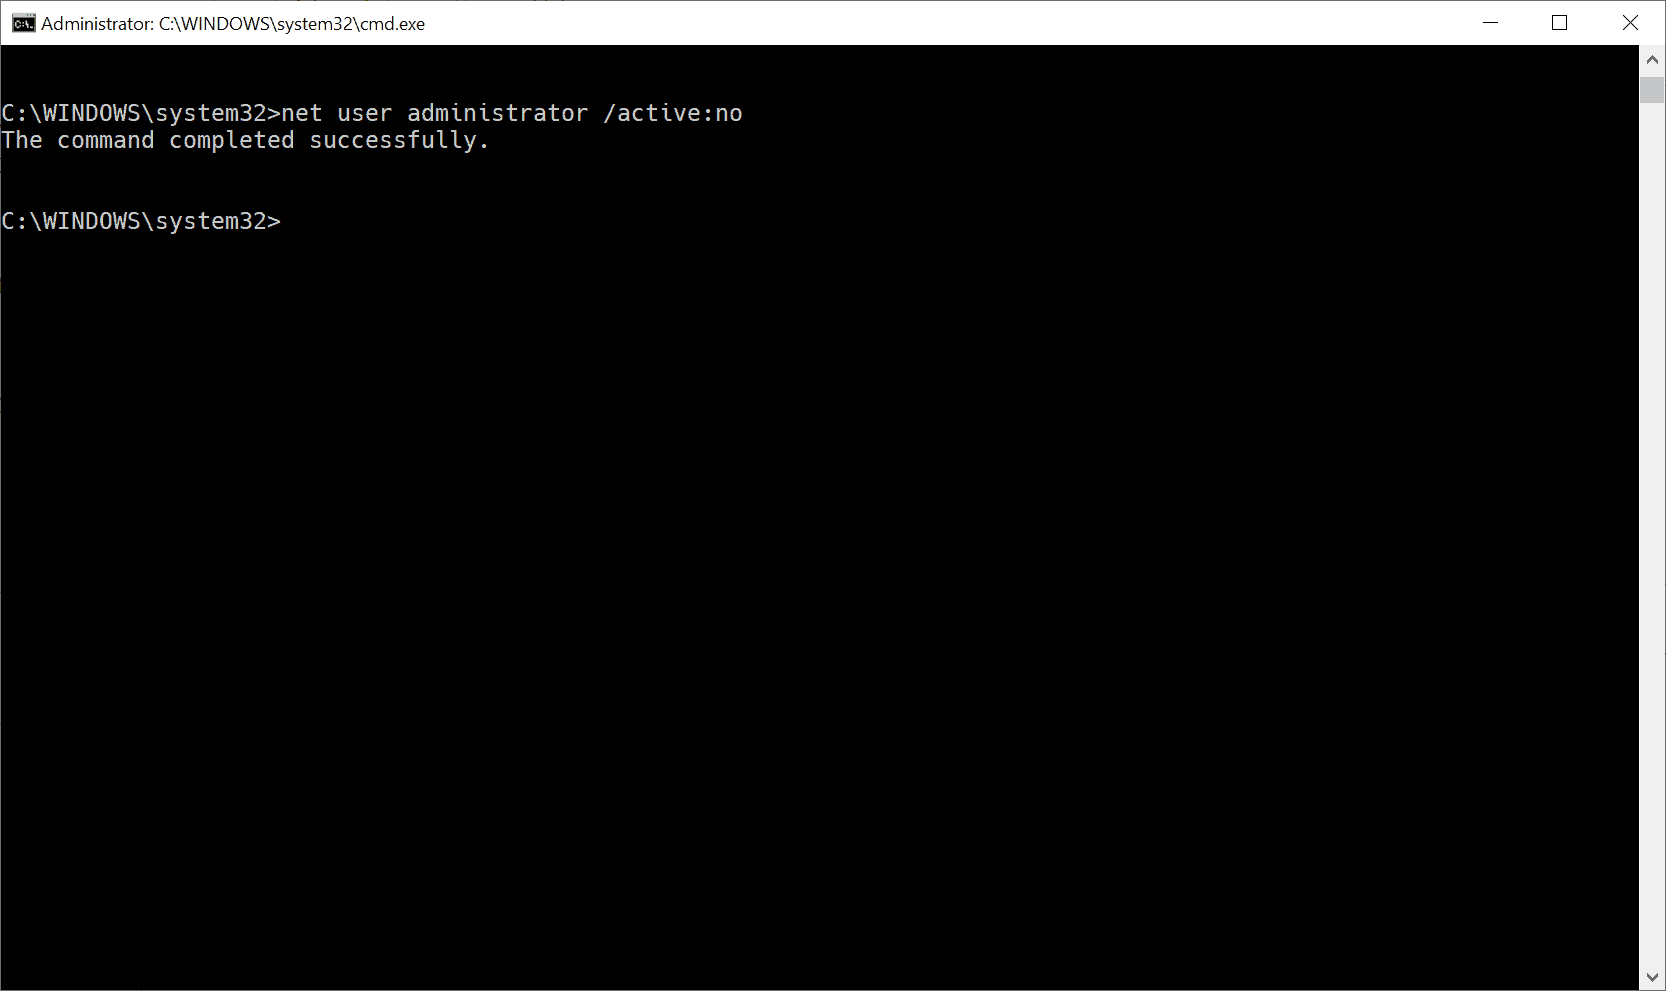
To disable accounts at any time, use the following command:
- On an elevated command prompt: net user administrator /active:no
You can verify that by running the command net user administrator again from the command line. The line "account active" should state "no".
Other commands of interest are:
- Net user administrator - Displays information about the user account on the command line.
- Net user username /delete - Deletes username on the system. This does not work with built-in accounts.
Tip: if you are running Windows 8, check out this guide which walks you through the procedure on this version of Windows.
Note: The following two methods work as well but they are only available on professional and Enterprise versions of the Windows 10 operating system.
Using Local Users and Groups
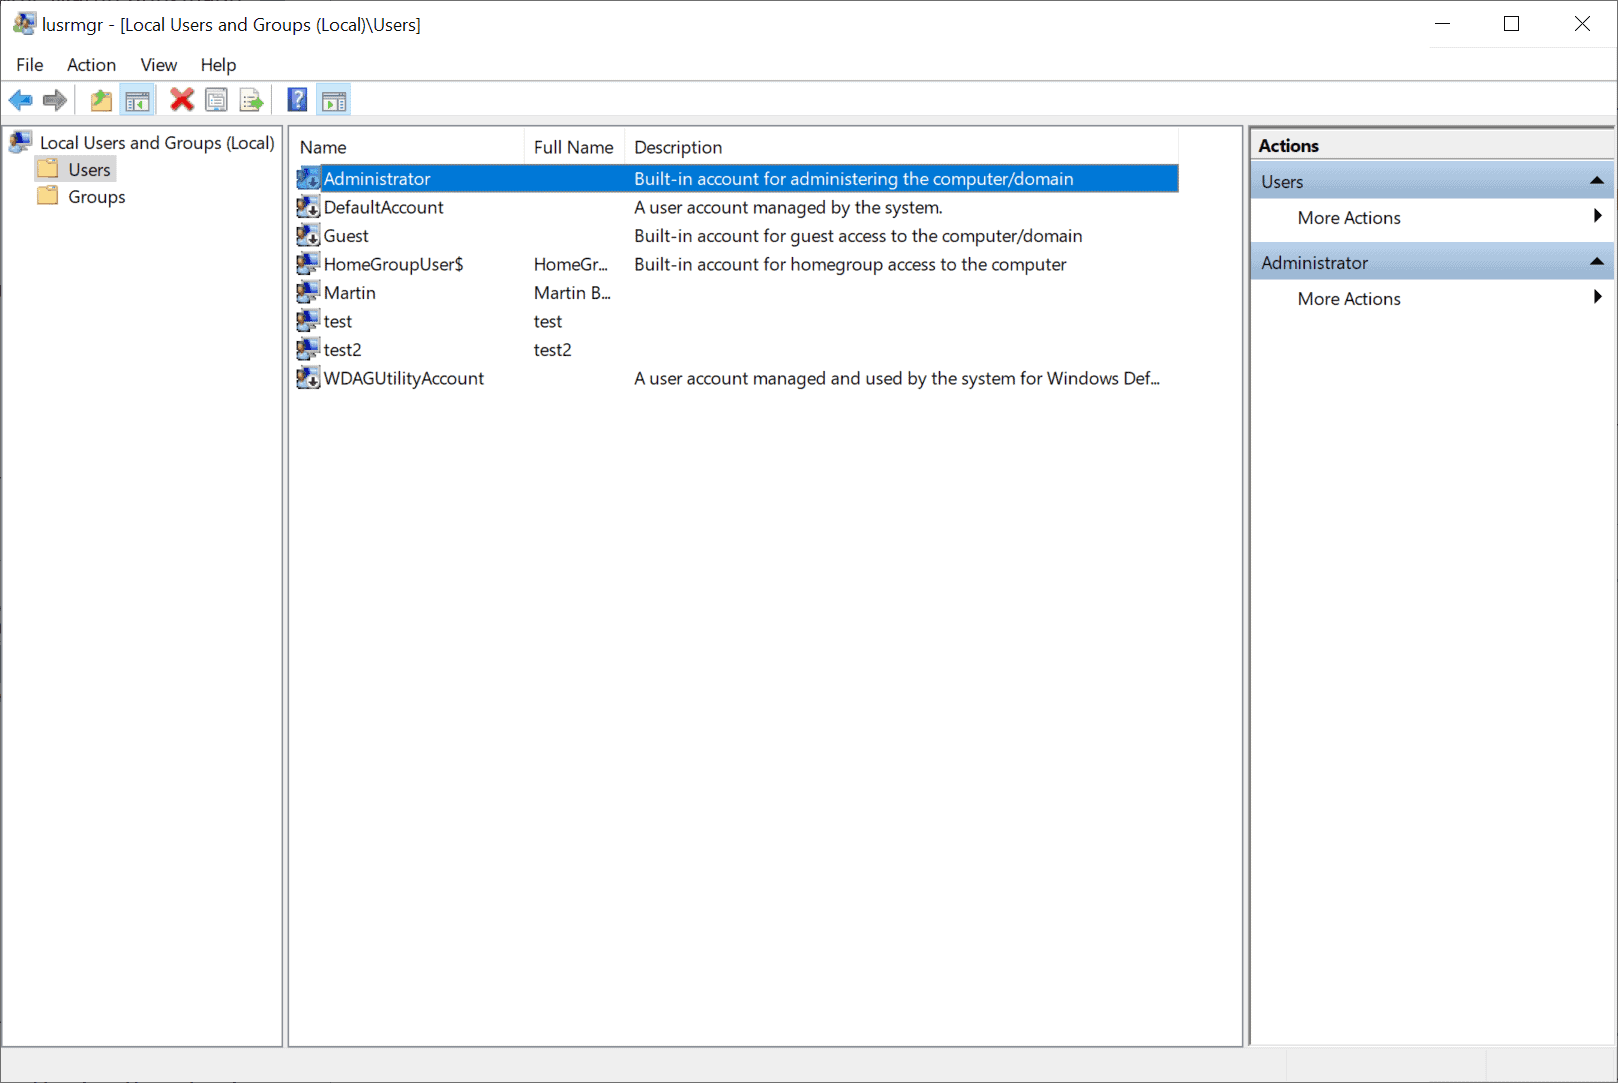
Windows users who prefer to work on user interfaces instead of the command prompt may use the built-in tool Local Users and Groups to manage accounts.
- Activate the Start menu on the system, e.g. with a click on Start or using the Windows-key.
- Type lusrmgr.msc and select the result that is returned to you.
- Left-click on Users in the left sidebar. You get a list of all accounts of the local system on the right.
- Right-click on Administrator and select Properties from the context menu.
- Remove the checkmark from "Account is disabled" on the Administrator Properties window and click apply, then ok.

The method activates the Administrator account on the Windows 10 machine. To deactivate the account again, place a checkmark in the "account is disabled" checkbox and click on ok.
Using Security Policies
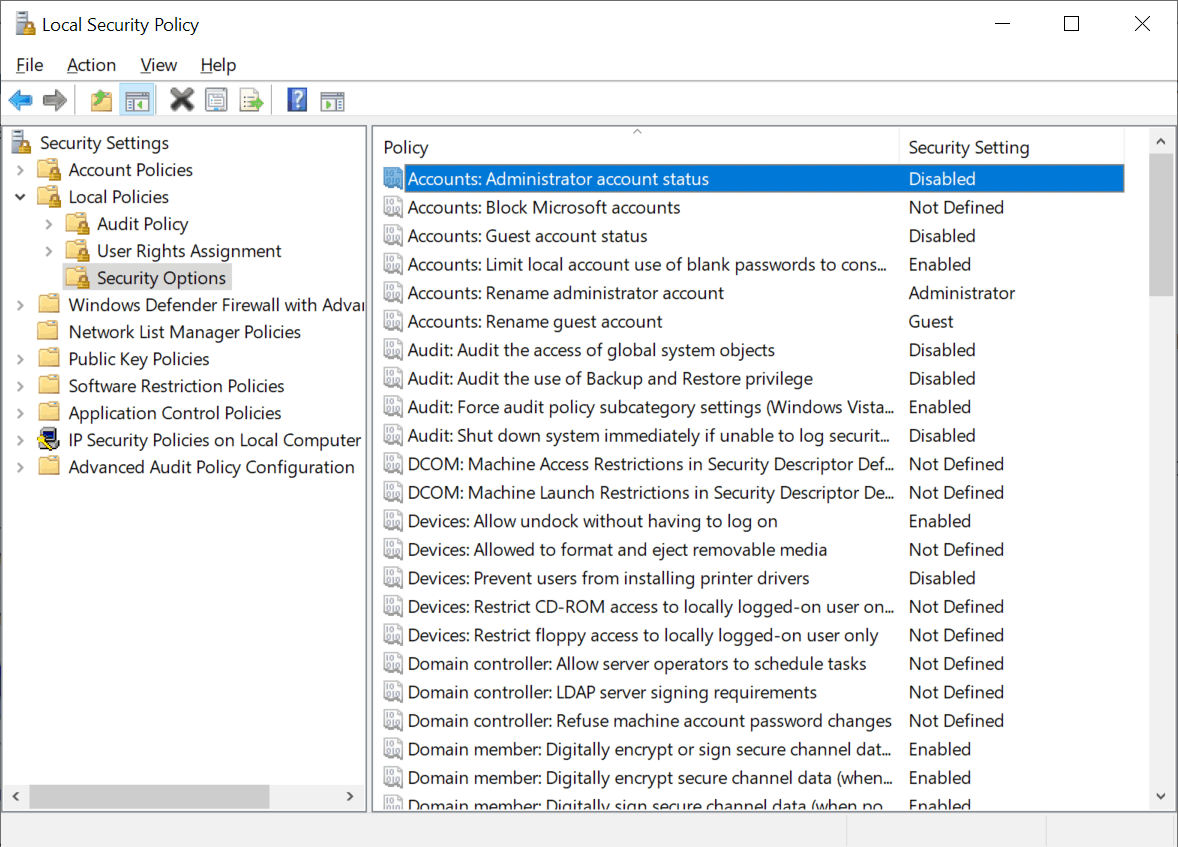
The second option to change the status of the built-in Administrator account on Windows 10 devices is to use Security Policies:
- Activate the Start Menu.
- Type secpol.msc and select the result to load the Local Security Policy.
- Go to Security Settings > Local Policies > Security Options.
- The policy Accounts: Administrator account status determines whether the local Administrator account is enabled or not. Check the "Security Setting" to see if it is disabled or enabled.
- Double-click on the policy and select "Enabled" to enable the account.
- Select ok and close the Local Security Policy.


0 Comments