As a network administrator, there are also cases where you may encounter the following:
- You have a server running the application, but the degraded hardware is at risk of dying at any time. and on the application, there are many things that if reinstalled, it will be very annoying and extremely good time, not to mention the old applications and license related ... not to mention that some of the old IT applications did not hand over. and if reinstalling the app is on the road, that's the case I've encountered.
- Or you simply want to switch from the real system to the virtualization system of VMWARE.
- So how to solve:
1. Do you backup the whole operating system of the machine with aronis, ghost?
=> How to do this is unlucky, because I have encountered a backup case finished sprung up in another machine, driver, ... and blue screen of death. So this way I think should be limited.
2. The way you clone to another device means that you convert from operating system to virtual. If your system has virtualization system of vmware (esxi), you can convert it to vCenter. If not, you can temporarily convert to vmware workstation temporarily while waiting for a more feasible solution.
In this article I will guide how to convert on physical machines to virtualization.
I.Convert physical machine to vmware workstation:
- First you need to setup vmware vCenter converter on physical machine, source you can download here : here
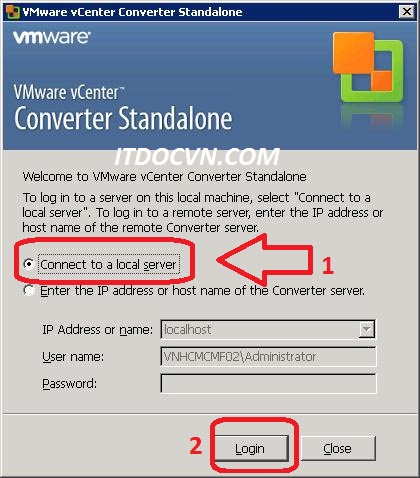
Step 1: After the installation is complete, open VMware vCenter Converter Standalone and log in at the computer:
+ Login dialog click Connect to a local server
+ And click login
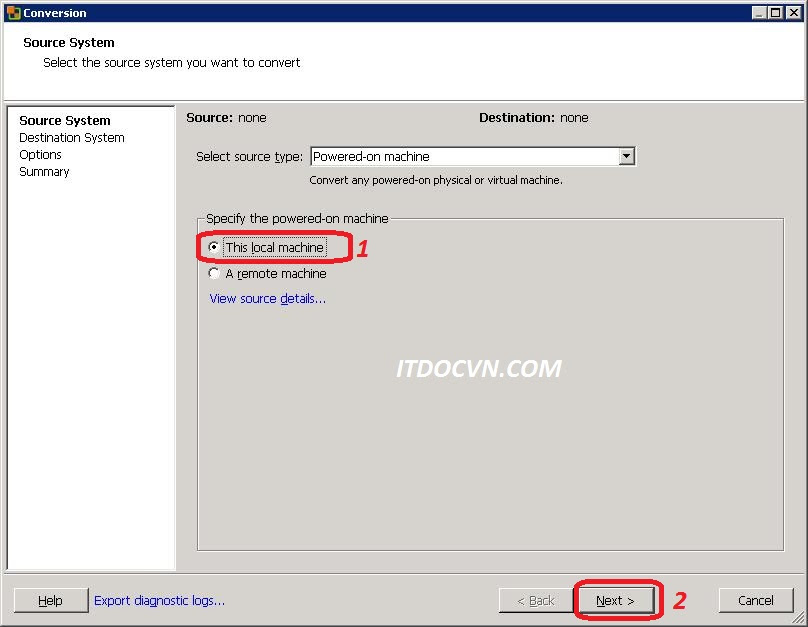
Step 3: At the Conversion dialog box:
+ Select source type: select Powered-on machine
This means that you will convert the virtual machine to the virtual machine and during this time the real machine will still work normally, and the conversion process will still work normally, but you should choose the time the user has the least access to the server to do because The conversion process has access to the hard drive, so if running at the peak of the user being used, the conversion process will take longer than the time when there is no user access to the server.
Step 4: In the Destination System dialog box, select the form you will convert to. Here to convert to vmware workstation then:
+ Select destination type: choose Vmware Workstation or other VMware virtual machine
+ Select VMware product, select the vmware workstation version you will move over here, I choose VMware workstation 9.0.x because I am currently using the vmware workstaiton version 9
+ And Select a location for the virtual machine you choose where to save the converted virtual machine.
Note: you choose the drive with a larger capacity than the one you convert, for example, your real hard drive is running 100GB and you need to convert the whole hard drive, here you have to choose a location with more capacity 100GB. and note that this destination location must be a different partition from the drive partition that you will convert to, for example, you will convert drive c and drive d, so the virtual machine cannot be stored on these two drives.
Step 5:
- In the Options dialog box, you edit some necessary things like the hard drive you want to convert to which partition? Or you want to set RAM for the virtual machine dest advertised, and how many cores the CPU dest will run, this you need to make sure that the dest machine can run with the configuration that you will convert, if not after you convert. After that, the device will not boot up, due to hardware failures.
- Often should pay attention to Data to copy: here you should convert the necessary things: it is partion not operating system, according to my partion containing data if nothing special, should not convert up to reduce time convert time, and partion contains data that you can copy later using traditional copying.
- Here after editing the hard drive you need to convert to you can select the drive you need to convert it by clicking the checkmark, and remove the partion you do not want to convert it by removing the check mark and clicking next to continue. converter
Step 6: The Sumary dialog box will summarize your choices, and you click finish to begin the conversion process.
II.Convert physical machine onto vCenter:
- In steps 1,2,3 do the same as step 1,2,3 in the Convert physical machine to vmware workstation above.
Step 4:
+ Select destionation type: choose VMware Infrastructure virtual machine
+ VMware Infrastructure server details: Server: enter vCenter's ip, Username / password: username / password login into vCenter.
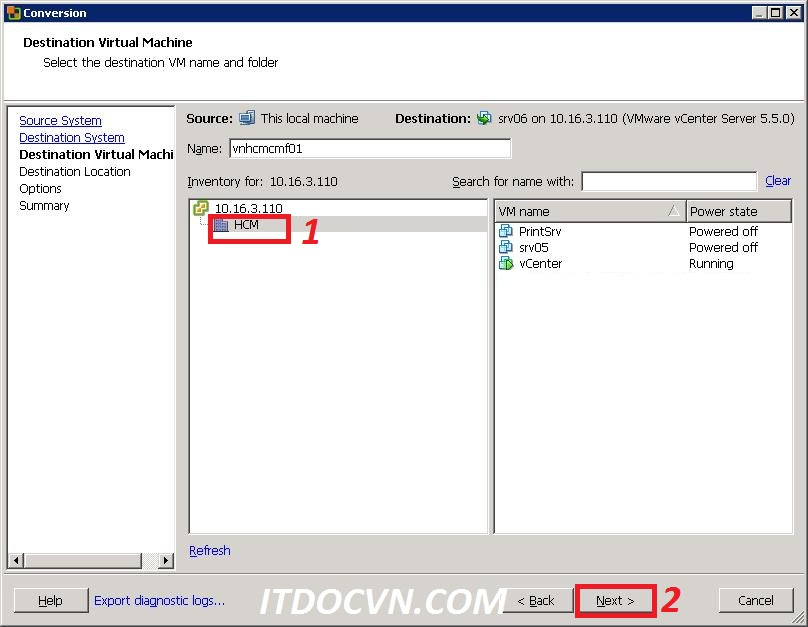
Step 6: The Destination Location dialog box appears, select Database for VM storage, here I choose datastore1 (SAN) to store VM on SAN. and choose the VMware version. Then most Next
Step 7: As well as step 5 in the Convert physical machine to vmware workstation we edit the hardware information to match the destination (esxi) before proceeding. Click next to continue.


0 Comments