One of the toughest aspects of learning Kubernetes is wrapping your mind around how services and internal containers are exposed to the outside world. There are a number of ways to do this and each has pros and cons, but there are definitely ways that are recommended for production environments. Using a Kubernetes Loadbalancer is one of those. MetalLB is a very popular Kubernetes load balancer that many are using in their Kubernetes environments. Let’s take a look at the Kubernetes install MetalLB load balancer process and see what steps are involved to install the solution and test it out.
What is a Kubernetes Loadbalancer?
Traffic from the “external” load balancer in a public cloud environment directs traffic to the backend pods. The cloud provider decides how it is load balanced. In itself, Kubernetes does not offer a built-in network load balancer for bare-metal clusters. While Kubernetes does support implementations of network load balancers via what is called “glue code,” it calls out to the public cloud environments such as AWS, Azure, and GCP. This is great if you are running your Kubernetes clusters in the cloud. However, for those with bare-metal clusters on their own hardware, this leaves only the NodePort and ExternalIPs to expose their Kubernetes services.
MetalLB provides a bare-metal load balancer
MetalLB is a freely available, open-source solution that addresses the problem described above with Kubernetes load balancers for bare-metal clusters. Even though it is open-source and free, many are using it in production and have had great success in doing so.
It offers a solution to offer a network loa balancer implementation that integrates with standard networking environments where bare-metal Kubernetes clusters are found. The implementation is straightforward and is meant to “just work.”
MetalLB requirements
The requirements for running MetalLB in your Kubernetes cluster are the following:
- A Kubernetes cluster, running Kubernetes 1.13.0 or later
- No other network load-balancing functionality enabled
- A cluster network configuration that can coexist with MetalLB
- Some IPv4 addresses for MetalLB to hand out
- When using the BGP operating mode, you will need one or more routers capable of speaking BGP
- When using the L2 operating mode, traffic on port 7946 (TCP & UDP, other ports can be configured) must be allowed between nodes, as required by members
For my testing and labbing, I am running a bare-metal Kubernetes cluster using Rancher on top of VMware vSphere. It uses a Ubuntu cloud image as the Kubernetes hosts. Read the following relevant posts covering these topics:
- Rancher Node Template VMware ESXi – Ubuntu Cloud Image
- Create Kubernetes Cluster with Rancher and VMware vSphere
Kubernetes Install MetalLB Loadbalancer
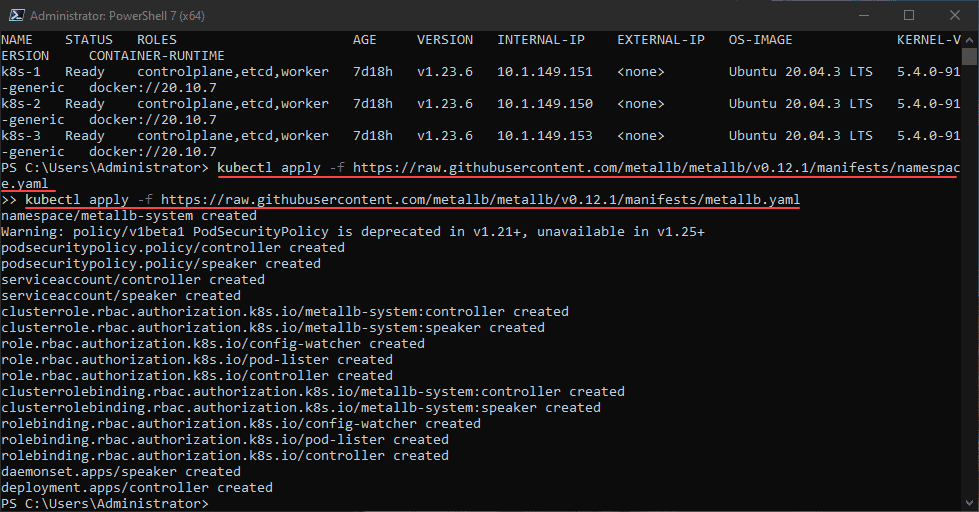
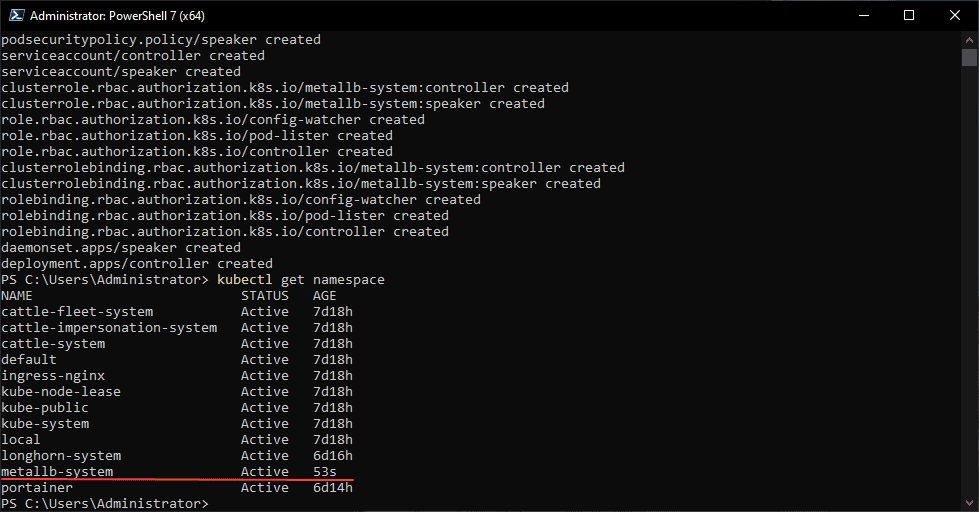
To begin with, I am installing MetalLB using the Manifests approach. To install MetalLB using Kubernetes manifest, use the following lines. I am simply following the installation documentation found here.
kubectl apply -f https://raw.githubusercontent.com/metallb/metallb/v0.12.1/manifests/namespace.yaml
kubectl apply -f https://raw.githubusercontent.com/metallb/metallb/v0.12.1/manifests/metallb.yamlCreate a Config Map for MetalLB
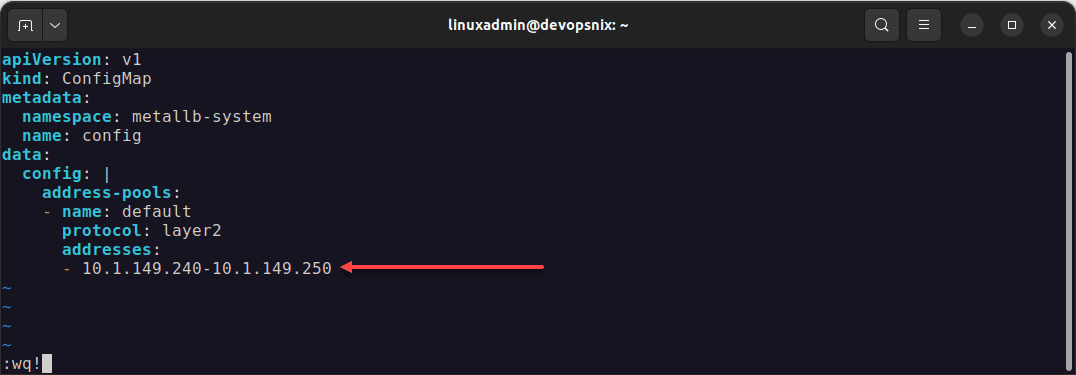
Once you have deployed MetalLB, you need to follow the documentation to deploy a Config Map. The config map is what determines the MetalLB network configuration and what IPs it hands out to services.
Below is simply the code copied from the documentation here. The only thing I am changing is the addresses section to match my local network. Paste the code into a temporary YAML file you can stick somewhere.
After you have the YAML file created and ready, we can deploy it using:
kubectl create -f /tmp/metallb.yamlTesting your MetalLB configuration deploying Nginx
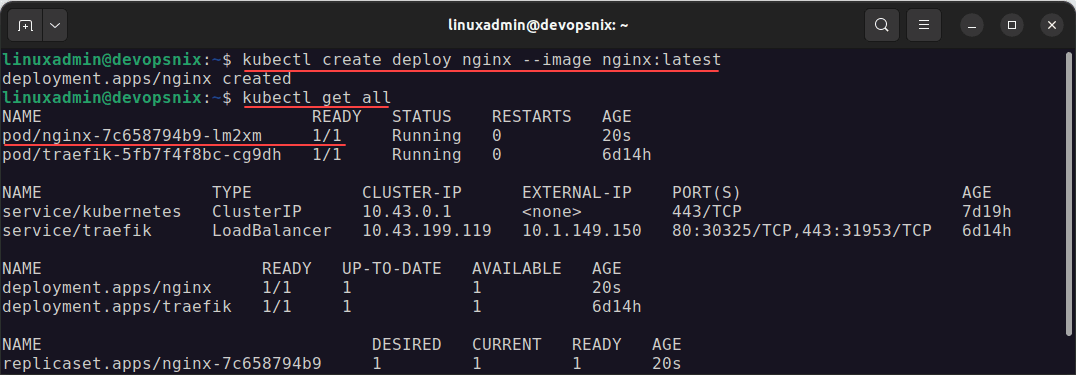
Now that we have installed MetalLB and created the config map for the network configuration it will hand out, we should be able to test that MetalLB works correctly. Let’s use an Nginx container deployment to test the handing out of IP addresses from MetalLB.
To deploy a test Nginx pod, you can use the following command:
kubectl create deploy nginx --image nginx:latestYou can then look at the deployment with:
kubectl get allExposing the Nginx deployment with type LoadBalancer
Now that we have deployed an Nginx test pod, we can expose the deployment using the type LoadBalancer.
kubectl expose deploy nginx --port 80 --type LoadBalancerUsing the kubectl get svc command, we can see the External IP is correctly assigned from the MetalLB IP pool. ***Note*** I will save you some time in troubleshooting an issue that really isn’t an issue. You won’t be able to ping the address handed out by MetalLB. I know I spent a few minutes trying to ping the address and it did not respond, making me think there was an issue. However, ICMP is not enabled for the IP address handed out for your deployment or at least this is the behavior in my lab.
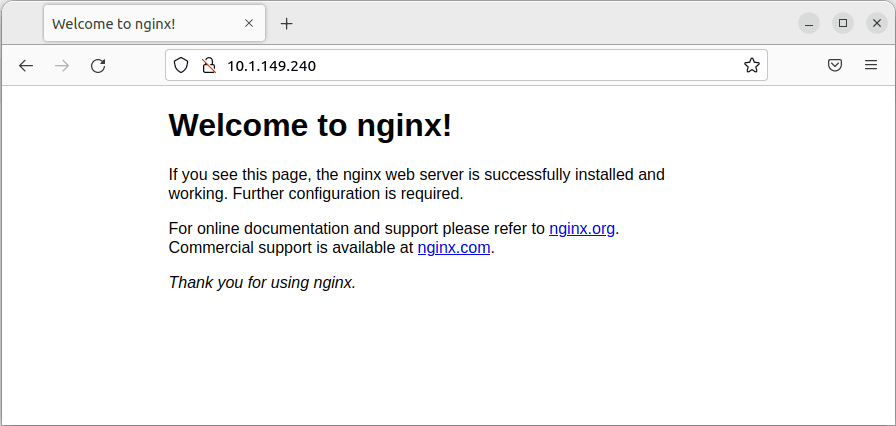
Even though we look to have an IP address assigned from MetalLB, can we actually connect? It is a good idea to test end-to-end. Success! We can get to our Nginx deployment using the IP address assigned from MetalLB.
Kubernetes Install MetalLB Loadbalancer FAQs
- What is a Kubernetes Load balancer? A load balancer handles the automatic configuration of network addresses for your Kubernetes deployments and configures the network layer so that incoming traffic is able to reach your deployment running in your Kubernetes cluster.
- What is MetalLB? MetalLB is an open-source Kubernetes bare-metal load balancer solution that provides an in-the-box load balancer for your Kubernetes deployments. It is free to download and easy to configure with just an easy config map deployment.
- Why do you need to expose Kubernetes deployments? When you deploy services in your Kubernetes cluster, these are not reachable by default. You need to use NodePort, ClusterIP, or a Load Balancer to expose the services where they are reachable from the outside world. Otherwise, they will be on an internal island within your Kubernetes cluster.
- Kubernetes ingress vs load balancer? – An ingress controller like Traefik only handles Layer 7 application traffic. It does not take care of lower-level network connectivity. For that, you need a load balancer.
Wrapping Up
I hope this post covering Kubernetes Install MetalLB Loadbalancer and the process to do that, including testing, will help anyone who wants to learn more about MetalLB. MetalLB is a great way to handle Kubernetes load balancing. It is free to use and open-source. Many use it in production and have a great deal of success doing so. As always, keep learning and labbing.





0 Comments