If you are looking for the ultimate Docker GUI management tool, there are several to choose from, both open-source and paid solutions. However, one stands out as a solution that is a great solution for managing your Docker hosts and Kubernetes environments – Portainer. The Portainer container management solution is a great tool for managing your Docker and Kubernetes environments Portainer is easy to install and instantly starts returning the value in the environment. However, what is the process for updating Portainer? Let’s look at how to update Portainer and the steps involved.
If you want to know more about Portainer, I featured it in an episode covering the best Docker containers to run in your home lab here:
What is Portainer container management solution?
Portainer is a freely available solution to manage your environment’s Docker hosts and Kubernetes clusters. With a Portainer instance, you can quickly pull down the Portainer container and be up and running with a new installation in just a few minutes.
Instead of managing your Docker containers from the CLI, it allows managing your Docker environment, including Docker containers and your Docker image resources, with the intuitive Portainer GUI.
Benefits of running Portainer container management
Portainer helps teams struggling to adopt containers more quickly get up to speed with containers in production environments. Portainer’s excellent GUI provides the missing link to management, configuration, monitoring, RBAC, etc. Note some of the features are limited to the Business edition, as we will see below.
Portainer Agent
Portainer also has an “agent” solution. The Portainer Agent allows organizations to work around a Docker API limitation. By default, Docker limits user interactions with specific resources, including containers, networks, volumes, and images, to the node targeted by the Docker API request. The Portainer Agent allows node-specific resources to be cluster-aware.
Portainer versions
There are a couple of Portainer versions that you can choose from, depending on your use cases. These include:
Portainer Community Edition (CE) – This is the foundational version of Portainer. It is an open-source solution that allows building and managing containers in Docker, Docker Swarm, Kubernetes, and Azure ACI.
Portainer Business Edition (BE) – The business offering is the paid version of Portainer that offers the more advanced features generally needed by organizations, including Role-Based Access Control, registry management, and support.
How to update Portainer
When you have Portainer installed, lifecycle management is part of the solution’s management. However, due to the modern architecture of Portainer, they have architected the solution with an easy way to update Portainer to the latest version, using the following commands.
Portainer architecture
The Portainer architecture includes housing the Portainer data locally on the Docker host. With this being the case, the upgrade process involves pulling a new image for the Portainer container and running the new container using the existing data.
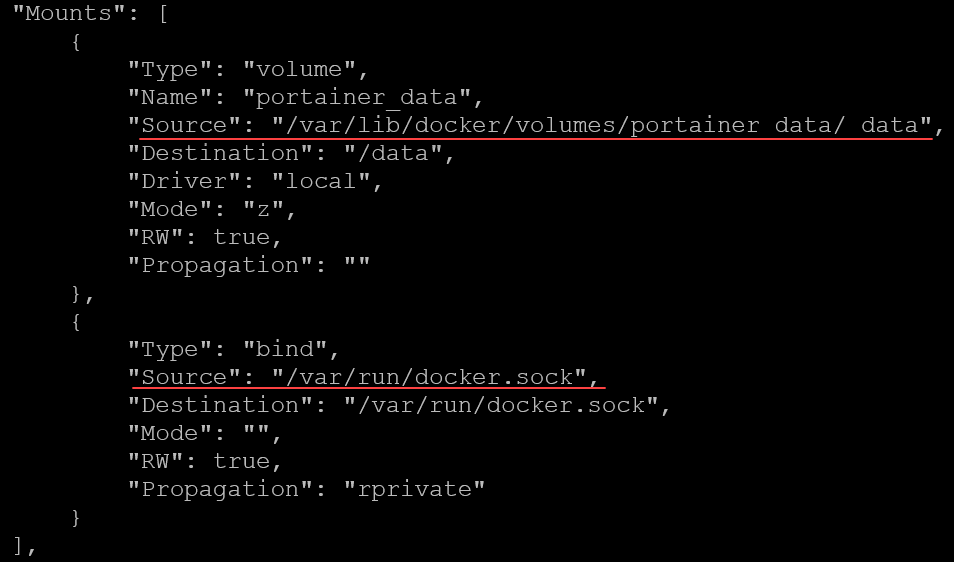
You can see where the data is mounted by running a docker inspect command on your Portainer container.
As you can see below, the source mounts: Docker.sock v portainer_data data portainer. The portainer_data is mounted from the path:
/var/lib/docker/volumes/portainer_data/_dataThe run docker.sock v portainer_data data is found at:
/var/run/docker.sock locationFind the current Portainer container ID
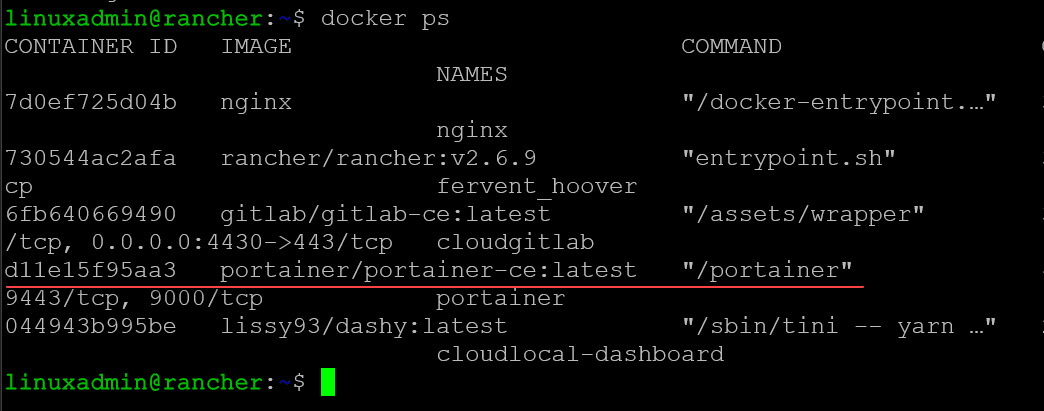
First, we need to find our current Portainer container ID and stop our Portainer container. We can find the existing Portainer installed by issuing the command. Note you will need to use the sudo docker command if your user is not a member of the Docker group.
docker psBelow, running the docker ps command line returns the currently running portainer container.
Stop Portainer and remove the Portainer container
After we have found the Portainer container ID, we can stop and remove the existing Portainer container. It sounds like a dangerous process. However, as we mentioned earlier, and as shown by the docker inspect command, the data is safely housed on the Docker host.
Stopping and removing the container
To stop the Portainer container, use the command:
docker stop <container ID>Once the Portainer container is stopped, we can remove the container:
docker rm <container ID>Pulling the latest Portainer image
Now, we need to pull the latest portainer container. We can use the command:
docker pull portainer/portainer-ce:latest***Note*** Be sure not to accidentally update to portainer/portainer-be as this will upgrade your data to the business edition. There is a process to downgrade your data, if you do. However, it is better to avoid doing this. I have accidentally copied the command for business edition and had to do this in times past. You can find the official Portainer KB on how to downgrade BE to CE here:
Can I downgrade from Portainer Business to Portainer CE?
Restart using the latest Portainer image
Now that we have the updated image for Portainer, we can update the Portainer container by running the container using the options to mount the existing data with the following options:
Portainer restart always v var run docker.sock
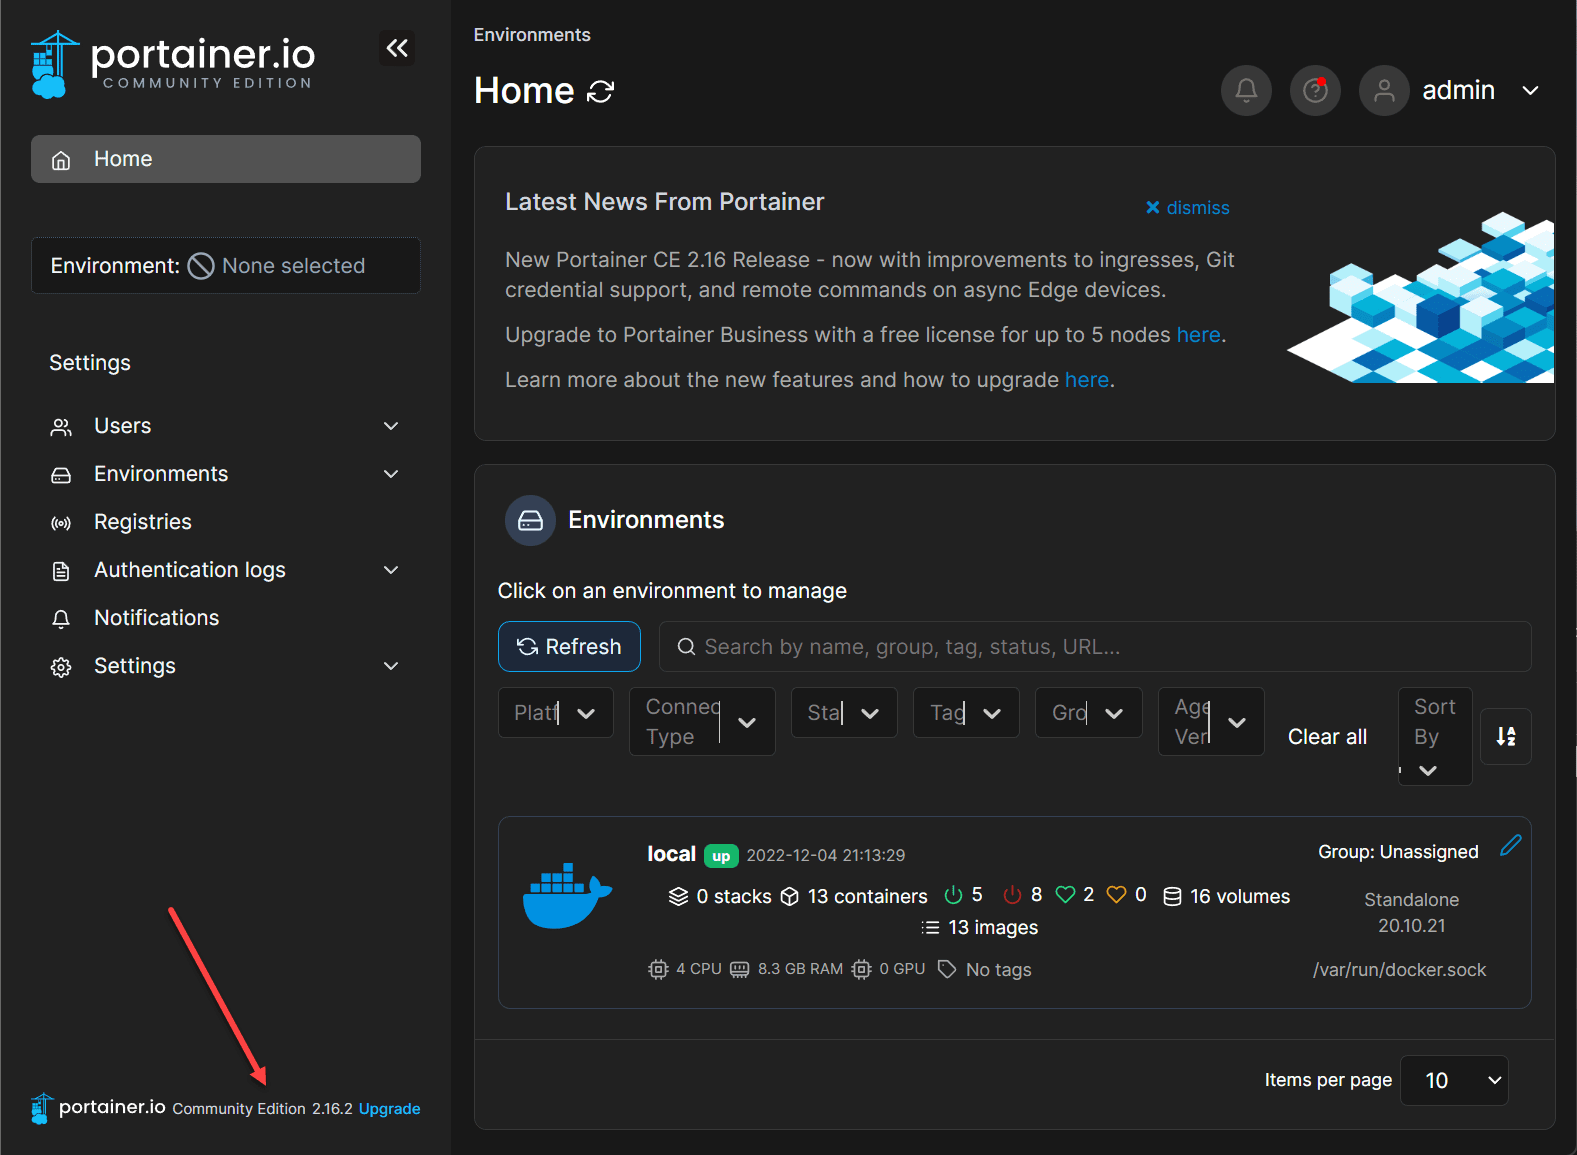
docker run -d -p 8000:8000 -p 9443:9443 --name=portainer --restart=always -v /var/run/docker.sock:/var/run/docker.sock -v portainer_data:/data portainer/portainer-ce:latestYou should be able to log back into your Portainer instance and see the latest version. You can see that in the lower left-hand corner.
Wrapping Up
Portainer is an excellent solution for having GUI management of your containers. It is great that the lifecycle management of the solution is straightforward. Hopefully, this brief overview of how to update Portainer to the latest version helps anyone wondering how the update process is accomplished.


0 Comments