Docker Desktop is an extremely popular development tool that developers, DevOps, and others can use to run Docker containers and Kubernetes on their local development workstations. However, if you have the Docker Desktop starting forever Windows 11 error, we will look at workarounds to help fix Docker startup errors, including Docker Desktop is starting.
What is Docker Desktop?
Docker Desktop is an innovative tool that allows developers to package software into standardized units called containers. These containers can run libraries and other dependencies, making it easy to build, test, and run modern applications on various operating systems, such as Windows 10 and 11.
When installing Docker on your operating system, Docker Desktop uses the Hyper-V backend for the virtualization hypervisor.
However, many users encounter the “Docker Desktop Starting Forever” error in Windows, causing frustration and delays in their workflow. In this post, we’ll explore some solutions to fix this issue.
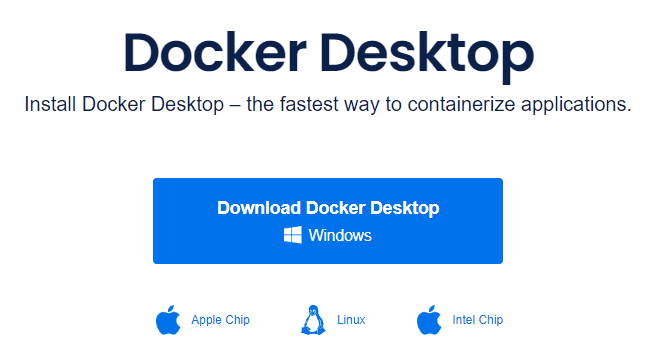
Docker Desktop installer
Let’s look at the process to install Docker Desktop in Windows. After downloading the installer, run the .exe. You will see a UAC prompt most likely.
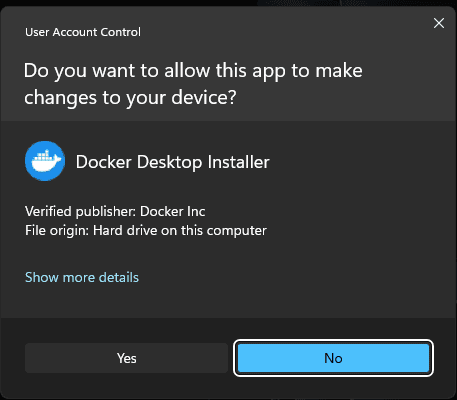
Running the installer
Click Yes to run the installer.
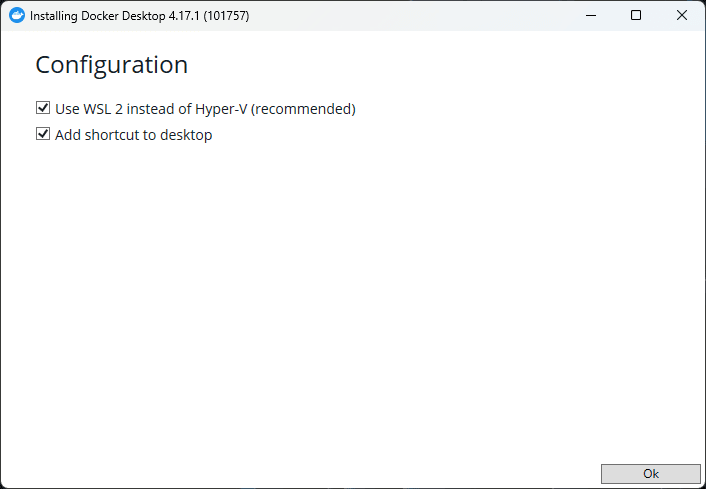
Setting the WSL2 option
You will see the options on the configuration. You will be asked to Use WSL 2 instead of Hyper-V (recommended) and add a shortcut to the desktop.
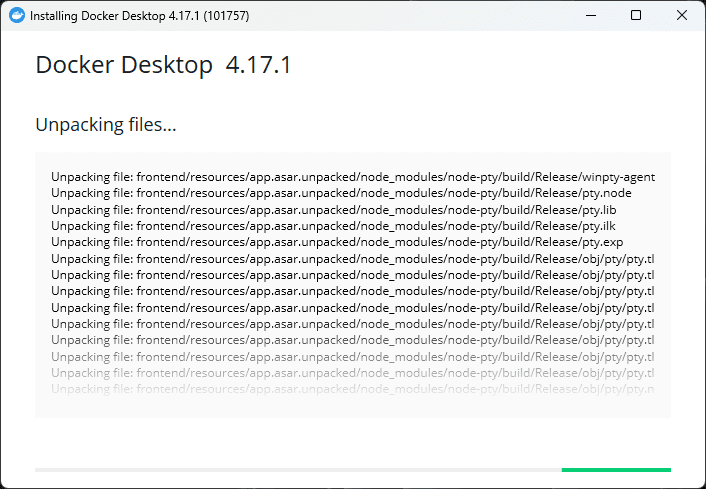
The installation begins
After that, the Docker Desktop installation will begin.
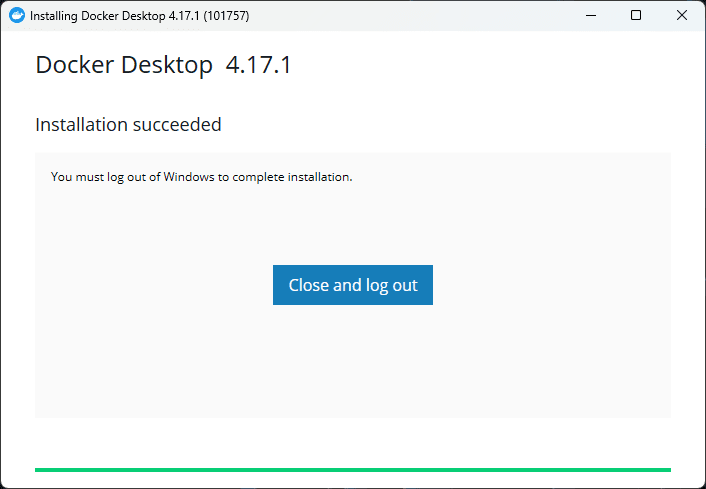
Docker desktop installed successfully
Docker Desktop is successfully installed. After the successful installation, you will be directed to close and log out. This will log you out of Windows.
Docker Desktop Starting Forever Windows 11
Perform a clean boot
A clean boot is one of the first steps to resolve the Docker Desktop Starting Forever error. A clean boot ensures that only essential services and programs are running, which may help identify and resolve conflicts with Docker Desktop.
1. Type msconfig in the Run dialog box and hit Enter.
2. Navigate to the Services tab and check “Hide all Microsoft services.”
3. Click “Disable all” and then go to the Startup tab.
Open Task Manager, disable any unnecessary startup programs, click the Windows button and select restart your computer.
After restarting, open Docker Desktop and check if the issue persists.
Often, this issue occurs when the system requirement isn’t met
Another reason for the Docker Desktop Starting Forever error in Windows 11 or 10 could be unmet system requirements.
To ensure smooth operation, verify that your PC meets the minimum requirements for running Docker Desktop. You can find the system requirements on the Docker documentation page.
What if your system doesn’t meet the requirements?
If your system doesn’t meet the minimum requirements, consider upgrading your hardware or installing the latest version of Docker compatible with your PC.
Switch to the Windows containers
By default, Docker Desktop uses Linux containers. However, some Windows devices may face issues when using the Linux option, resulting in the Docker Desktop Starting Forever error message.
Switching to Windows containers
To resolve this, switch to Windows containers:
Locate the Docker system tray icon and right-click on the whale icon.
Select “Switch to Windows containers” from the context menu.
After switching, Docker Desktop should start normally. If you encounter the same problem, proceed with troubleshooting.
Re-enable the Windows Subsystem for Linux (WSL) feature
The Windows Subsystem for Linux (WSL) is an essential component of Docker Desktop. Sometimes, disabling and re-enabling the WSL feature can resolve the Docker Desktop Starting Forever issue.
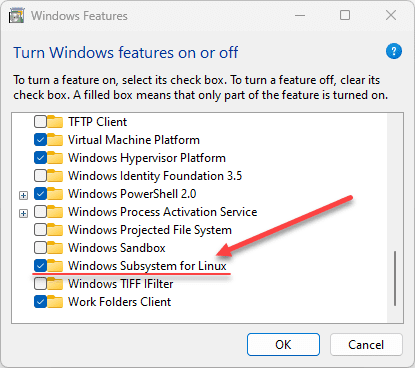
Disabling and reenabling WSL
1. Type optionalfeatures in the Run dialog box and hit Enter to open the Windows Features dialog.
2. Uncheck “Windows Subsystem for Linux” and click “OK.”
3. Restart your computer, reopen the Windows Features dialog, and re-enable the WSL feature.
Unregister Docker Desktop
Unregistering Docker Desktop can help fix startup errors by clearing any corrupt or conflicting data.
Process to unregister docker desktop
1. Open Windows PowerShell as an administrator.
2. Type wsl –unregister docker-desktop and hit Enter to unregister Docker Desktop.
3. Restart your computer and launch Docker Desktop.
You can also uninstall Docker Desktop and then reinstall Docker desktop. Also, check the Docker desktop version you are installing to make sure you have the latest.
Use Windows PowerShell to fix Docker Desktop stuck on starting
In some cases, using Windows PowerShell to stop and restart the Docker service can fix the Docker Desktop Starting Forever error:
1. Open Windows PowerShell as an administrator.
2. Type Stop-Service docker and hit Enter to stop the Docker service.
3. Type Start-Service docker and hit Enter to restart the Docker service.
Uninstall the tool completely and then install running as administrator
If the above steps haven’t resolved the issue, try uninstalling Docker Desktop and perform a fresh install:
1. Open the “Apps & features” page in Windows Settings.
2. Locate Docker Desktop, select “Uninstall,” and follow the prompts.
3. Download the latest Docker Desktop installer from the official website.
4. Right-click on the installer and select “Run as administrator” to begin the installation. You may need to accept any user account control prompt messages
Disable Docker at Startup
Another way to fix the Docker Desktop Starting Forever error is to disable Docker at startup and then manually start it:
1. Press Ctrl + Shift + Esc to open Task Manager.
2. Navigate to the “Startup” tab, locate Docker Desktop, right-click, and select “Disable.”
3. Restart your computer.
After restarting, manually start Docker Desktop by double-clicking the Docker Desktop icon on your desktop or searching for it in the Start menu.
Disable and re-enable the WSL feature
If the Docker Desktop Starting Forever error still persists, try disabling and re-enabling the WSL feature once more:
Open the Run dialog box, type optionalfeatures, and hit Enter to open the Windows Features dialog.
Uncheck “Windows Subsystem for Linux” and click “OK.”
Restart your computer, reopen the Windows Features dialog, and check “Windows Subsystem for Linux.”
Once the WSL feature is re-enabled, attempt to relaunch Docker Desktop.
Make sure your virtualization capabilities are working correctly
In some systems, Hyper-V may not be functioning or enabled correctly. Check your BIOS settings to ensure virtualization is enabled.
AMD CPUs
If you are running an AMD CPU and are running a VMware workstation with nested virtualization enabled, there is a known issue where you can’t run virtualization on the host and VM simultaneously.
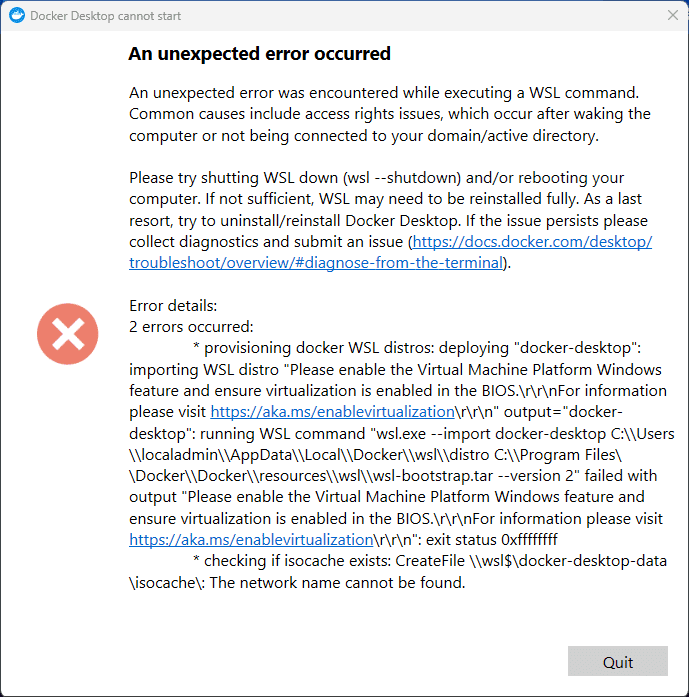
Error message
Below is an error message I received when running Windows 11 nested in VMware Workstation. The AMD host (threadripper CPU) had virtualization enabled on the host operating system.
I received the following message when trying to launch Docker on the VMware Workstation VM. If you run into issues enabling CPU virtualization on your VMware Workstation VMs, you will have issues running Docker Desktop inside them.
Docker Desktop Starting Issues on AMD CPUs
Docker Desktop starting issues are not exclusive to users with Intel processors; those using AMD CPUs can also face similar challenges.
In some cases, the problems may be caused by the specific features and configurations of AMD processors, which can affect the operation of Docker Desktop. Here are a few insights and possible solutions to address these issues.
SVM Mode
SVM Mode: For Docker Desktop to function correctly on AMD CPUs, the virtualization feature known as Secure Virtual Machine (SVM) must be enabled. This feature can be found in your BIOS settings.
Make sure to access your BIOS and enable SVM mode if it is not already active. Each motherboard may have a different BIOS layout, so refer to your motherboard’s manual for detailed instructions on enabling SVM mode.
Nested Virtualization
Nested Virtualization: Some AMD processors support nested virtualization, which allows you to run a virtual machine inside another virtual machine. However, this feature may cause conflicts with Docker Desktop. To resolve this issue, ensure that nested virtualization is disabled in your BIOS settings or that you are using a stable Docker Desktop version compatible with nested virtualization on AMD CPUs.
Update System BIOS
Update System BIOS: Older BIOS versions may not be fully compatible with the latest AMD CPUs or may have issues related to virtualization.
In such cases, updating your system BIOS to the latest version can help resolve Docker Desktop starting issues. Visit your motherboard manufacturer’s website for instructions on how to update your BIOS safely.
Ryzen Master Utility
Ryzen Master Utility: Some users have reported that the Ryzen Master Utility, a software tool provided by AMD for monitoring and overclocking Ryzen processors, may cause conflicts with Docker Desktop.
If this utility is installed, try uninstalling or disabling it before starting Docker Desktop.
Hyper-V Related Errors
Hyper-V is a critical component for running Docker Desktop on Windows, as it provides the necessary virtualization support.
If you’re experiencing issues with Docker Desktop taking forever to start, there may be Hyper-V-related errors. Here are some solutions to troubleshoot and fix these errors:
Enable Hyper-V: Ensure that Hyper-V is enabled on your system. You can do this by going to “Turn Windows features on or off” in the Control Panel, and checking the “Hyper-V” option.
Check BIOS settings: Some hardware configurations might disable virtualization in the BIOS. Make sure to enable virtualization in your BIOS settings.
Restart Hyper-V services: Restarting the Hyper-V services can help resolve issues related to Docker Desktop. Open an elevated PowerShell window and run the following commands:
net stop vmms net start vmmsReset Docker’s virtual switch: If the issue persists, Docker’s virtual switch may have been corrupted. You can reset it using the following PowerShell commands:
Remove-VMSwitch -Name "DockerNAT" -Force New-VMSwitch -Name "DockerNAT" -SwitchType NAT -NATSubnetAddress "10.0.75.0/24"Reinstall Docker Desktop: If none of the above solutions work, consider uninstalling Docker Desktop. Close Docker. Once you have uninstalled Docker, reboot your system, and reinstall the latest version of Docker Desktop.
Windows PowerShell Not Working Correctly
Windows PowerShell is essential for Docker Desktop to function properly on Windows machines. If PowerShell is not working correctly, Docker Desktop might get stuck at the “starting” phase. Here are some possible solutions to resolve the issue:
Run PowerShell as Administrator: Ensure you’re running PowerShell with administrative privileges. Right-click on the PowerShell icon, and choose “Run as Administrator.”
Update PowerShell: Older versions of PowerShell might not be compatible with Docker Desktop. Check if you’re using the latest version of PowerShell and update it if necessary.
Unblock PowerShell scripts: Some scripts may be blocked if you’ve recently installed Docker Desktop. To unblock the scripts, open an elevated PowerShell window and execute the following command:
Get-ChildItem -Path 'C:\Program Files\Docker\Dockerresources' -Recurse | Unblock-FileReinstall Docker Desktop: If the above steps don’t resolve the issue, uninstall Docker Desktop, reboot your system, and reinstall the latest version of Docker Desktop.
Wrapping up
The Docker Desktop Starting Forever error in Windows 11 or 10 can possibly be resolved by following the steps outlined in this blog post. Remember to check your system requirements, perform a clean boot, switch to Windows containers, re-enable the WSL feature, unregister Docker Desktop, use Windows PowerShell to fix the issue, reinstall Docker Desktop as an administrator, disable Docker at startup, or disable and re-enable the WSL feature.
By following these solutions, you can quickly return to running your Docker containers and enjoy the benefits of standardized units for your software packages.

0 Comments