
With the massive uncertainty regarding VMware vSphere, there are a lot of home labbers out there who are looking at alternatives to VMware vSphere. These may be looking at open-source solutions like Proxmox and XCP-ng. However, there is another solution you can consider: Nutanix Community Edition. The Nutantix CE edition is free to download. It provides a great solution for spinning up and running your home lab on top of what may become one of the popular alternatives in the enterprise for VMware if things continue to escalate with the Broadcom changes.
What is Nutanix Community Edition?
Nutanix Community Edition CE 2.0 is a free, community-supported version of the Nutanix hyper-converged infrastructure (HCI) system cloud platform. It’s designed to be installed on various hardware configurations using the Nutanix CE Installer.
This edition allows individuals to explore and learn the functionalities of the Nutanix platform, including managing infrastructure on their own hardware. It includes Prism, which is the Nutanix interface that provides management of the Nutanix environment.

Nutanix Community Edition is ideal for those who want to experience the features of the Nutanix platform without the cost associated with the commercial version. It can be installed on different types of hardware, from VMware vSphere and Workstation to bare metal physical servers.
While you may not have thought about Nutanix being home lab-friendly, it is. The community edition allows running VMs without limitation and you can even run up to a 4-node cluster with the community edition licensing. You will need to register for a Nutanix account.
Nutanix CE supports various upgrades and deployments, including upgrades for AOS (the operating system for Nutanix clusters) and AHV (Nutanix’s hypervisor), as well as deployments for Prism Central, a management solution for Nutanix environments, similar to VMware vCenter Server.
Recommended community edition hardware
Take a look at the table below for the recommended Nutanix community edition hardware:
| Component | Recommendation | Notes |
|---|---|---|
| CPUs | Intel CPUs (Sandy Bridge or later), AMD CPUs (Zen or later) | 4 core minimum; 2 cores for Controller VM |
| System Memory | 20 GB minimum | 32 GB+ recommended for AOS features like deduplication, compression |
| Network Interface Card | Intel: 1GbE, 2.5GbE; Realtek: 1GbE, 2.5GbE; Other compatible NICs | |
| Host Bus Adapter (HBA) | Supports AHCI SATA, LSI controller in IT mode, IR mode with pass-through, or IR mode with RAID-0 | NVMe drives also reported to work by some users |
| Storage Devices, All | Max 4 SSD/HDD drives per node | Some users reported success with more than 4 drives |
| Storage Devices, Cold Tier | 500 GB+ available, Max 18 TB (3 x 6 TB HDDs) | HDD or SSD for cold-tier storage |
| Storage Devices, Hot Tier | Single 200 GB+ SSD | |
| Hypervisor Boot Device | One 32 GB+ device per node (external or internal) | USB 3.0 drives recommended to avoid imaging issues |
| Firmware | Update to the latest version recommended by hardware vendor | |
| Cluster Size | Single-node, three-node, and four-node clusters supported | Three-node cluster recommended; single-node cluster cannot be expanded |
| Imaging Software | Use dd utility (Linux, Mac OS X) or Rufus (Windows) for USB drive imaging | Not needed if using Virtual Drive feature of IPMI |
Community Edition licensing requirements
Note the following licensing requirements:
| Requirement | Enforcement |
|---|---|
| Admin Account Password Change | Mandatory immediate change of the default admin user password upon first sign-in to the Prism web console. |
| Nutanix NEXT Account Login | Requires login with Nutanix NEXT account with valid Community Edition privileges after changing admin credentials. Your NEXT account is the same as My Nutanix account. |
| Outgoing TCP Ports 80 or 8443 Access | Must have outgoing TCP ports 80 or 8443 open through your firewall for Pulse, an automated feedback mechanism that sends cluster alerts and usage statistics. |
My Nutanix Home Lab hardware for testing
The following walkthrough will consider setting up just a single Nutanx host in your home lab environment. I will be using one of my older Supermicro SYS-5028D-TN4T servers. These have a Xeon D-1541 processor with 8 cores and 16 threads.
Install Community Edition
Installing Nutanix Community Edition involves downloading the Community Edition ISO and using something like Rufus or Ventoy. You can download the ISO here:
- Nutanix Community Edition | Hands-on Hyperconvergence.
- Look for the link “Join and Download at no cost.“
The Nutanix Community Edition ISO is fairly hefty at around 5 gigs for the 6.5.2 stable edition that I downloaded at the time of this writing. Booting my Supermicro from the ISO below.
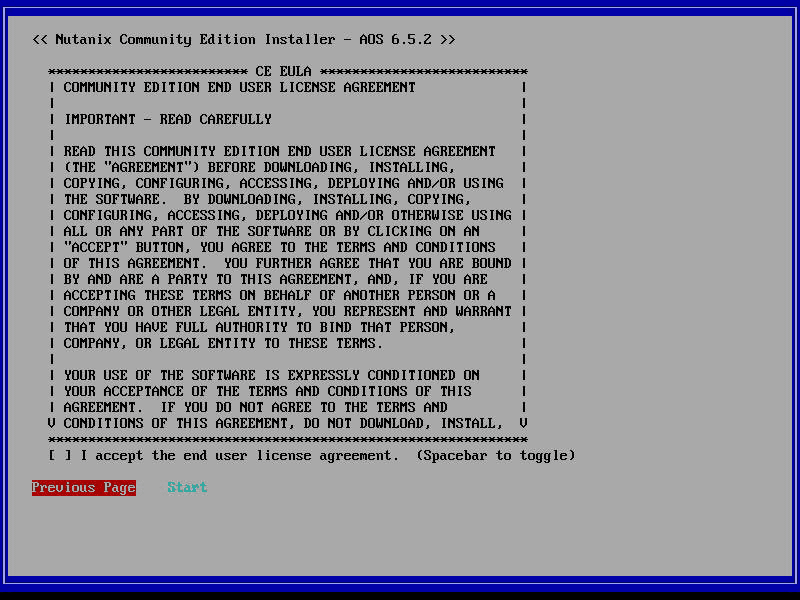
You will get to the Nutanix Community Edition installer as you see below. Select your hypervisor. Yes, Nutanix can actually work with ESXi as the hypervisor and it provides the storage. However, here we are going native Nutanix.
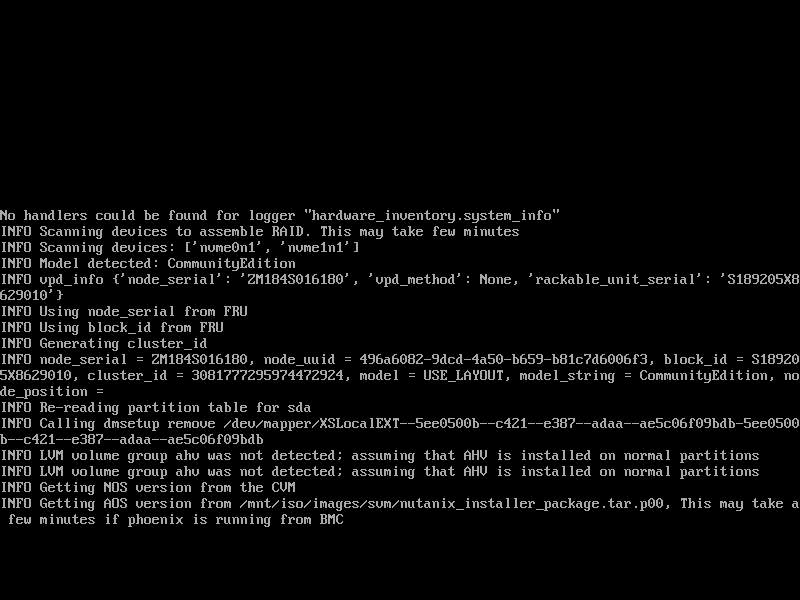
It will automatically take a look at the drives you have installed. You will also set the host IP address, CVM IP address, Subnet Mask, Gateway, and DNS Server address. You can select whether or not you are creating a single-node cluster.

Accept the EULA.
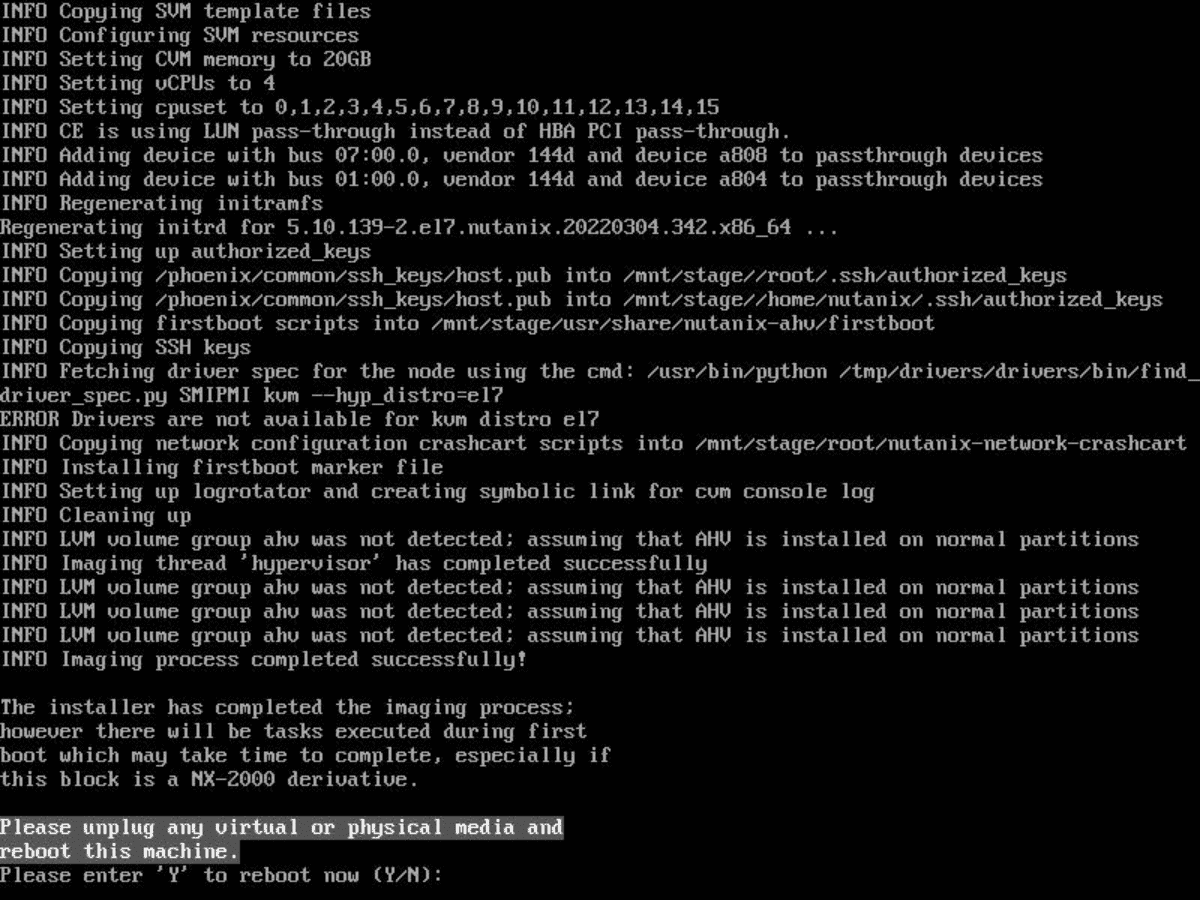
Rebooting after the first round of the installation.
The Nutanix host is fully booted.

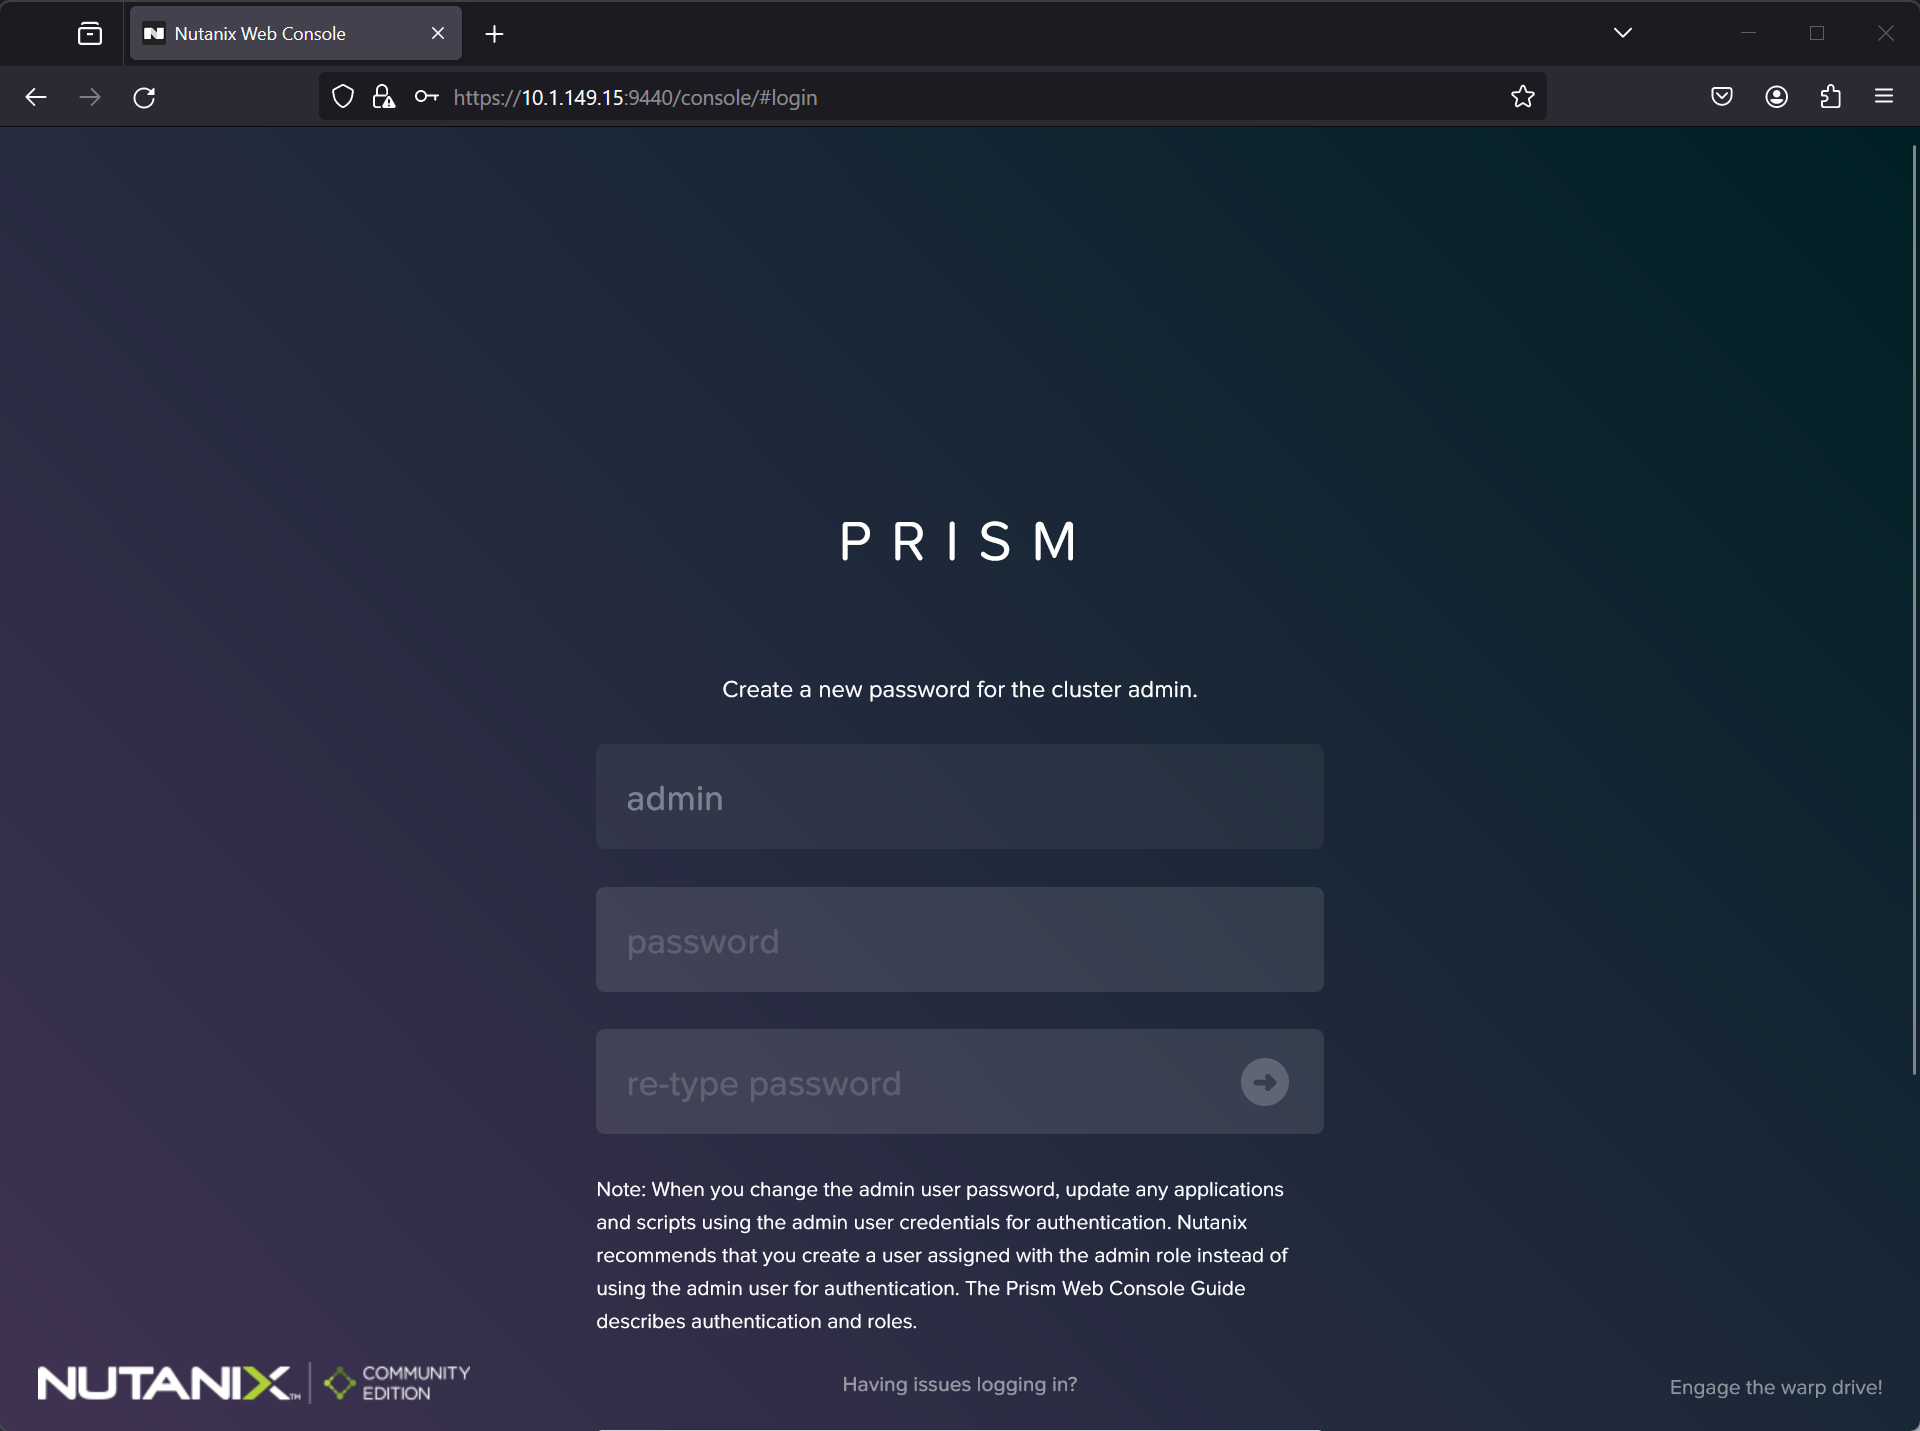
Log into Prism with the default admin account admin/Nutanix4u as the default. You will be asked to change the default admin Nutanix 4u password after you log in the first time.
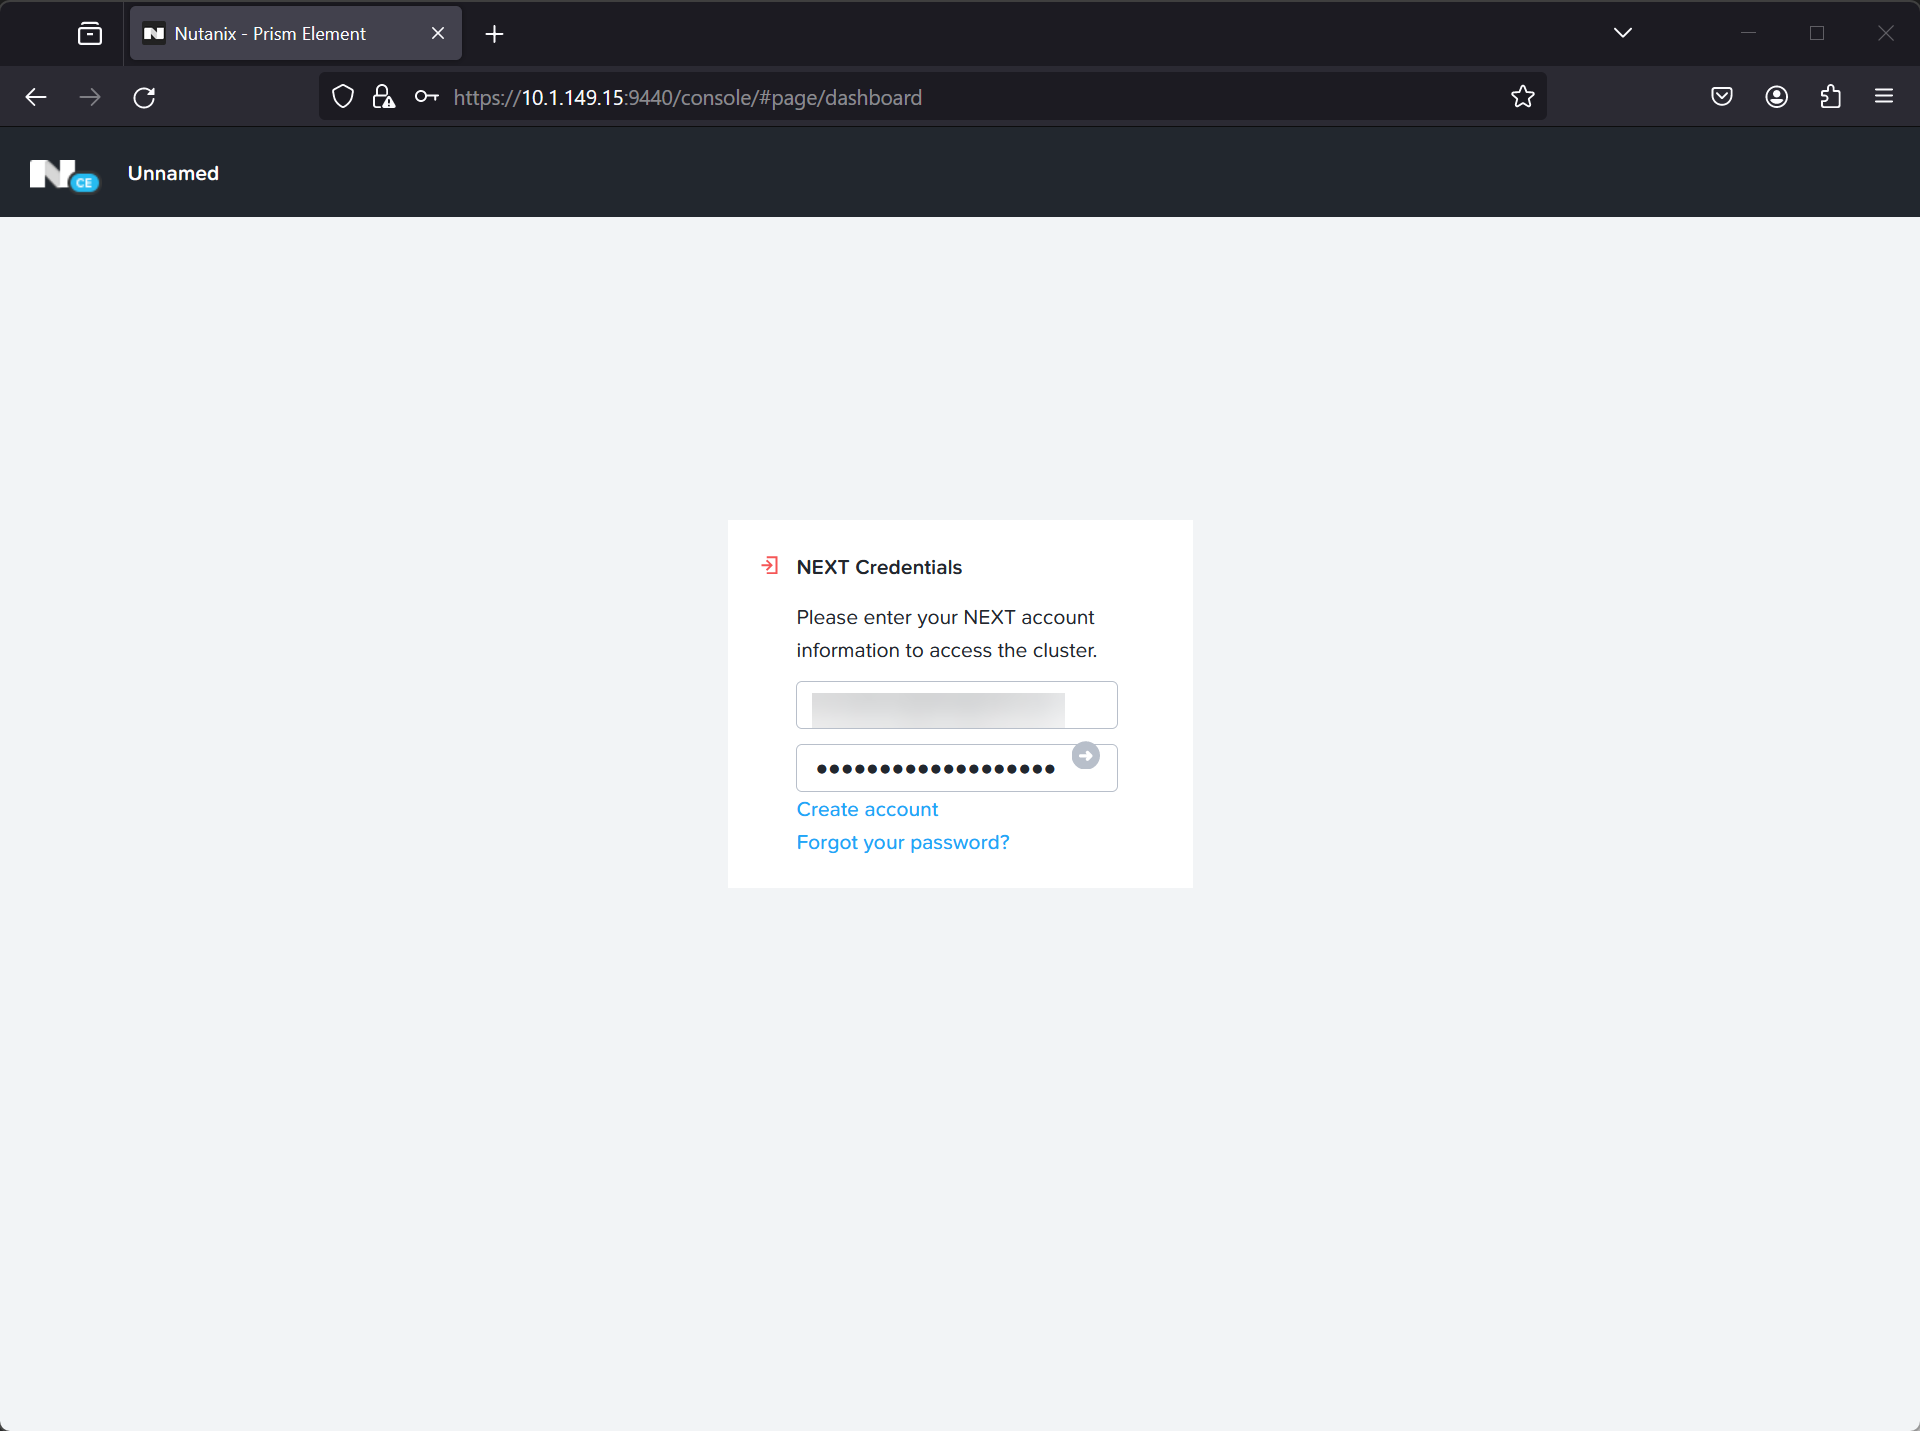
Sign up for a NEXT account
You will need to sign up for Nutanix NEXT account as well and will be prompted for this after you log into Prism central.
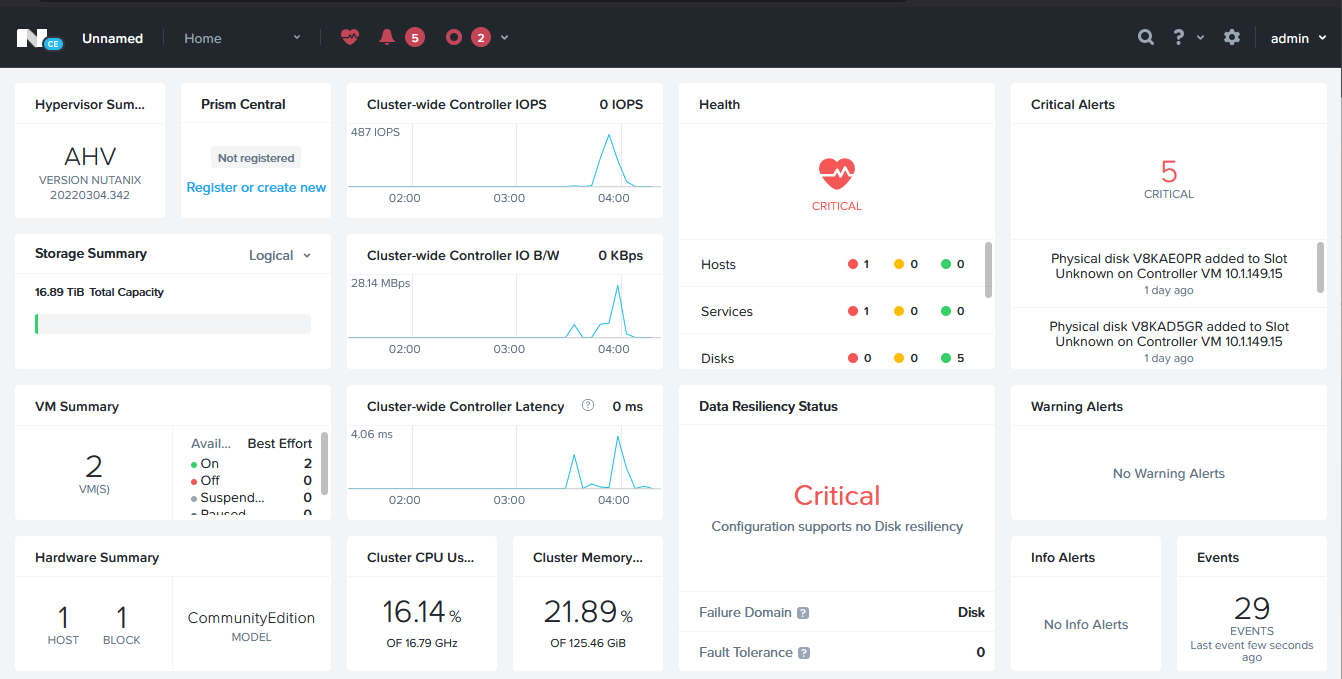
Getting to the Home dashboard in Prism central.
Controller VM and Data Management
The
Nutanix Controller VM (CVM) is a core component of the Nutanix
architecture. It is deployed as a virtual machine on each node in a
Nutanix cluster. Its primary role is to manage data operations for the
cluster, including storage, I/O operations, and data management
functions like deduplication, compression, and replication.
Uploading an ISO to your Nutanix home lab
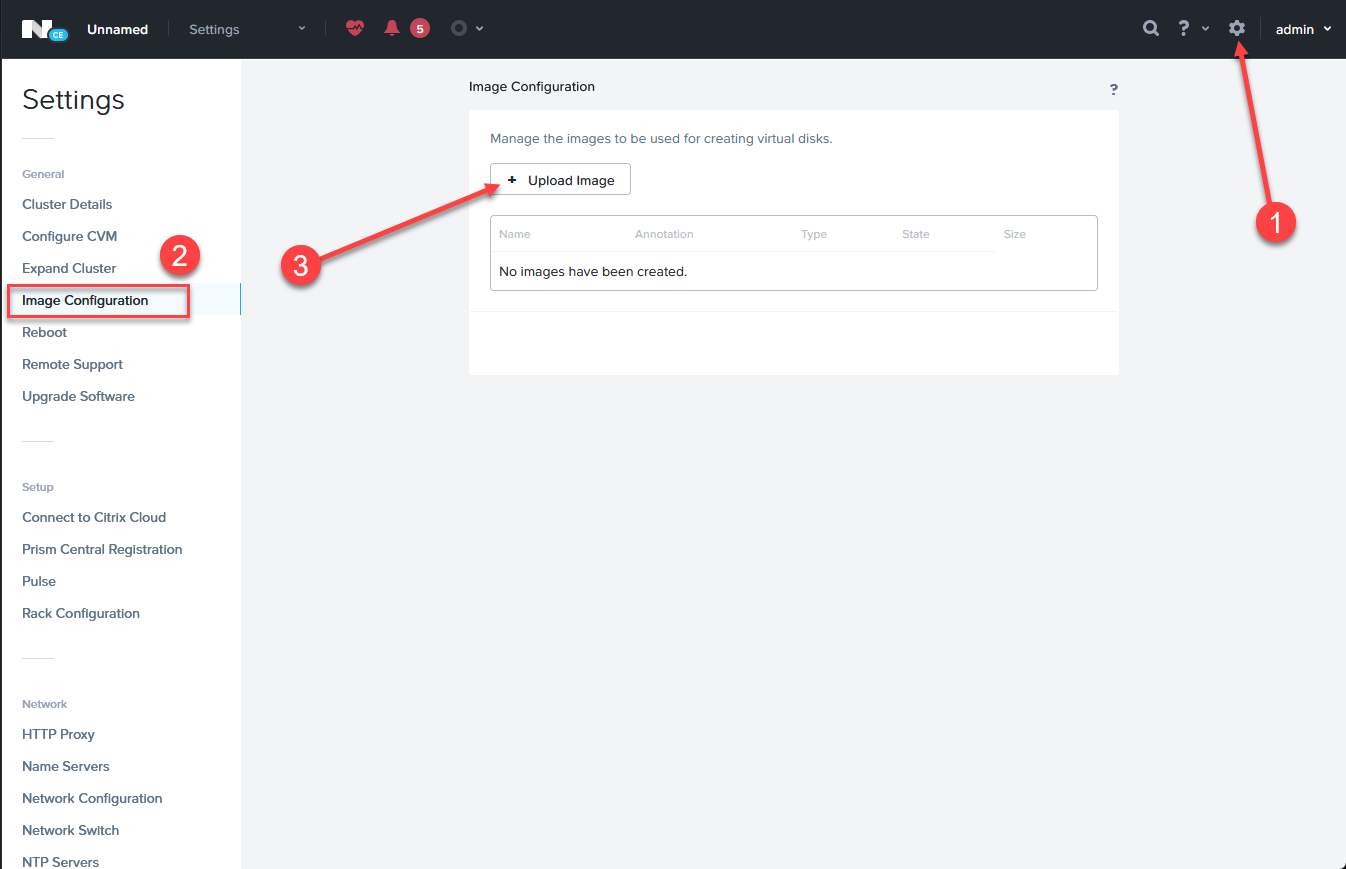
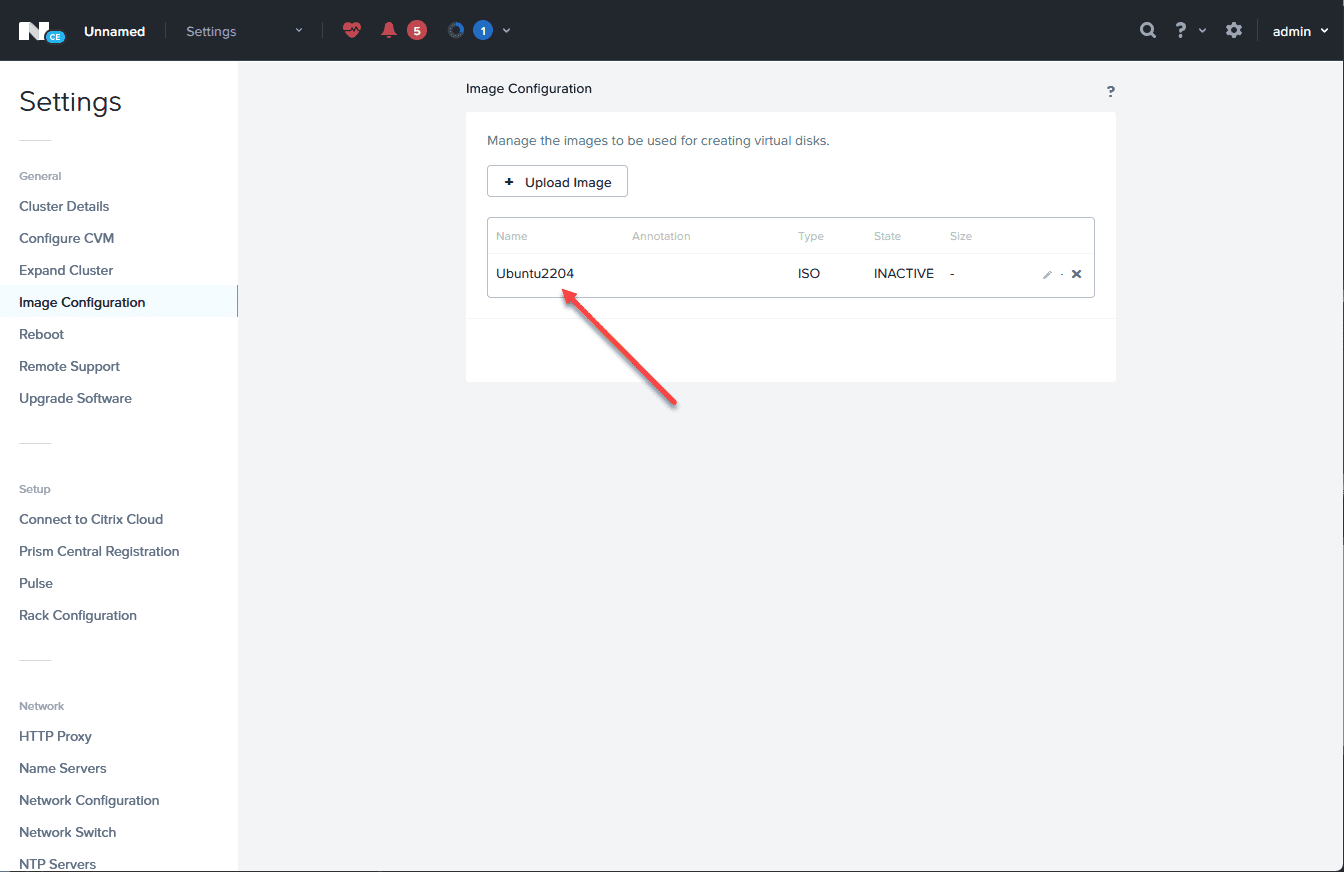
One of the first things you will want to do is upload an ISO image to install your first Nutanix virtual machine from. Click the settings cog in the upper right-hand corner of Prism. Then click Image Configuration > Upload Image.
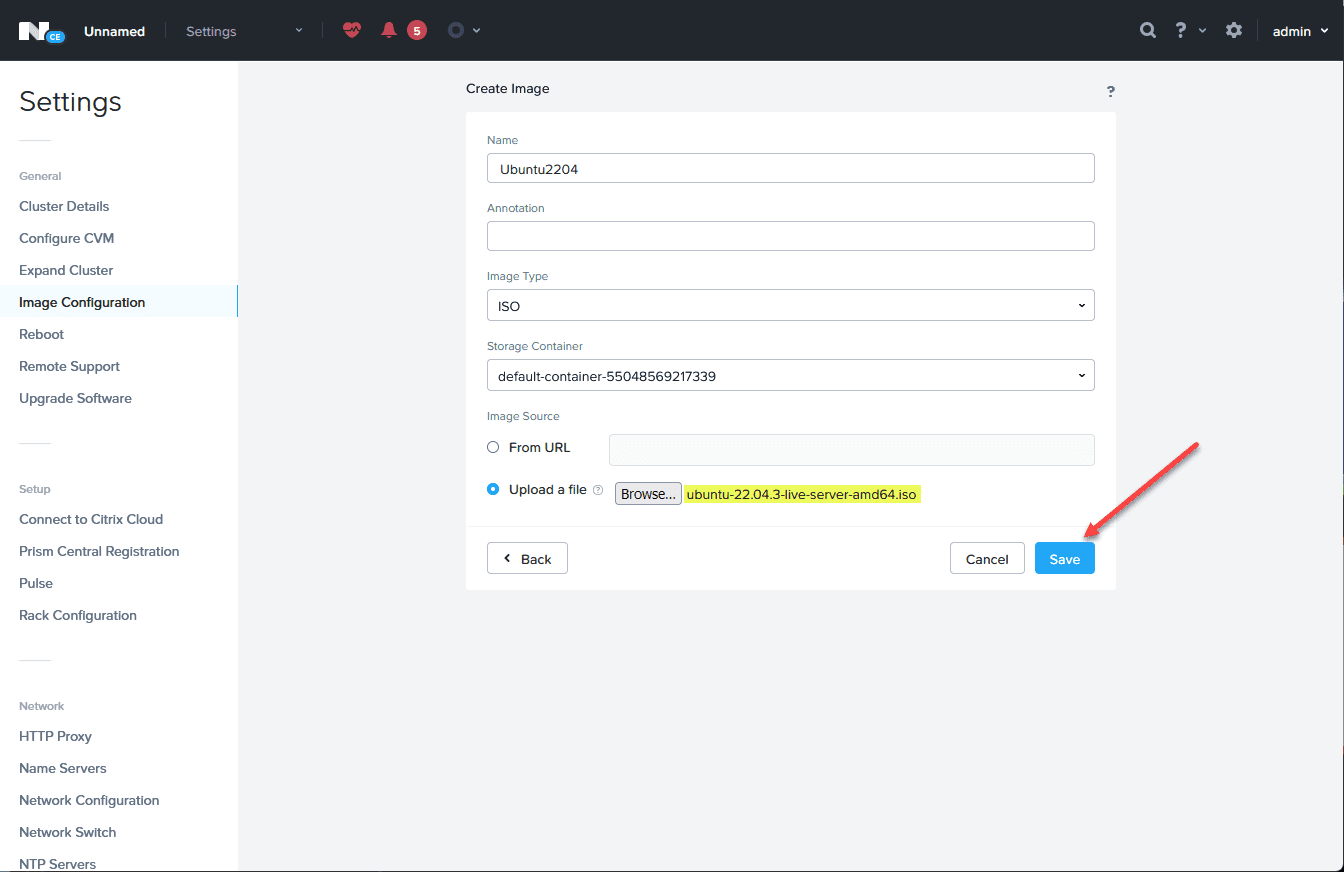
Fill in the Create Image dialog box. Browse to your ISO file and Save your ISO image. It will then begin uploading.
You will see the ISO image listed in your image configuration.
Creating a Nutanix virtual machine in your home lab
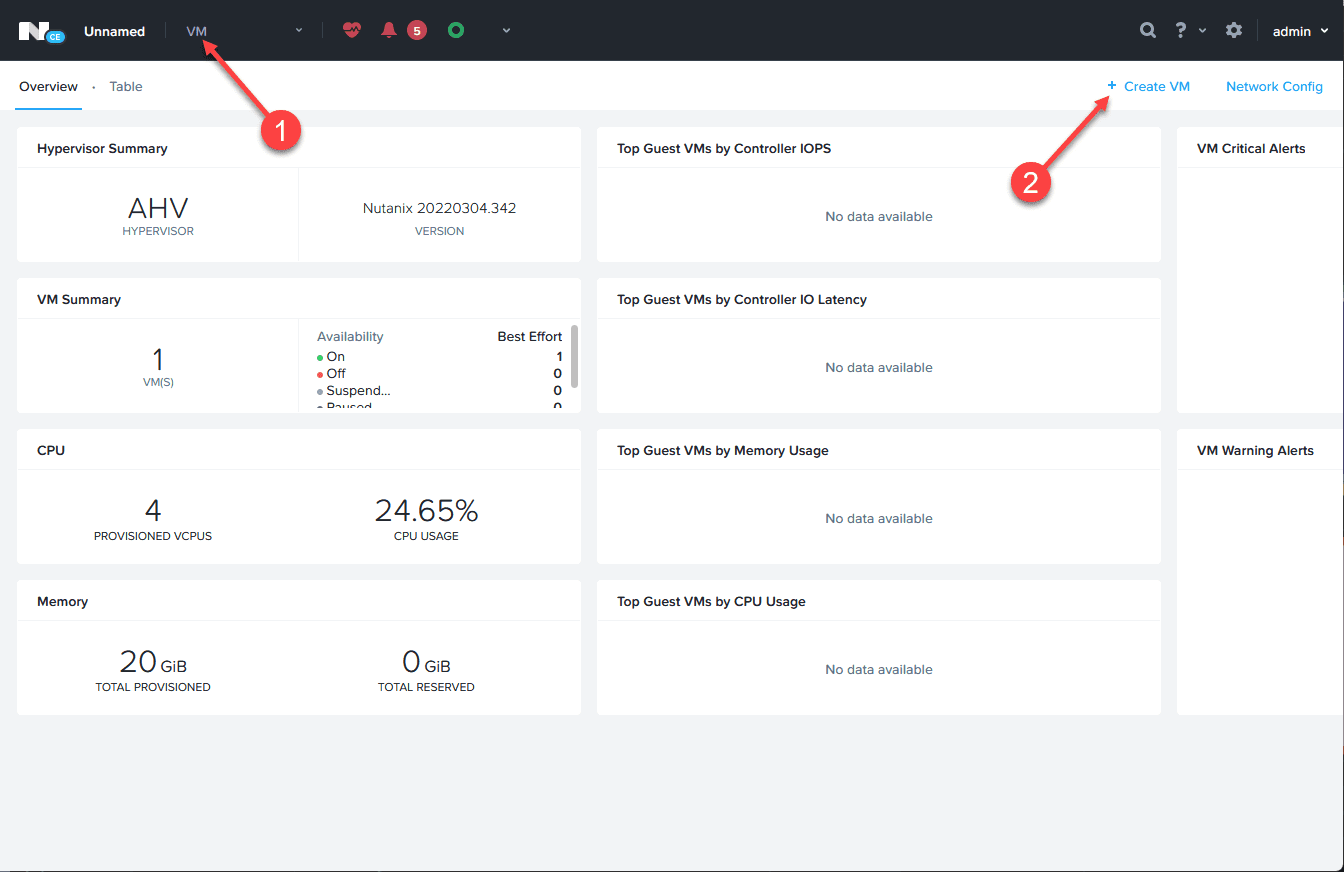
Now that we have the ISO image uploaded and ready to go, we can create our new virtual machine. Select VM in the dropdown menu in the upper left. Then select Create VM.
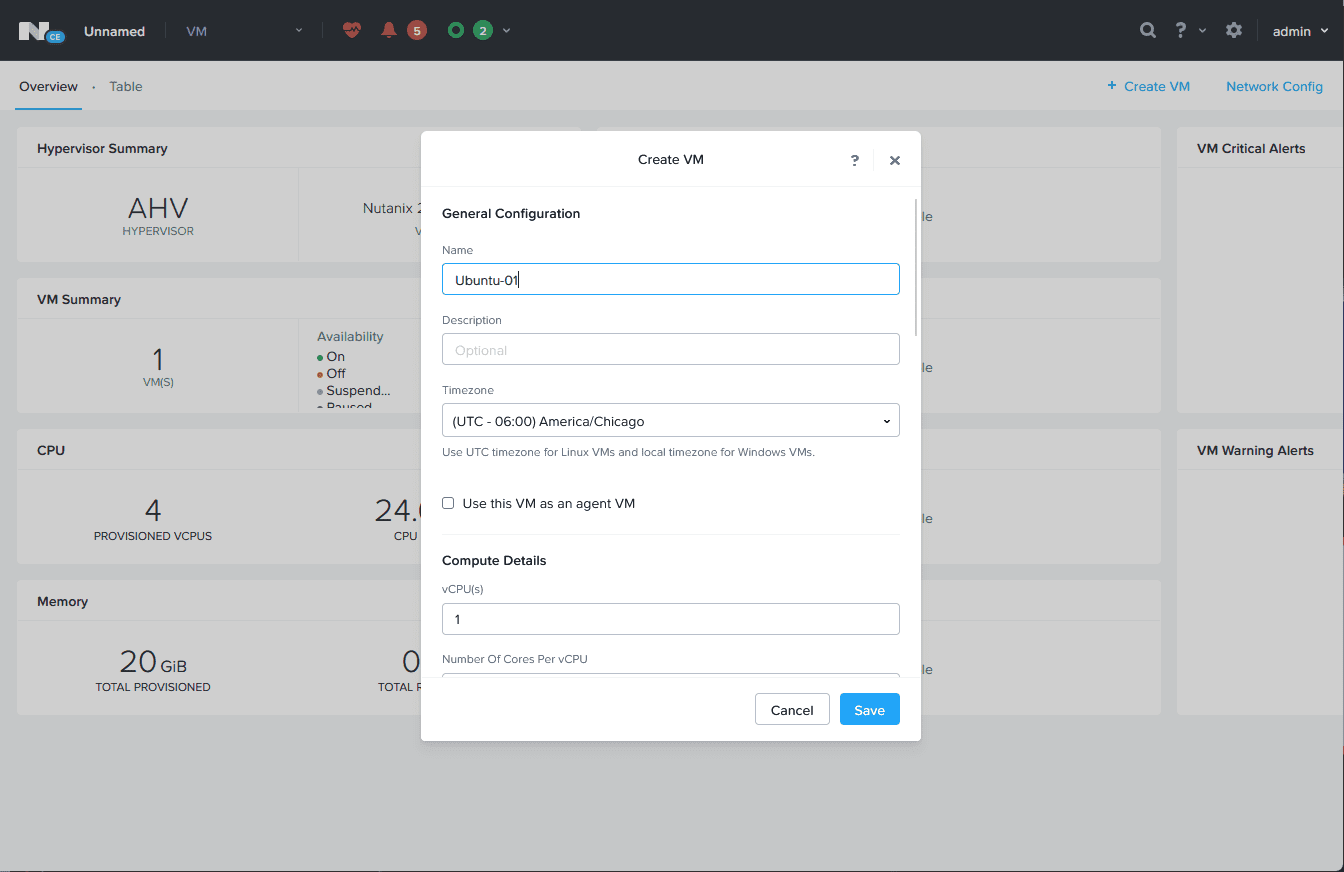
In the general configuration, fill in the general configuration that you want to enable for the virtual machine, including CPUs, memory, CD-ROM, and network configuration.
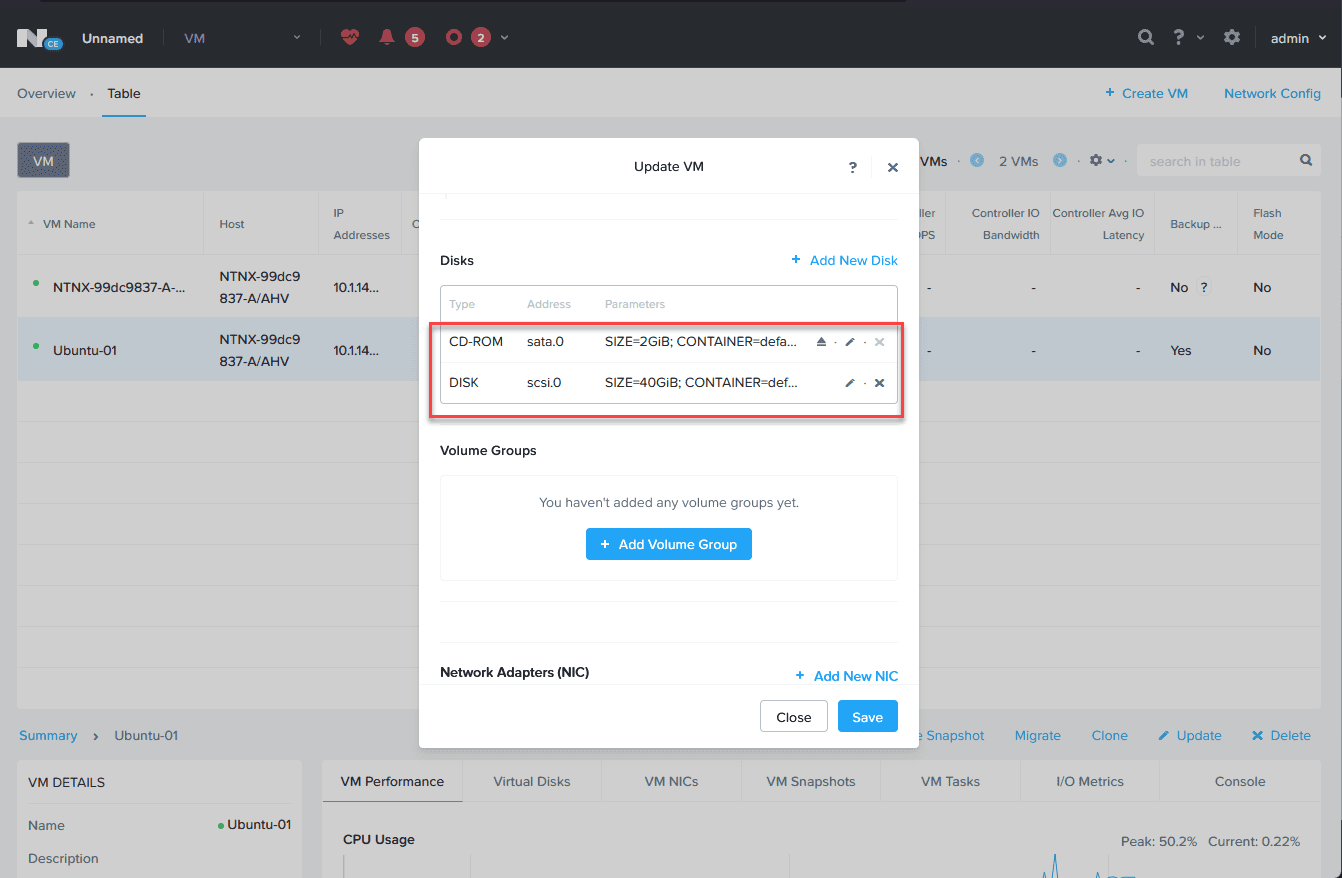
You will want to configure your CD-ROM to point to the image we uploaded and also add a new disk to the VM.
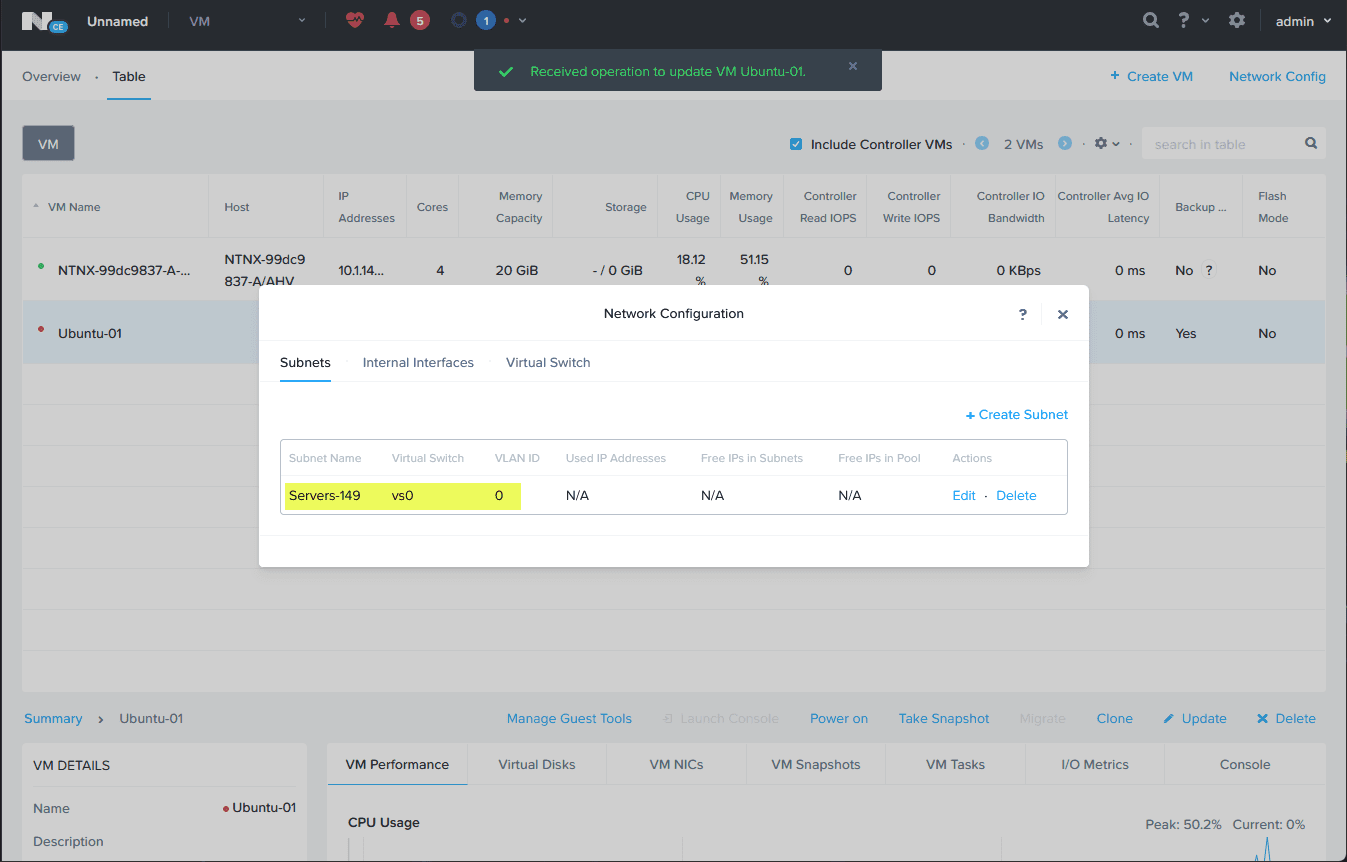
Also, add a new network configuration, including a new Subnet. You can use the existing virtual switch to get started like I am doing below. If you simply want your VM to connect to the untagged VLAN, you can name the new subnet and then use VLAN ID 0.
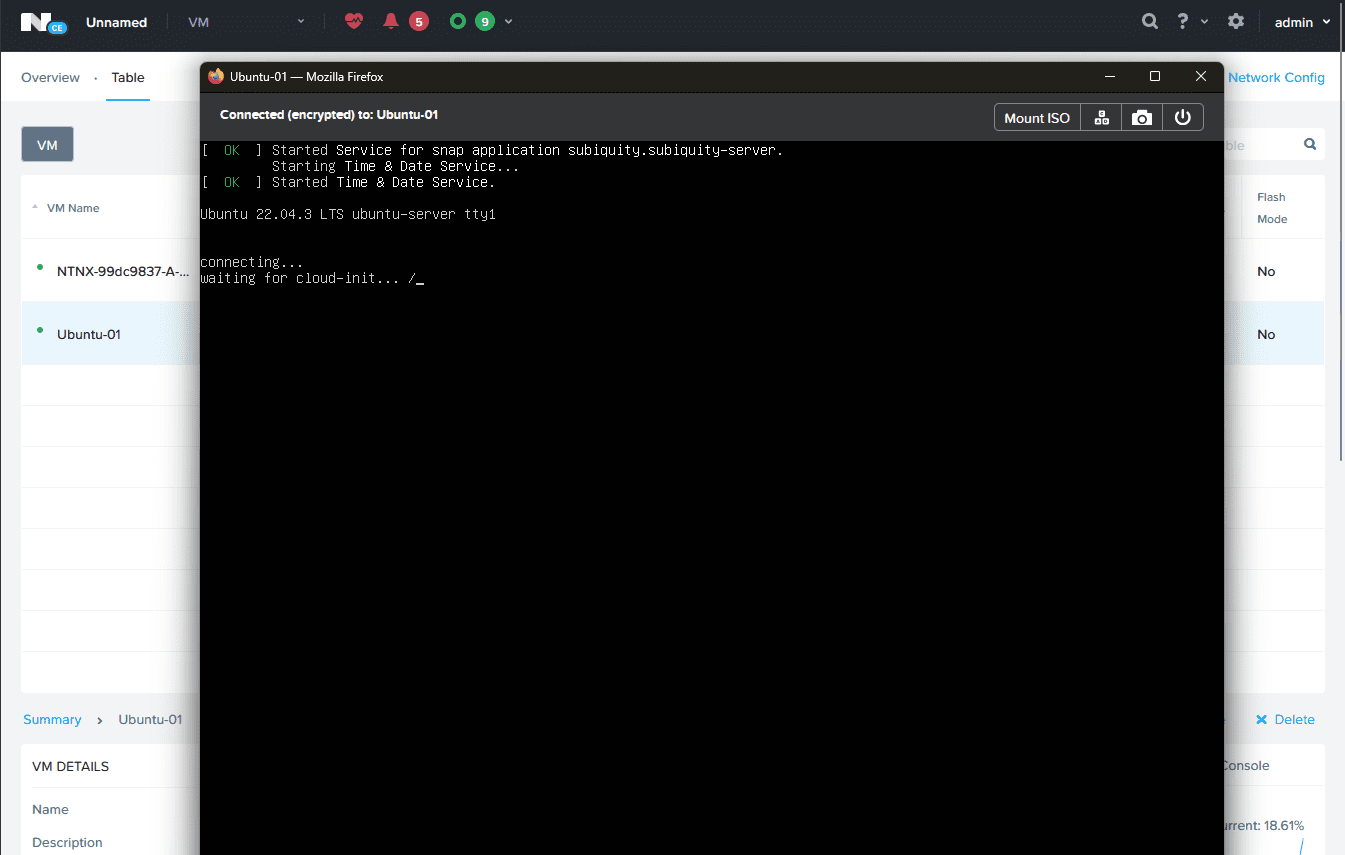
Now that we have the virtual machine created, I have powered it on, and we can see the Ubuntu 22.04 LTS installation begin.
Exploring the Web Console
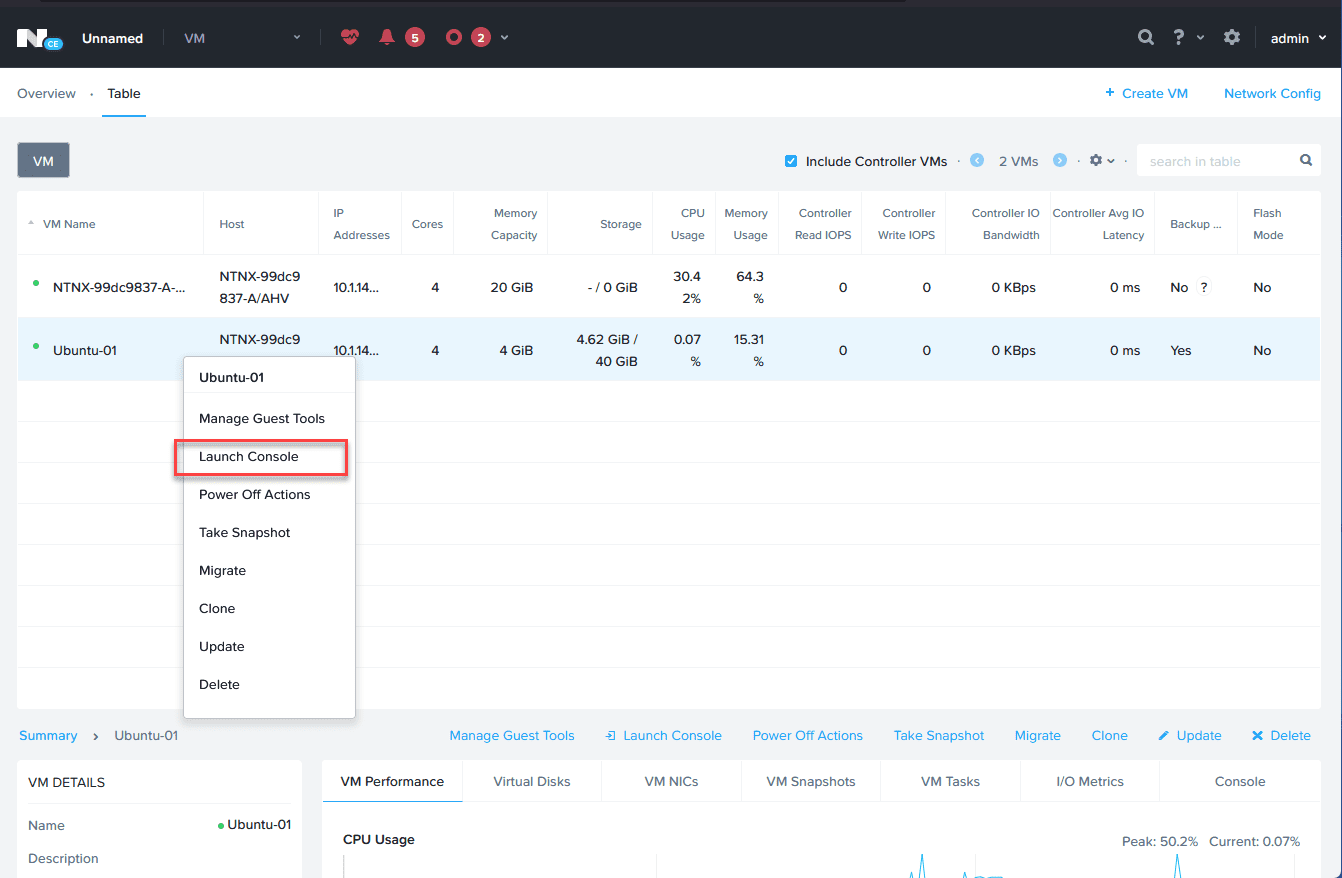
Nutanix’s web console is an excellent tool for managing your home lab virtual machines. If you are used to the VMware VMRC or the web console, then using the Nutanix web console is not much different. You can right-click on a virtual machine and select Launch Console.
Other things to consider
Setting Up and Managing Accounts
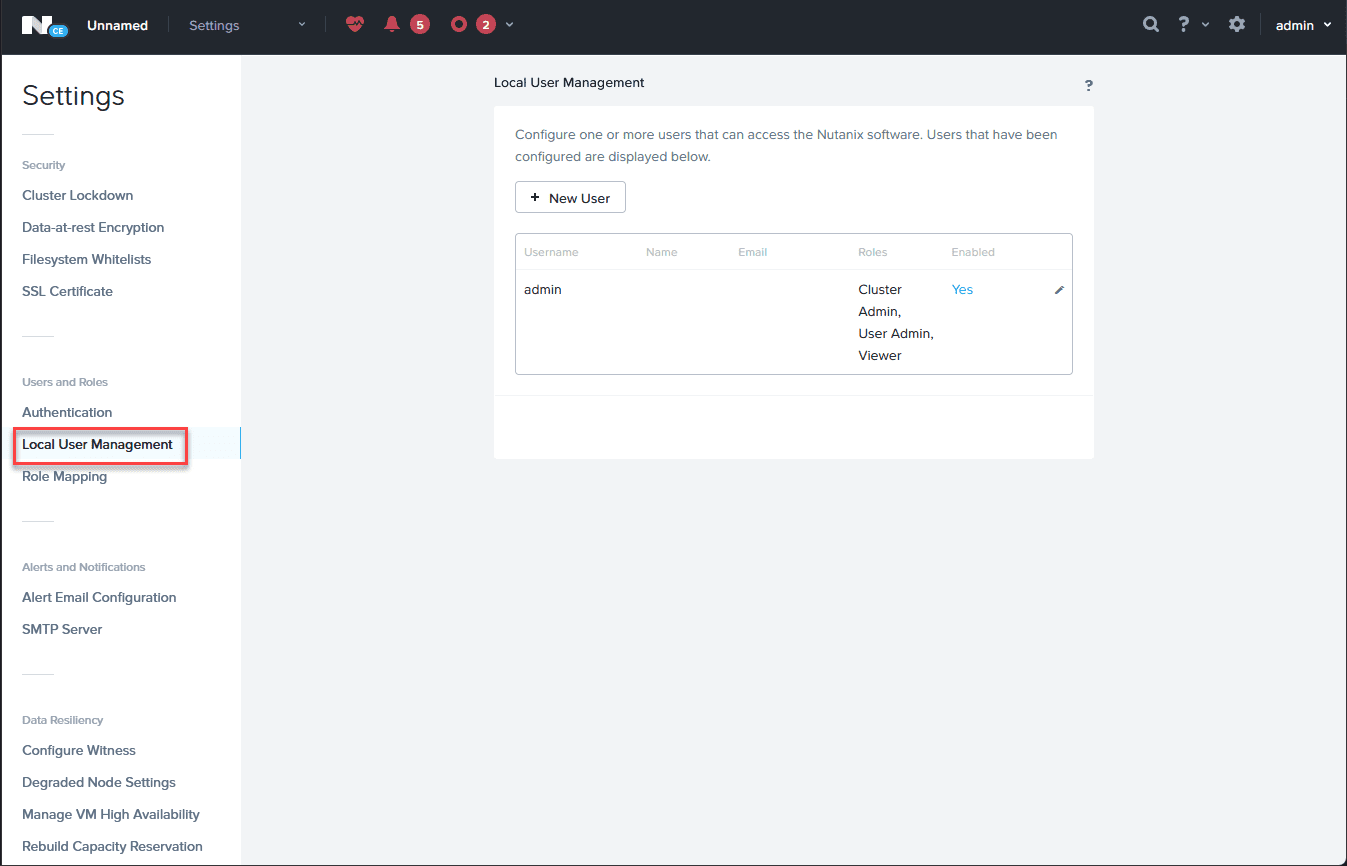
Account management is also something you can do with your Nutanix home lab. You can create and manage accounts within Nutanix CE, including changing the default admin settings and the community edition role configuration.
Weird issue with the self-signed SSL certificate in Nutanix CE
I ran into a weird issue that I posted on the VHT Forum with the Nutanix Community Edition self-signed certificate. Oddly enough, I could only access the site using Firefox, as it must handle the SSL error a bit differently. Chrome and Edge Chromium would present with the error below and not allow you to continue.
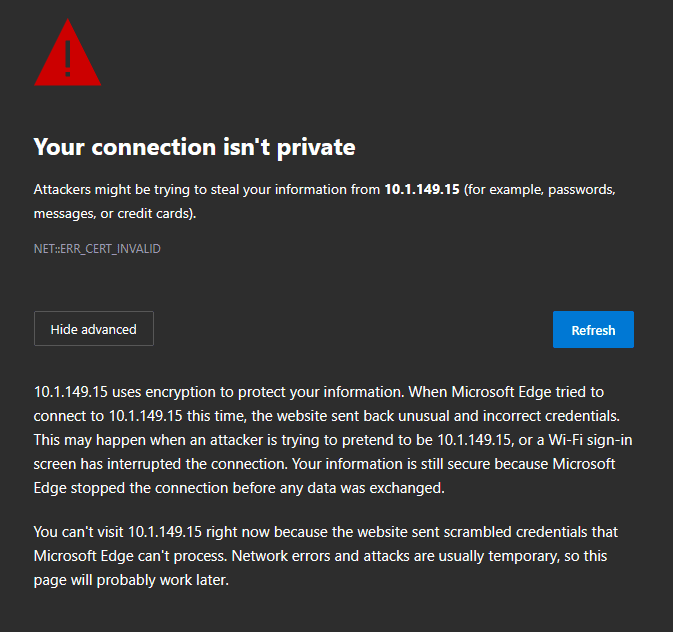
The solution is to regenerate the certificate. Follow the steps below to regenerate the certificate.
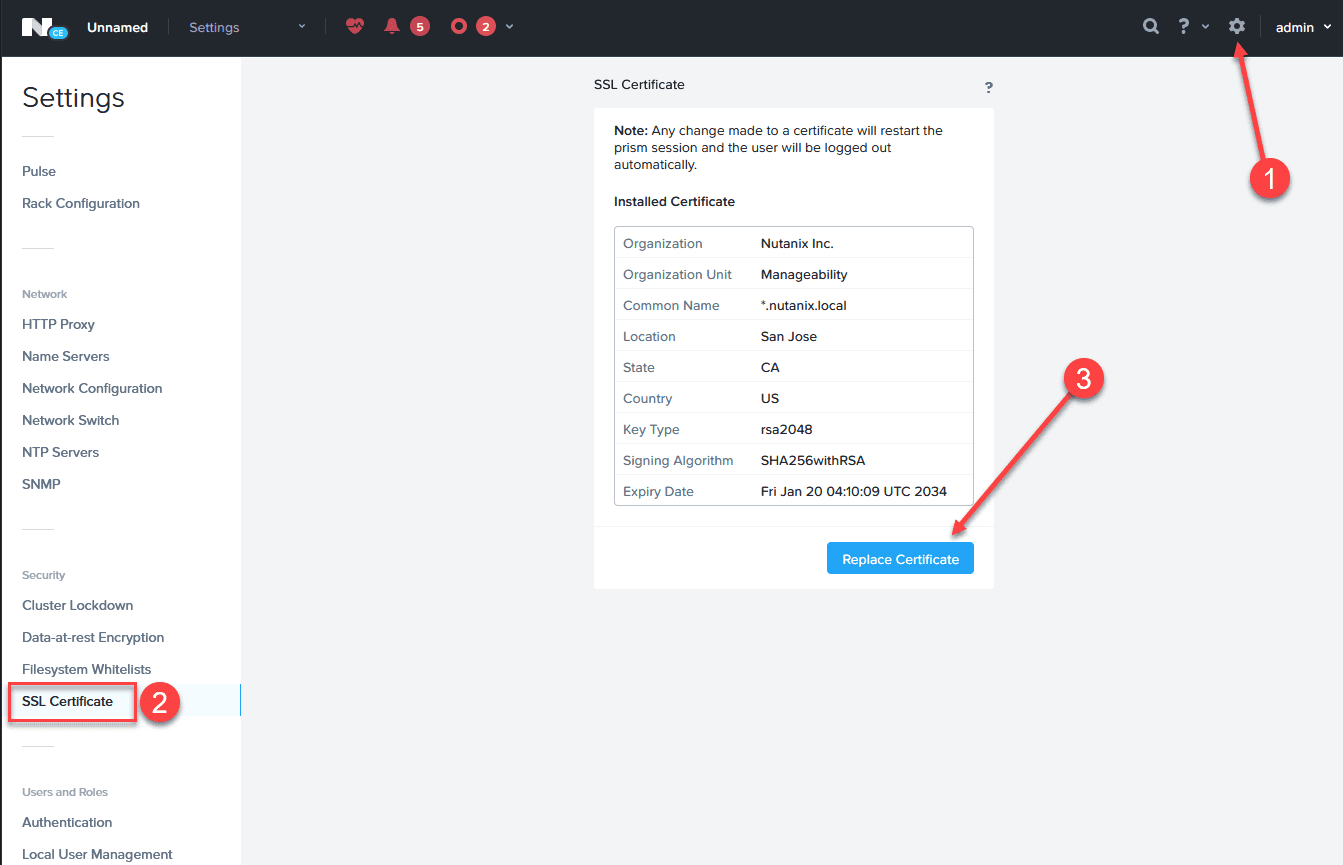
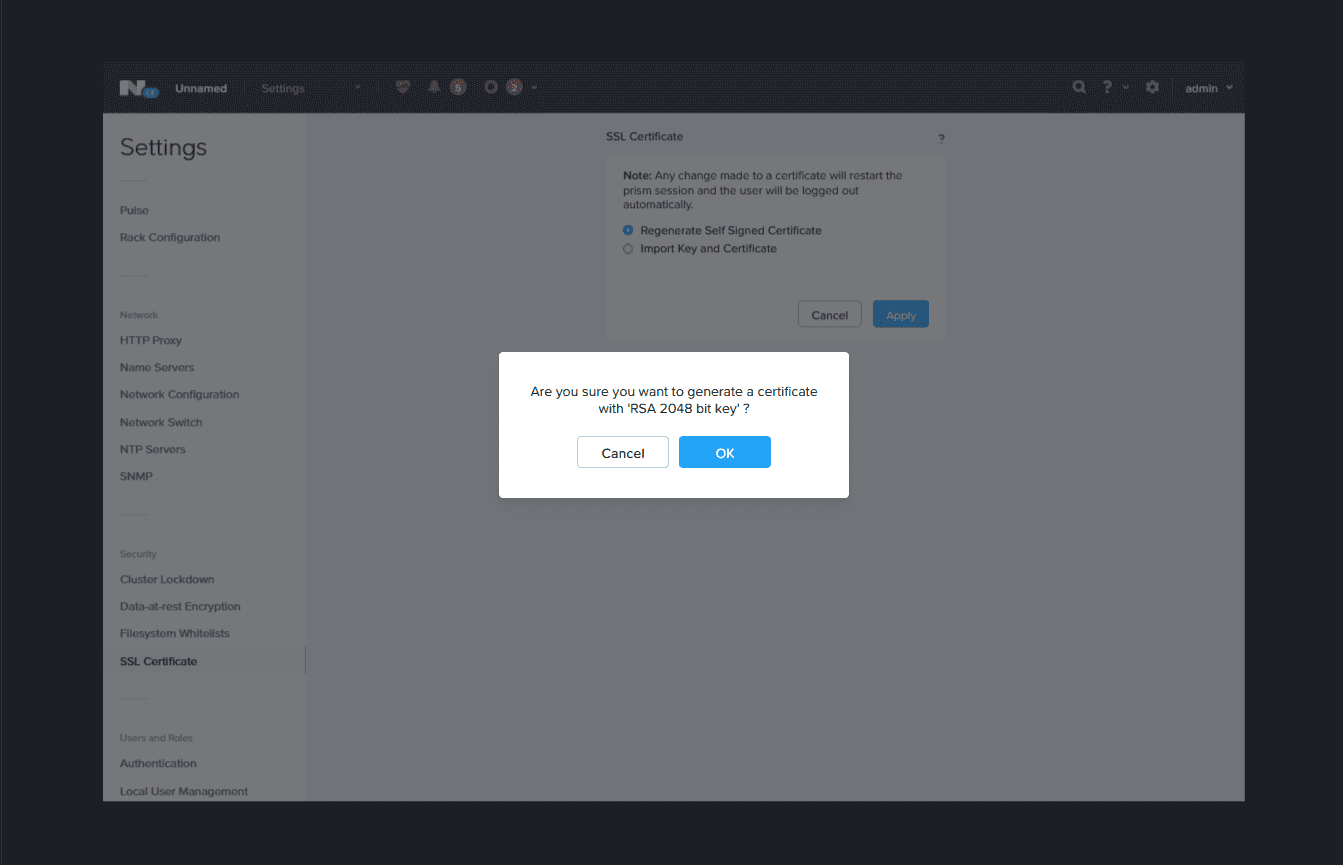
Choose the option to regenerate the certificate.

Then click OK.
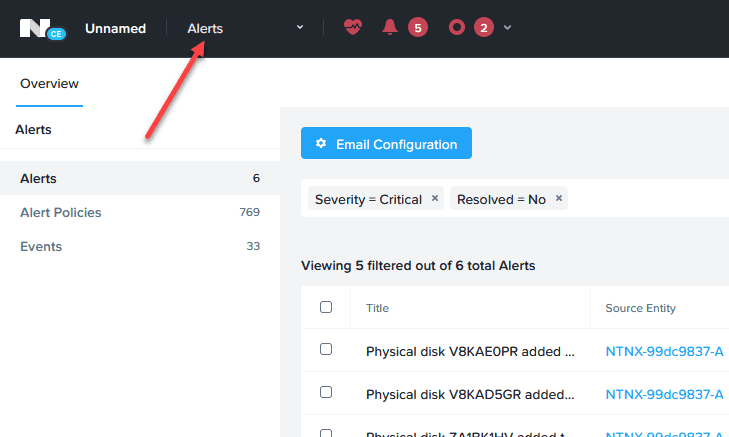
Alerting and logging
If you run into issues, you will want to look at the logging and alerting in Nutanix CE.
Wrapping up Nutanix Community Edition for home lab
I think the Nutanix Community Edition is a great option for home lab as it provides a similar experience running VMware vSphere (an enterprise hypervisor that you can run as a free community edition). Also, Nutanix doesn’t place many limits on the community edition (relatively speaking), which is nice. If you are looking at your options moving forward in the home lab environment for a different hypervisor with the uncertainty with VMware vSphere, Nutanix is an excellent option to get your feet wet with as I am sure there will be quite an uptick in adoption in the enterprise after the recent happenings on the VMware side of things.


0 Comments