At this point, you’ve verified that the problem is not temporary and that all your hardware works. Since Windows can’t fix the problem on its own, we need to pinpoint the spot along the connection where the problem is occurring.
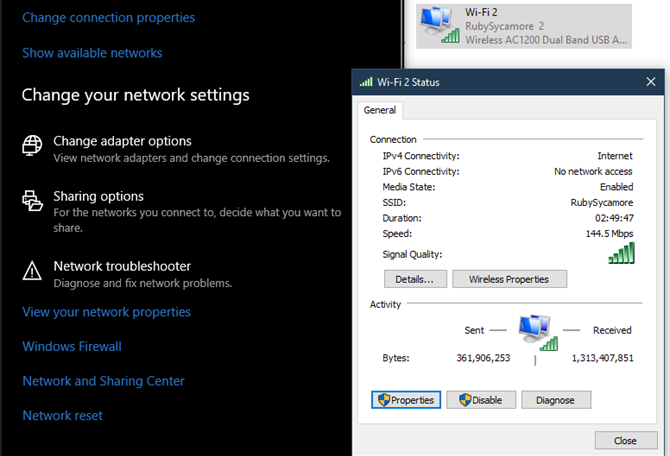
It’s a good idea to make sure that you don’t have any strange IP settings selected. To check this, open Settings and go to Network & Internet > Status. Below the Change your network settings header, choose Change adapter options. In the resulting window, double-click the name of your network.
Next, you’ll see a status box. Click the Properties button.

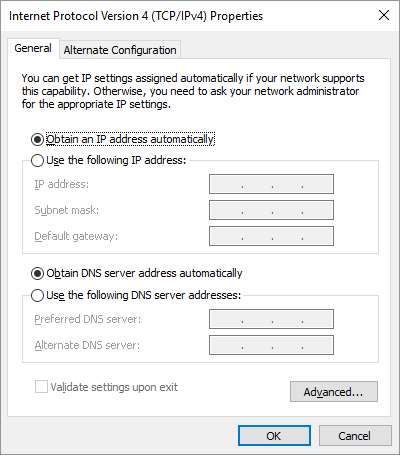
Here, double-click the Internet Protocol Version 4 entry.
Unless you’ve set up a static IP (if you don’t know what this is, you probably don’t use one), make sure you have both Obtain an IP address automatically and Obtain DNS server address automatically checked. Repeat this process for Internet Protocol Version 6 to ensure everything is automatic there, as well.

Reviewing Your IP Address Validity
Once you’ve done this, you can check to confirm the router is giving you a valid IP address. Open up a Command Prompt window by typing cmd into the Start Menu. Enter ipconfigand look for the text under Ethernet adapter (for wired connections) or Wireless LAN Adapter (for wireless connections).
If IPv4 Address starts with 169.x.x.x, your computer is not receiving a valid IP address from your router. Typing the following two commands will release your computer’s current IP address and request a new one, which may resolve this:
ipconfig /release
ipconfig /renew
Should you still have a 169.x.x.x address after typing the above commands and ipconfigagain, your machine still isn’t receiving an IP from the router. Try plugging your PC directly into the modem with an Ethernet cable and see if you can get online. If so, your router is the problem.

0 Comments