I came across a router which had an issue with the Wi-Fi; the LAN connection was working fine but the wireless functionality appeared to be busted. My friend wanted a temporary fix, as he waited for the replacement router to arrive.

Windows 10 has an option for setting up a mobile hotspot without a software. Thinking this would be a good fix, I fired up the Settings app, navigated to the Mobile Hotspot screen and in a matter of seconds I was able to set up the connection to use the PC's Ethernet network. It's never that easy, is it? Apparently not.
The Hotspot was created, our phones could see and connect to it, but there was a notification that said "This Wi-Fi network has no internet". The computer's browser also threw up errors which said the connection failed. What happened is, the Hotspot was active, but the internet wasn't working. Disabling it fixed the issue on the system.
Time for the manual fix, command prompt to the rescue. This method works on Windows 7 and above.
How to set up a mobile Wi-Fi hotspot in Windows 7 or above without any software
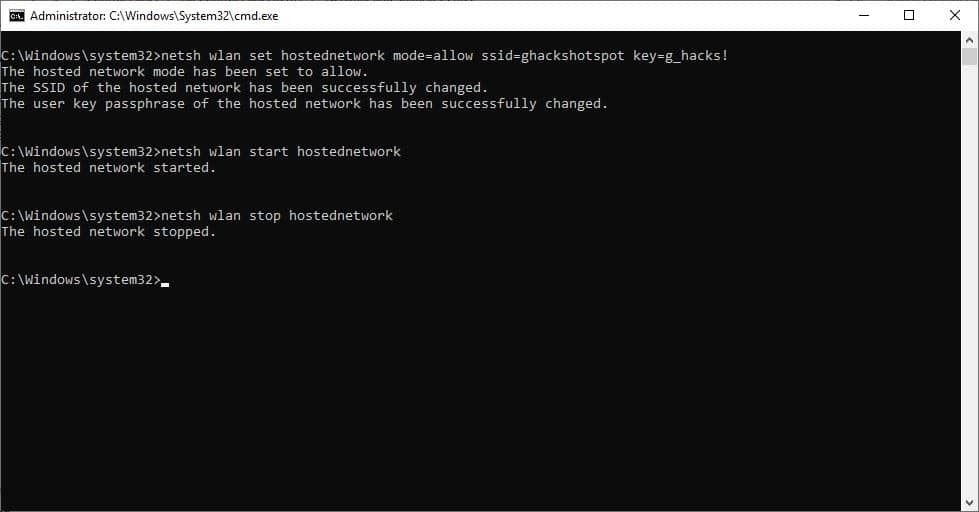
1. Open a Command Prompt window with administrator rights.
2. Type the following in the window,
netsh wlan set hostednetwork mode=allow ssid=wifiname key=password
Replace wifiname with a name that you want to assign to your network. For the password, choose a strong non-pronounceable one. The password should have a minimum of 8 characters.
For e.g. netsh wlan set hostednetwork mode=allow ssid=ghackshotspot key=g_hacks!
3. Hit the enter key and the screen should read "The hosted network mode has been set to allow. The SSID of the hosted network has been successfully changed. The user key passphrase of the hosted network has been successfully changed."

4. Congratulations, you have created a hotspot. Now to activate it. Type
netsh wlan start hostednetwork
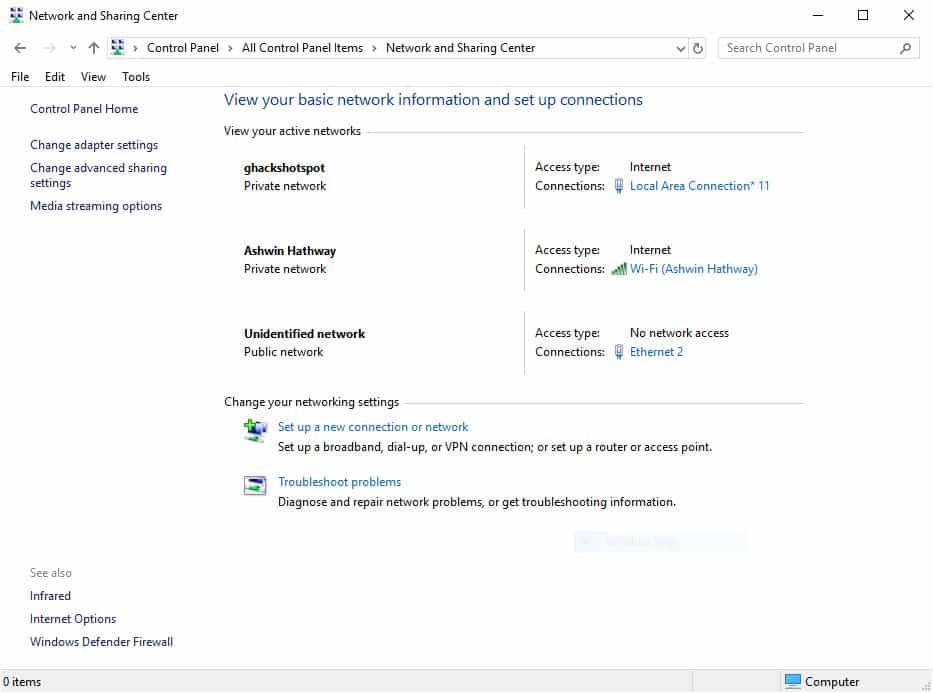
5. You will need to configure the hotspot to use your Wi-Fi. Open the Network and Sharing Center from the Control Panel. You can paste the following path in Windows Explorer.
Control Panel\All Control Panel Items\Network and Sharing Center.
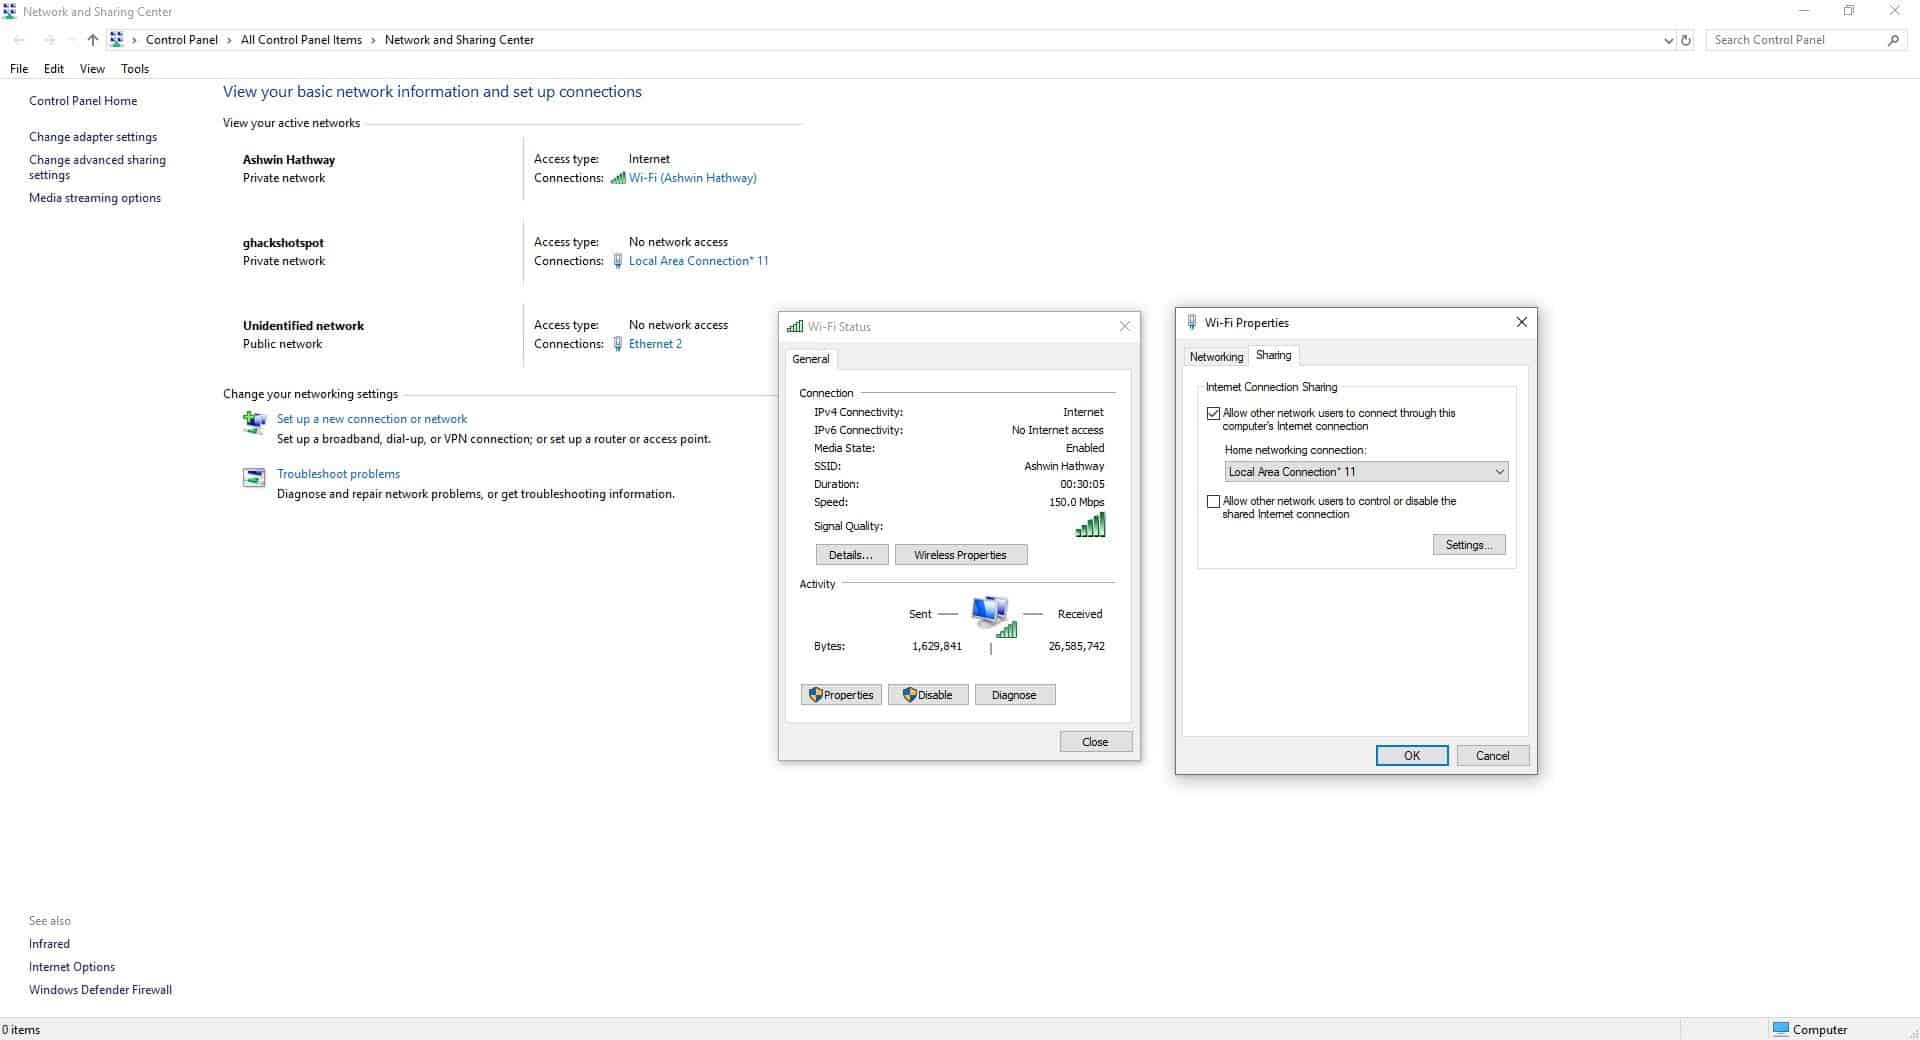
6. You'll see all available network adapters, including the newly created hotspot. Choose the one that you wish to share. It's usually your Ethernet or Local Area Connection, but sometimes it may have the adapter's name instead. Click on the network's name and it should open the Network Status window. Select the properties option.

7. Click on the Sharing tab and enable Internet Connect Sharing by checking the box next to "Allow other network users to connect through this computer's internet connection". Next, click on the drop-down menu and select the hotspot network with which you should share your network. In this case, I selected Local Area Connection 11.
8. Hit the ok button, and your Hotspot is ready to be discovered. You can verify this by observing the "Access Type" of the hotspot at the Network and Sharing Center screen, it should say "Access Type: Internet".
Enable Wi-Fi on your laptop or phone and try connecting to it using the password that you chose.
Note: My laptop's Ethernet port doesn't work, so I had to use the Wi-Fi adapter in the screenshots, but the procedure is the same. I've tested it with my friend's computer.
To stop the hotspot, use the following command
netsh wlan stop hostednetwork
If you ever find yourself with just a wired network connection, but have a laptop or a desktop PC with a Wi-Fi card or USB dongle, you can use this method to create a hotspot. This can also be useful if you're using USB-tethering to access your phone's mobile network.


0 Comments