
What is Failover Clustering?
Failover Cluster is a group of independent computers working together to improve clustered roles ‘ efficiency and scalability. In the above explanation, the terms “efficiency and scalability” actually refer to the clustered applications and services.
The clustered servers also referred to as nodes are connected by software and physical cables. If one or more cluster nodes fail, other nodes start providing service (a failover process).
Additionally, the clusters are under proactive monitoring to ensure that they are functioning properly. They are restarted or transferred to another node if they have issues in functioning.
Cluster Shared Volume (CSV)
Cluster Shared Volume (CSV) is a functionality of Failover clusters that provides a consistent, distributed namespace to be used by clustered roles to access shared storage from all nodes; Users experience a minimum of disruptions in service using the Failover Clustering feature.
To know more about Cluster Shared Volume (CSV) click here.
Failover Clustering has many practical applications, including:
- File share storage for applications such as Microsoft SQL Server and Hyper-V virtual machines are made highly or continuously available.
- Highly available clustered roles running on physical servers, or on virtual machines built on Hyper-V servers.
Deployment
The deployment and configuration of a Failover Cluster in Windows Servers 2016 are more similar:
A failover cluster can be created either through the Failover Cluster Manager snap-in or through the Windows PowerShell.
Prerequisites:
Verify the following prerequisites before you proceed:
- Make sure that all cluster servers (cluster nodes) that you wish to add are running a similar version of Windows Server.
- Review the following hardware requirements to ensure that support is provided for your configuration:
- Servers: It is recommended to use a set of matching computers that contain the same or similar components.
- Network adapters and cable (for network communication): If using iSCSI, you must devote each network adapter to either network communication or iSCSI, but not both.
NOTE: If the cluster nodes are connected with a single network, the network will pass the redundancy requirement in the Validate a Configuration Wizard. The wizard’s report may, however, include an alert that the network should not have single points of failure. - iSCSI: If you are using iSCSI, each clustered server should have one or more network adapters or Host Bus Adapters (HBAs) that are dedicated to the cluster storage.
- The network you use for iSCSI should not be used for network communication.
- In all clustered servers, the network adapters you use to connect to the iSCSI storage target should be identical, and it is recommended that you use Gigabit Ethernet or higher.
- Storage: Make sure the Shared storage is compatible with the Windows Server 2016.
- You can use shared storage that is attached, and also use SMB 3.0 file shares as shared storage for servers that are running Hyper-V configured in a failover cluster.
- Use basic disks, instead of dynamic disks for the native disk support included in the Failover Clustering.
- It is recommended to format the partitions with either NTFS or ReFS (ReFs in case If you have a disk witness for your quorum configuration). If Cluster Shared Volumes (CSV) is used then, the partition for each of those must be of NTFS.
- Either Master boot record (MBR) or GUID partition table (GPT) can be used for disk partition.
- To add clustered storage during cluster creation, make sure that all servers can access the storage. (clustered storage can also be added after creating the cluster).
- Make sure that all servers that you want to add as cluster nodes are joined to the same Active Directory domain.
- The account to create the cluster must be a domain user who owns administrator rights on all servers that are to be added as cluster nodes.
Installation of Failover Clustering feature:
Must install the Failover Clustering feature on every server that is to be added as a failover cluster node.
Step 1: Start Server Manager.
Step 2: Select Add Roles and Features from the Manage menu.
Step 3: Click Next, On the Before you begin page.
Step 4: On the Select Installation Type page, choose Role-based or Feature-based installation, and click Next.
Step 5: On the Select Destination Server page, select the server where you want to install the feature, and then click Next.
Step 6: Click Next On the Select Server Roles page.
Step 7: On the Select Features page, select the Failover Clustering checkbox.
Step 8: To install the Failover Cluster Management tools, select Add Features, and click Next.
Step 9: On the Confirm Installation Selections page, click Install. (No server restart is required for the Failover Clustering feature).
Step 10: When the installation is completed, click Close.
Step 11: Repeat this procedure on every server that you want to add as a failover cluster node.
Failover Cluster creation using Failover Cluster Manager snap-in:
Before we start, attach an iSCSI storage in all the nodes and make sure all virtual switches in nodes are identical.
Step 1: Select the Failover Cluster Manager in the Tools menu of the Server Manager.
Step 2: In the Failover Cluster Manager, select Create Cluster option under Management pane.
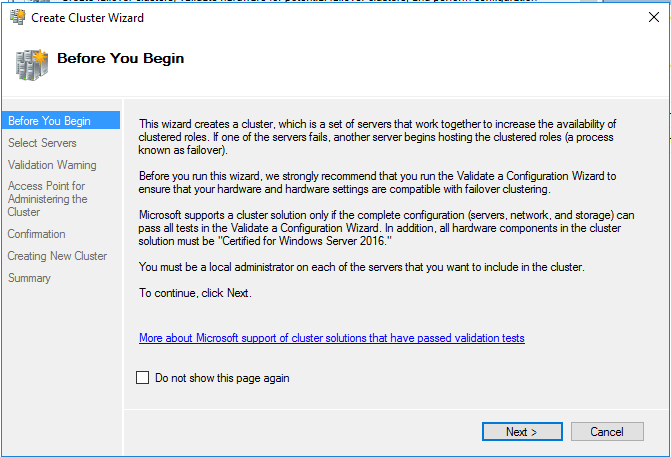
Step 3: The Create Cluster Wizard will open; On the Before You Begin page, select Next.
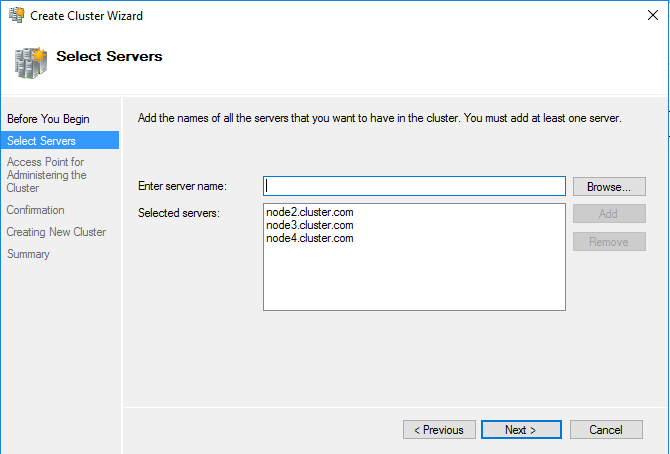
Step 4: Now browse and select the nodes and click Next.
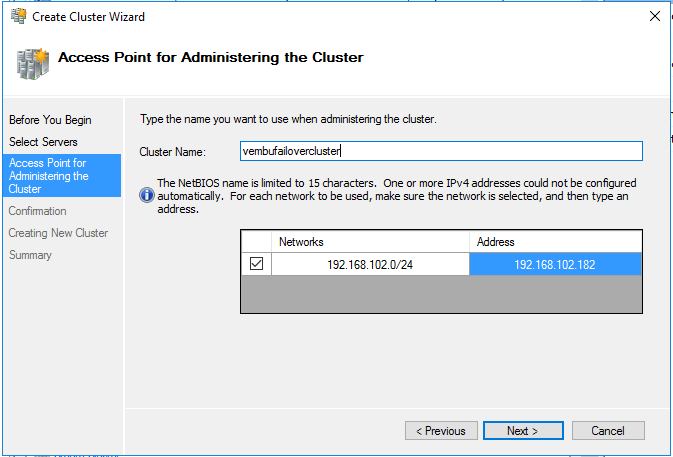
Step 5: Specify a Name and IP address for the cluster, On the next page.
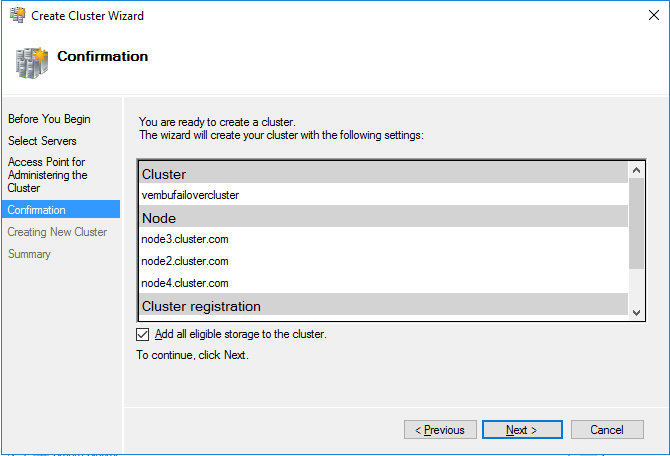
Step 6: Click Next to the confirmation page to start the cluster configuration validation.
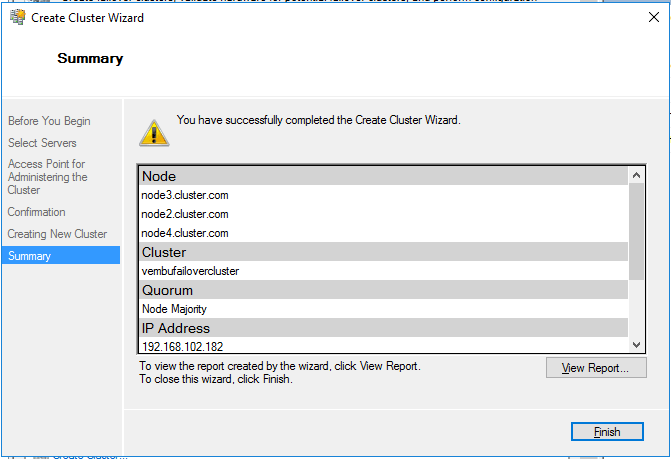
Step 7: On the Summary page, confirm that the failover cluster was successfully created. If there were any warnings or errors, view the summary output or select View Report to view the full report. Select Finish.
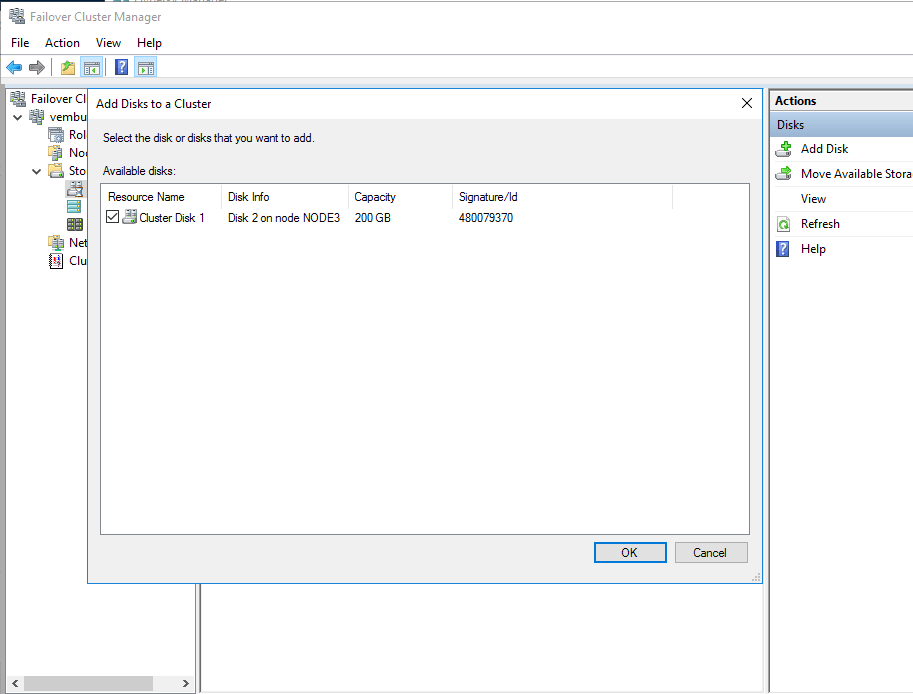
Step 8: Now open Failover Cluster Manager, expand storage and click on Disks.
Step 9: Click Add Disk and select the available iSCSI storage.
Step10: Then right-click on the Cluster Disk and select Add to Cluster storage.
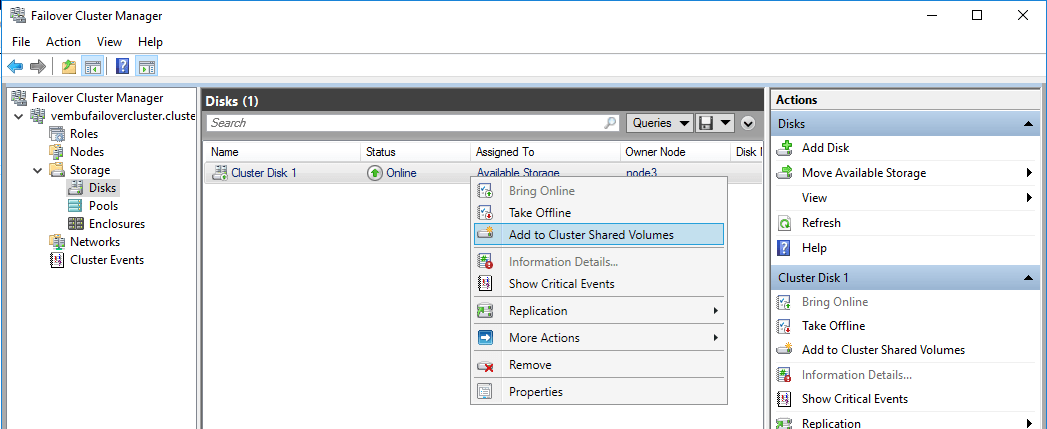
Step11: You can also check the storage by opening the C:\ClusterStorage in all the nodes.
Now it is all set to go.
Failover Cluster creation using WindowsPowerShell:
In this topic, the following Windows PowerShell cmdlets perform the same functions as that of the Failover Cluster creation using Failover Cluster Manager snap-in:
Step 1: Open Windows Powershell editor.
Step 2: Install the Windows failover cluster feature along with management tools.
cmd: Install-WindowsFeature –Name Failover-Clustering –IncludeManagementTools
Step 3: The cmd below runs all cluster validation tests on computers named Server1 and Server2.
Cmd: Test-Cluster –Node Server1, Server2
Note: The Test-Cluster cmdlet outputs the results to a log file in the current working directory. For example: C:\Users
Step 4: Create a failover cluster named MyCluster with Server1 and Server2 nodes, and assign a static IP address 192.168.10.182 and transfer all qualifying data to the failover cluster.
Cmd: New-Cluster –Name MyCluster –Node Server1, Server2 –StaticAddress 192.168.10.182
Step 5: Create a failover cluster named as MyCluster in the Cluster OU of the domain testvembu.com
Cmd: New-Cluster -Name CN=MyCluster,OU=Cluster,DC=testvembu,DC=com -Node Server1, Server2
That’s it, a failover cluster is created with static IP, Storage and posted in domain testvembu.com.
Windows Server 2016 Failover Clusters new features:
Cluster Operating System Rolling Upgrade:
With the new feature like Cluster OS Rolling upgrade, the Administrator can upgrade the Cluster Nodes Operating System from Windows Server 2012 R2 to Windows Server 2016 without stopping the Services of Hyper-V . This new feature helps to avoid downtime penalties against Service Level Agreements (SLA).
Cloud Witness for a Failover Cluster:
A new type of quorum witness that leverages Microsoft Azure to determine which cluster node should be authoritative if a node goes offline.
Health Service:
Improves the day-to-day monitoring, operations, and maintenance experience of Storage Spaces Direct clusters.
Fault Domains:
Helps to define which fault domain to use with a Storage Spaces Direct cluster. A fault domain is a set of hardware that shares a single point of failures, such as a server node, server chassis or rack.
VM load balancing:
The load is distributed across nodes evenly with its help, in a Failover Cluster by finding out busy nodes and live-migrating VMs on these nodes to less busy nodes.
Simplified SMB Multichannel and multi-NIC cluster networks:
Enables an user to easily configure multiple network adapters in a cluster.
Workgroup and Multi-domain clusters in Windows Server 2016:
Windows Server 2016 breaks down the previous barrier of creating cluster between the member nodes joined to the same domain and introduces the ability to create a Failover Cluster without Active Directory dependencies. The following configuration is implemented in Failover Clusters can now, be created in:
- Single-domain: Clusters with all nodes joined to the same domain.
- Multi-domain: Clusters with nodes that are members of different domains.
- Workgroup: Clusters with nodes that are member servers/workgroup (not domain joined).
Conclusion:
The new and enhanced features of Windows Server 2016 Failover Cluster has made the concept of Clustering and High-Availability to be easier than ever. Thus, we recommend upgrading the previous versions of Failover Cluster to the new Windows Server 2016 Failover Cluster where you can experience the advantage of all new features.


0 Comments