
Introduction
NLB is a scalable, high-availability feature that you can install on all editions of Windows Server 2016. NLB distributes network traffic across a set of servers, balancing the workload each server must handle. It is scalable because it enables you to add additional servers (also called nodes or hosts). A node (or host) in an NLB cluster in Windows Server 2016 is a computer, either physical or virtual, that is running the Windows Server 2016 operating system. Each node or host runs a copy of the server applications that are also running on the other hosts in the cluster.
Windows Server 2016 NLB clusters can have between 2 and 32 nodes. When you create an NLB cluster, it creates a virtual network address and virtual network adapter. The virtual network adapter has an IP address and a media access control (MAC) address. Network traffic to this address is distributed evenly across the nodes in the cluster. In a basic NLB configuration, each node in an NLB cluster services requests at a rate that is approximately equal to that of all other nodes in the cluster. When an NLB cluster receives a request, it forwards that request to the node that currently is the least used. You also can configure NLB to direct traffic to a specific host, called a default host.
New in Windows Server 2016 is it includes a new Azure-inspired Software Load Balancer (SLB) as a component of the Software Defined Networking (SDN) infrastructure. Use SLB instead of NLB if you are using SDN, are using non-Windows workloads, need outbound network address translation (NAT), or need Layer 3 (L3) or non-TCP based load balancing. You can continue to use NLB with Windows Server 2016 for non-SDN deployments.
How NLB works 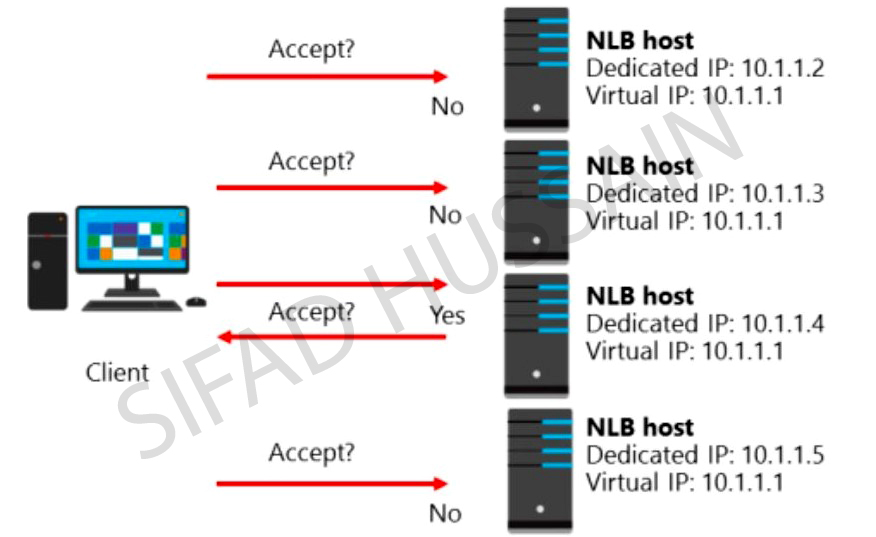
When you configure an application to use NLB, clients address the application using the NLB cluster address rather than the address of nodes that participate in the NLB cluster. The NLB cluster address is a virtual address that is shared between the hosts in the NLB cluster.
For this NLB demo this time, I will be using 03 Server, which is 01 Domain Server and 02 Member Server.
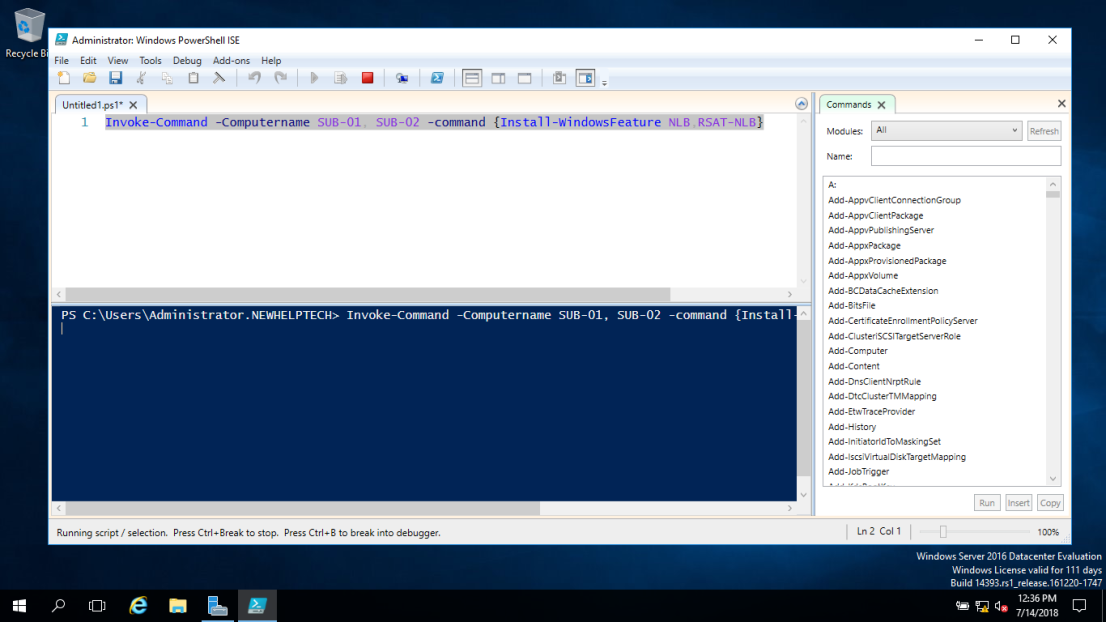
1 – Now switch to the SUB-01 server and open Windows PowerShell ISE
2 – In the Windows PowerShell ISE type
Invoke-Command -Computername SUB-01,SUB-02 -command {Install-WindowsFeature NLB,RSAT-NLB}
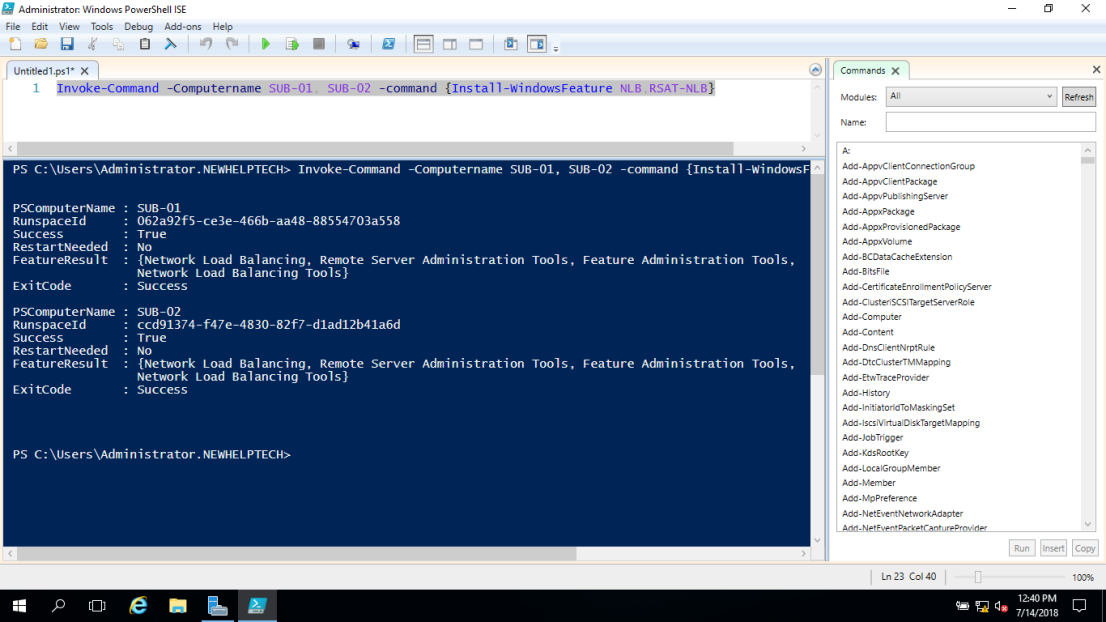
3 – Once the process complete, open Server Manager, click Tools and verify that Network Load Balancing Manager is installed
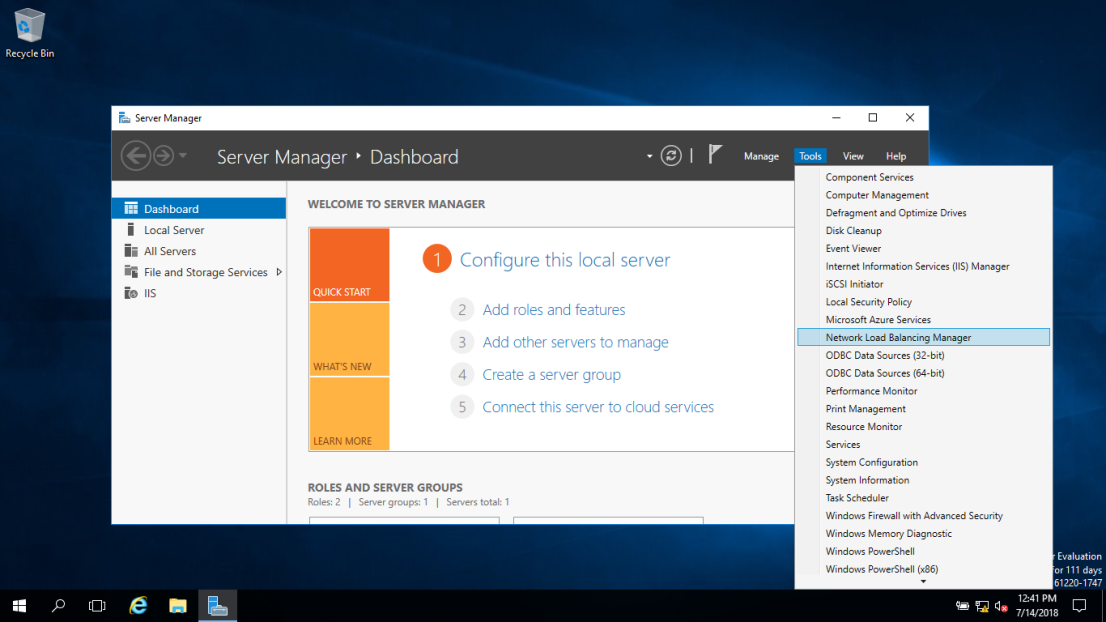
4 – Now switch to SUB-02, open Server Manager, click Tools and verify also that Network Load Balancing Manager is installed

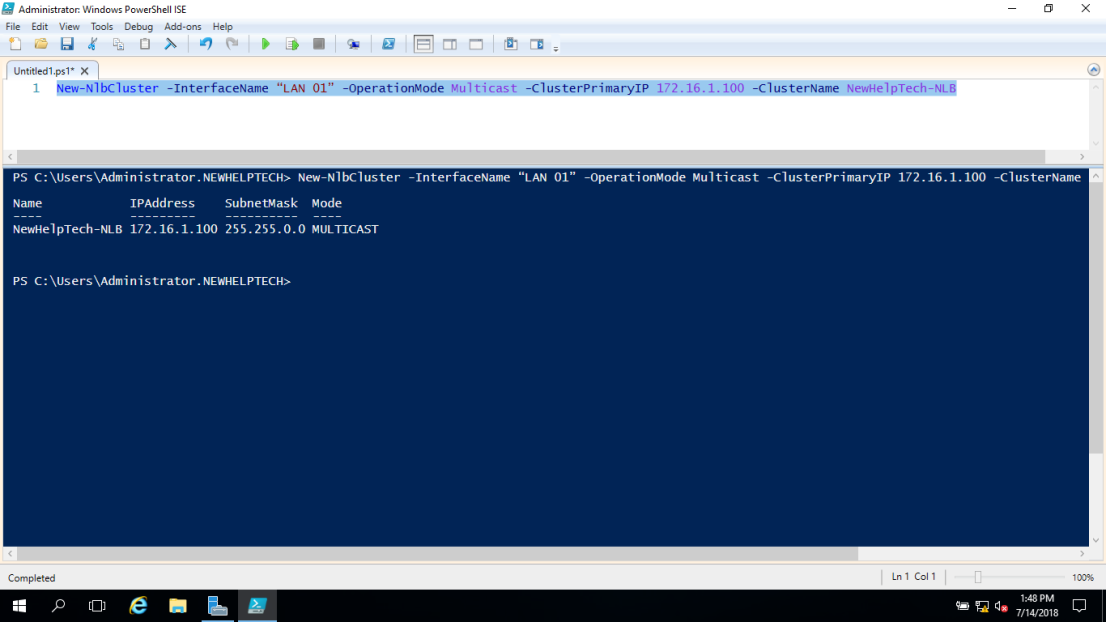
5 – On the SUB-01 server, in the Windows PowerShell ISE, type
New-NlbCluster -InterfaceName “Ethernet” -OperationMode Multicast -ClusterPrimaryIP 172.16.1.100 -ClusterName NewHelpTech-NLB
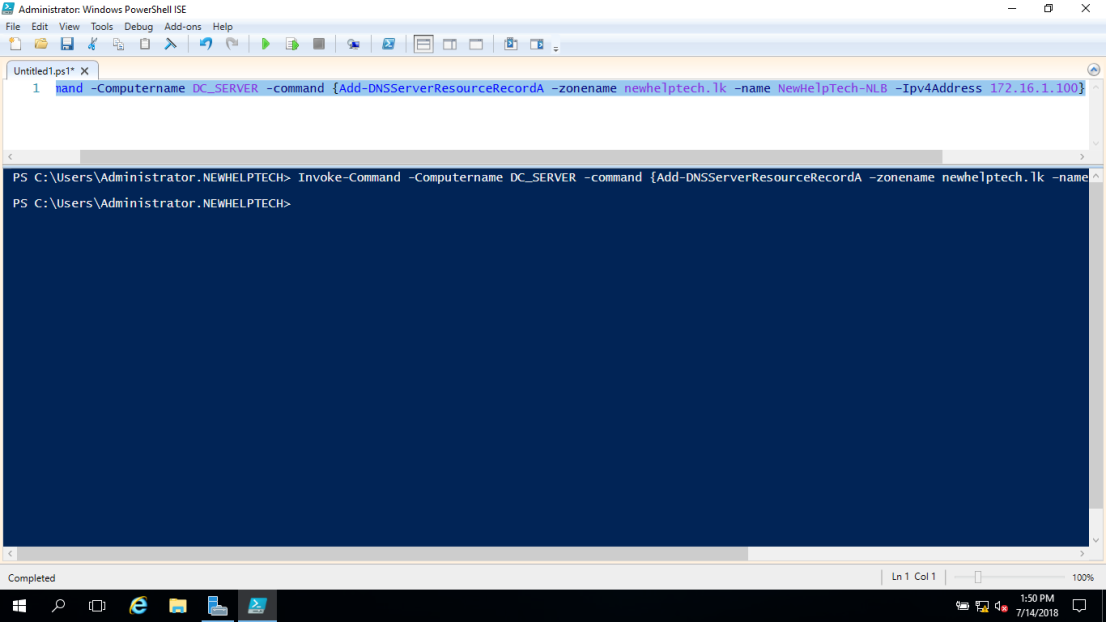
6 – Once the command complete, still in the Windows PowerShell ISE, type
Invoke-Command -Computername DC-SERVER -command {Add-DNSServerResourceRecordA – zonename adatum.com –name NewHelpTech-NLB –Ipv4Address 172.16.1.100}
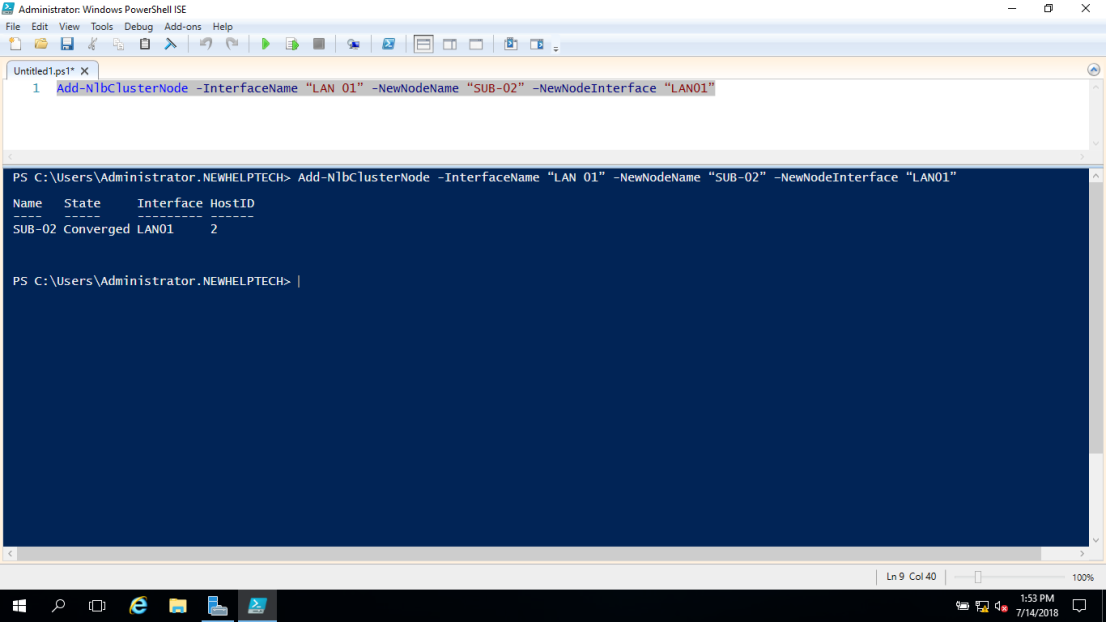
7 – Now to add a second host to the cluster, still in Windows PowerShell ISE, type
Add-NlbClusterNode -InterfaceName “Ethernet” -NewNodeName “SUB-02” –NewNodeInterface “Ethernet”
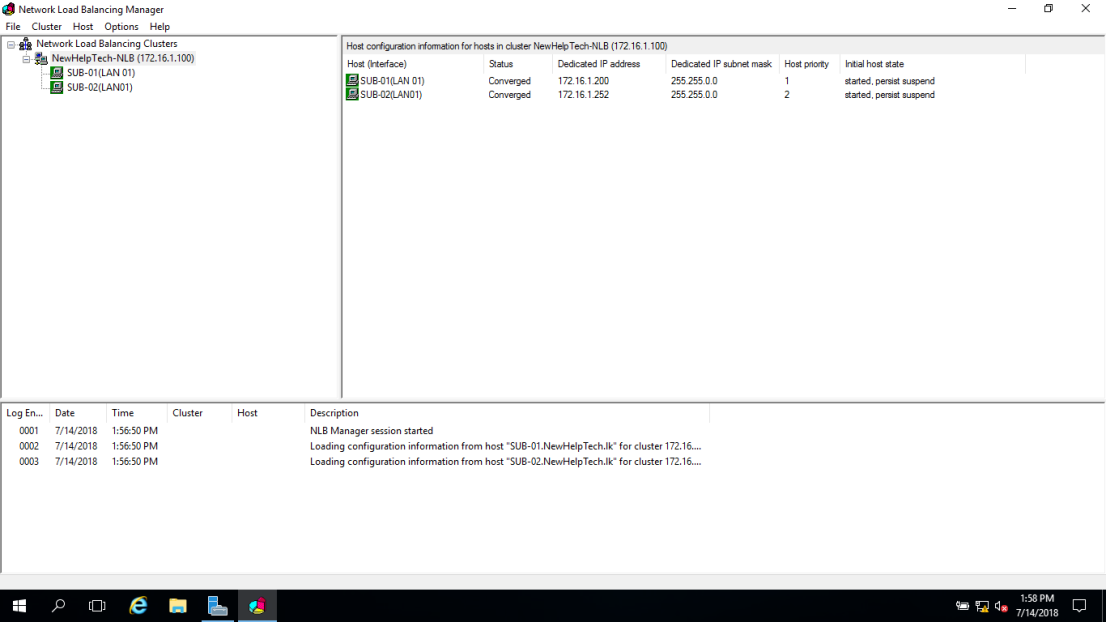
8 – On the SUB-01 Server, open Server Manager, click the Tools and then click Network Load Balancing Manager
9 – In the Network Load Balancing Manager console, verify that nodes SUB-01 and SUB-02 display with the status of Converged for the New HelpTeh-NLB cluster
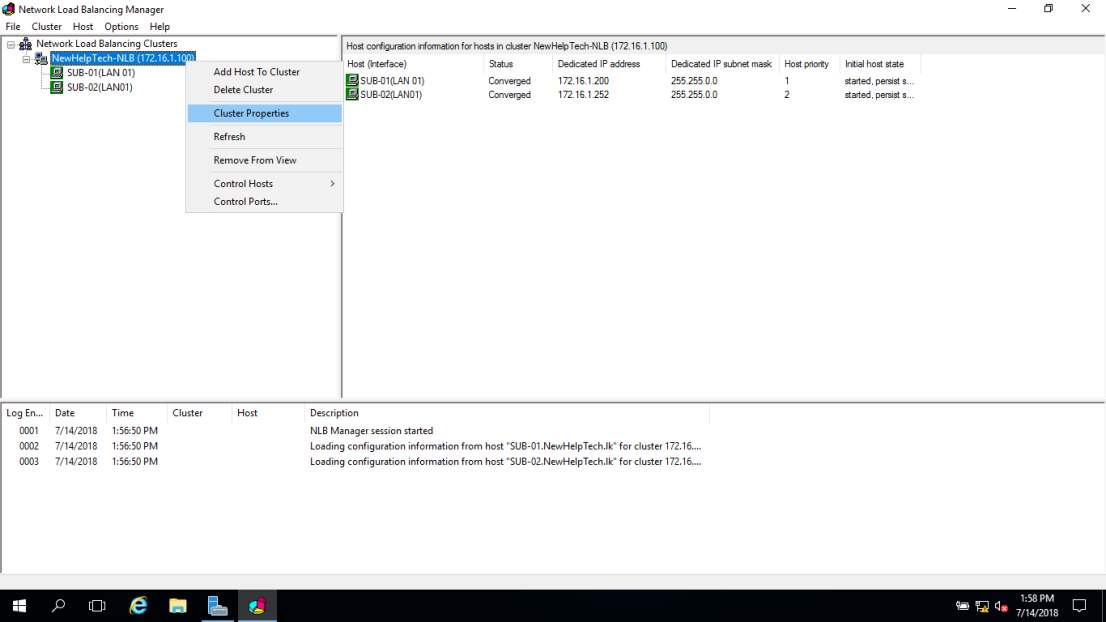
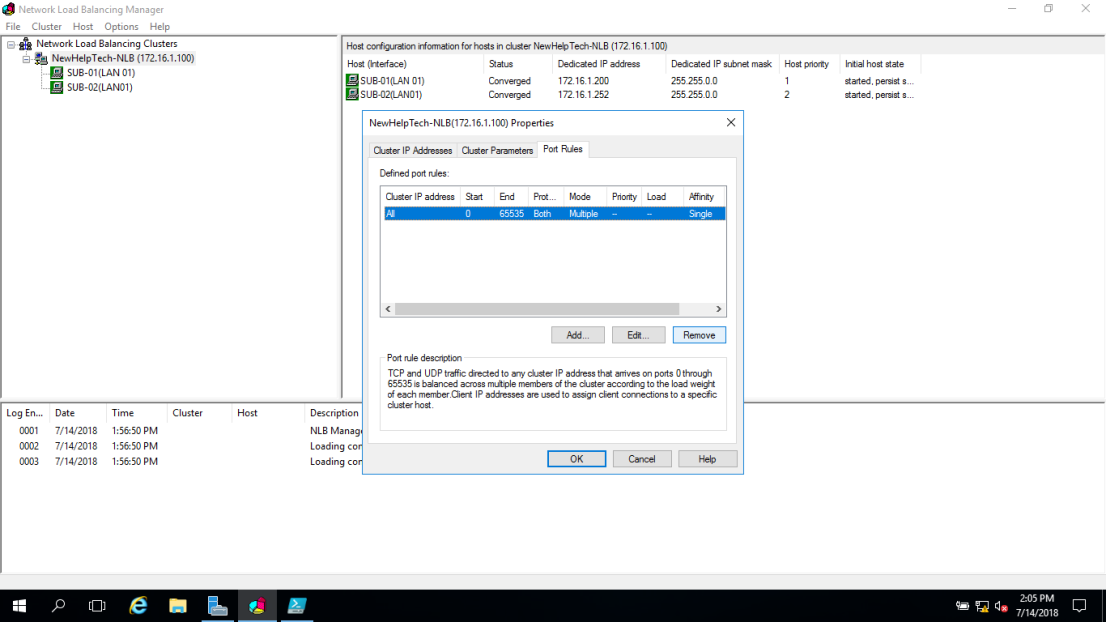
10 – Next, right-click the NewHelpTech-NLB cluster, and then click Cluster properties
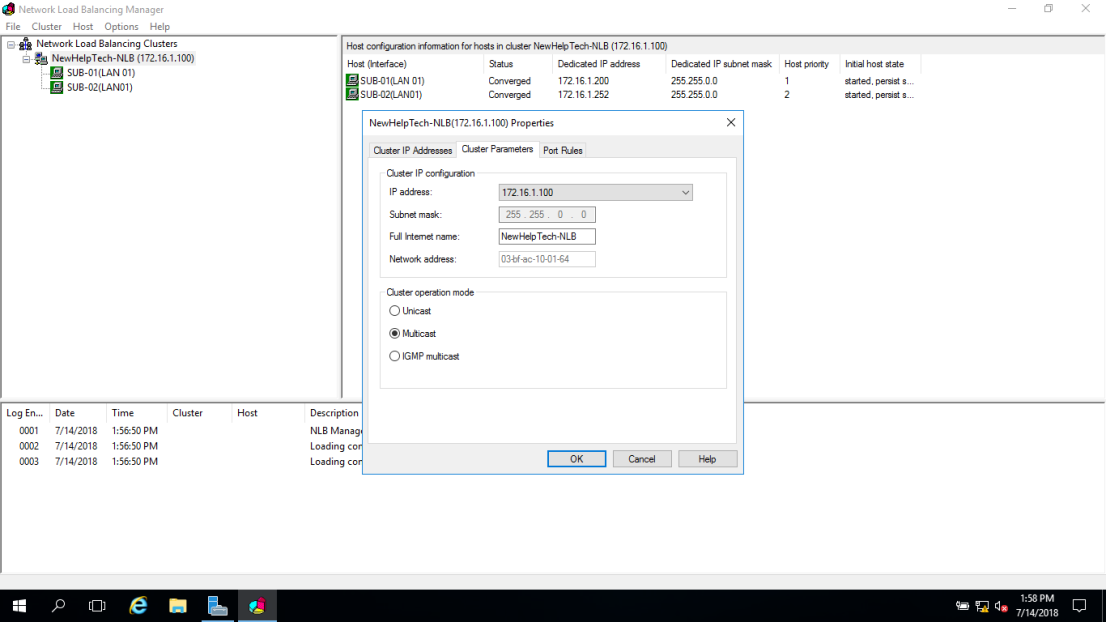
11 – In the NewHelpTech-NLB(172.16.1.100), on the Cluster Parameters tab, verify that the cluster is set to use the Multicast operations mode
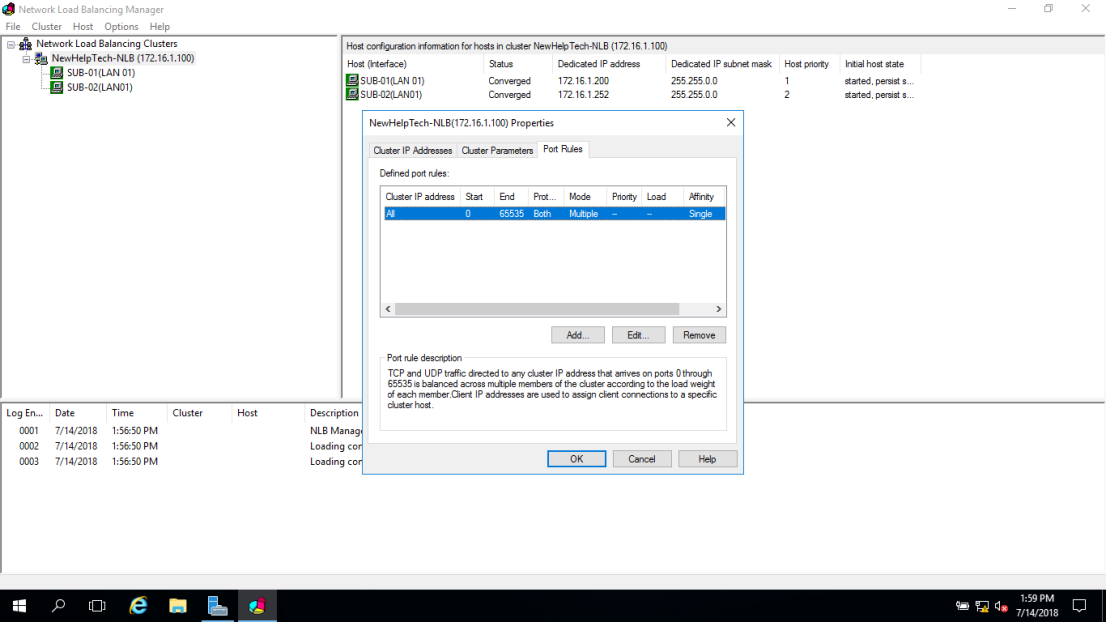
12 – On the Port Rules tab, verify that there is a single port rule named All that starts at port 0 and ends at port 65535 for both TCP and UDP protocols and that it uses Single affinity
Configuring and Managing the NLB Cluster
1 – Before we start to configure and manage the NLB Cluster, log on to the SUB-02 server, and create 01 folder named NewHelpTech in C:\
2 – then copy all C:\inetpub\wwwroot to C:\NewHelpTech folder
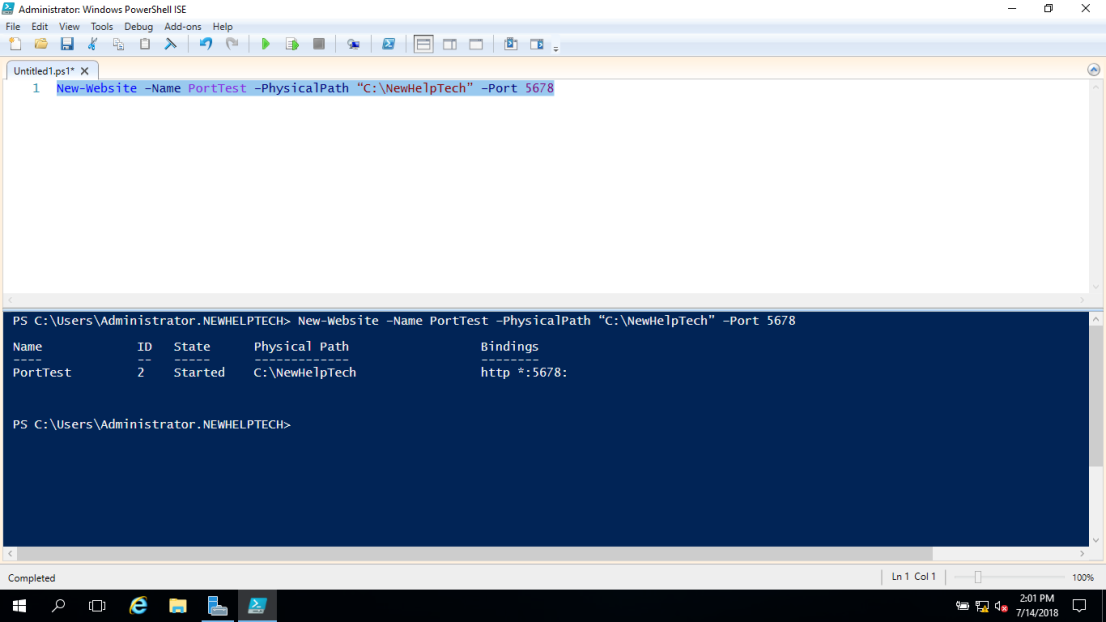
3 – Open PowerShell and type
New-Website –Name NewHelpTech –PhysicalPath “C:\NewHelpTech” –Port 5678
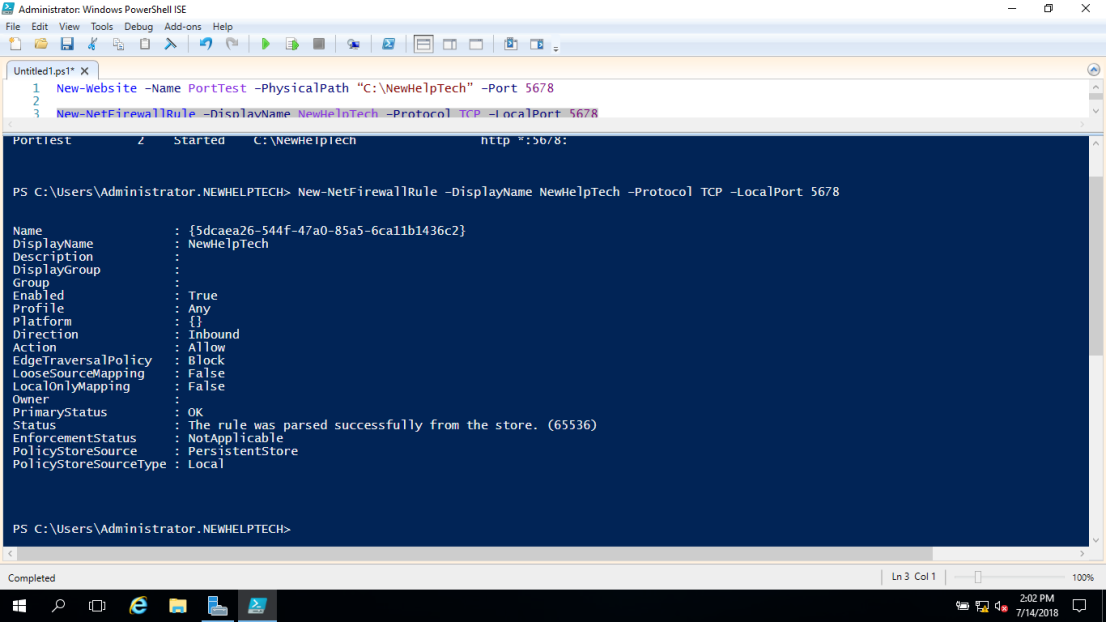
4 – Open PowerShell and type
New-NetFirewallRule –DisplayName NewHelpTech –Protocol TCP –LocalPort 5678
5 – Now switch to Domain Server and in the IE type http://SUB-02:5678
Verify that the static basic website
6 – Now switch back to the SUB-01 server and open Network Load Balancing Manager, in the Network Load Balancing Manager console, right-click NewHelpTech-NLB, and then click Cluster Properties
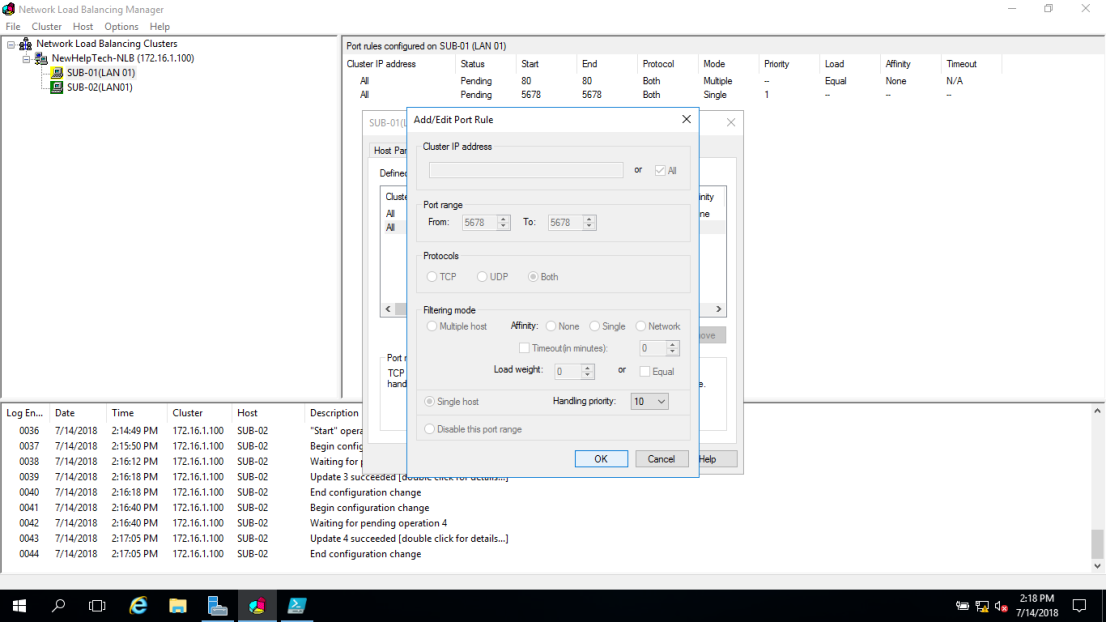
#_# In the NewHelpTech-NLB(172.16.1.100), on the Port Rules tab, select the All port rule, and then click Remove
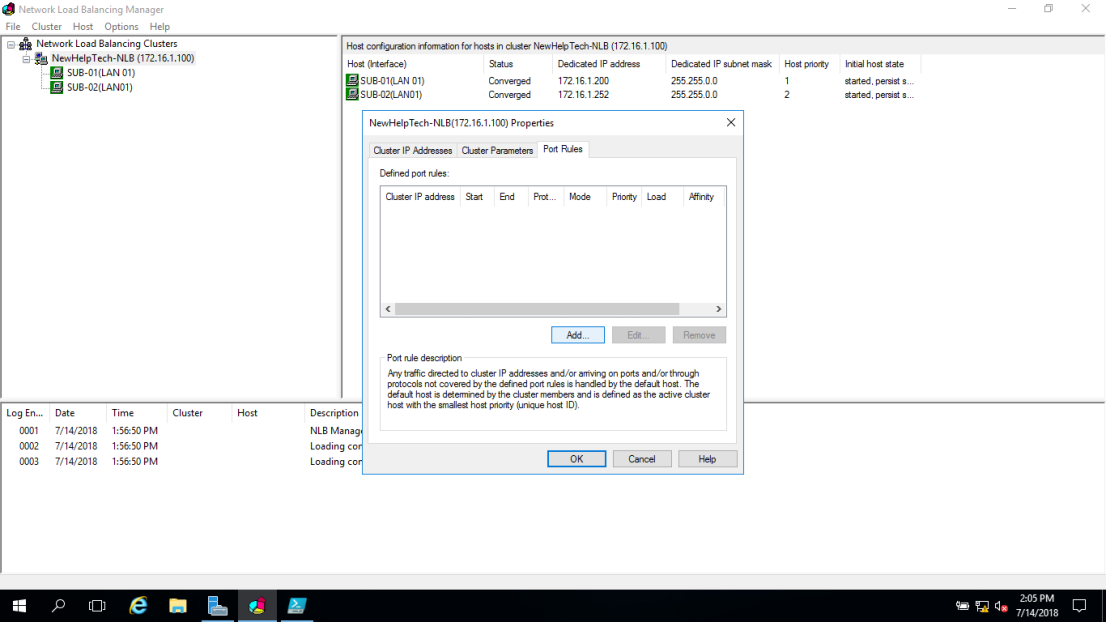
7 – On the Port Rules tab, click Add
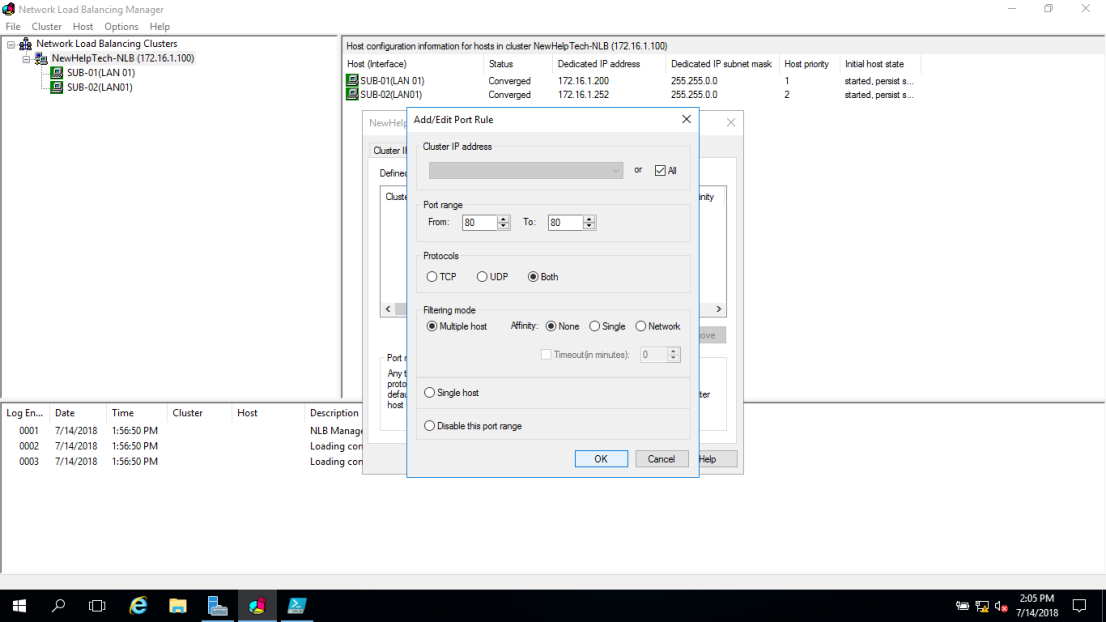
8 – In the Add/Edit Port Rule box, enter the following information, and then click OK
• Port range: 80 to 80
• Protocols: Both
• Filtering mode: Multiple Host
• Affinity: None
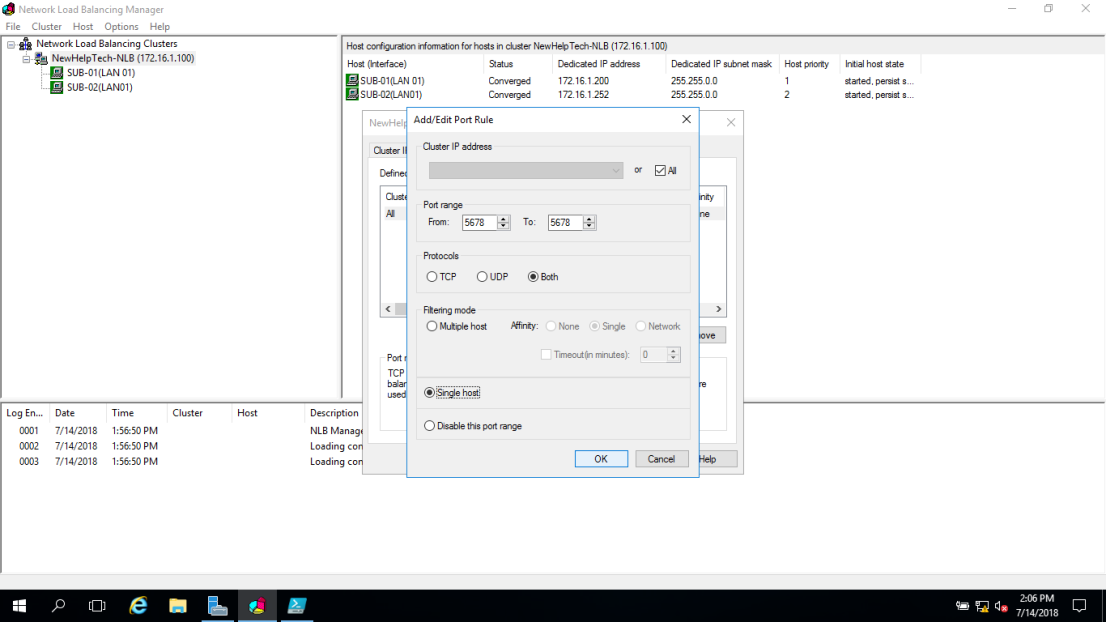
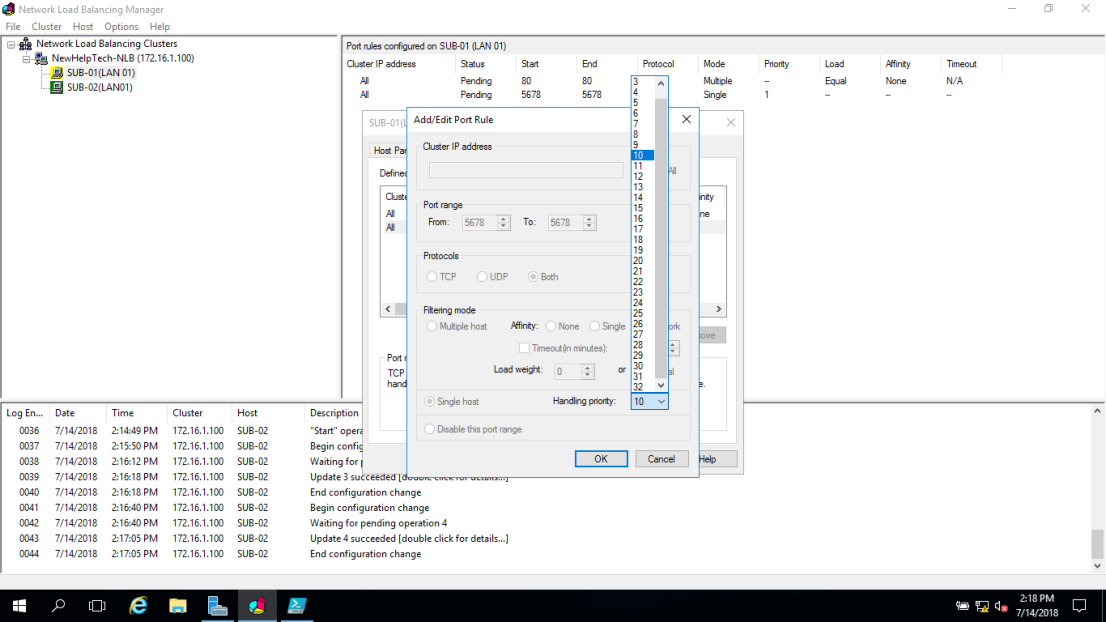
9 – On the Port Rules tab, click Add again
In the Add/Edit Port Rule box, enter the following information, and then click OK
• Port range: 5678 to 5678
• Protocols: Both
• Filtering mode: Single Host
10 – Click OK to close the NewHelpTech-NLB(172.16.1.100)
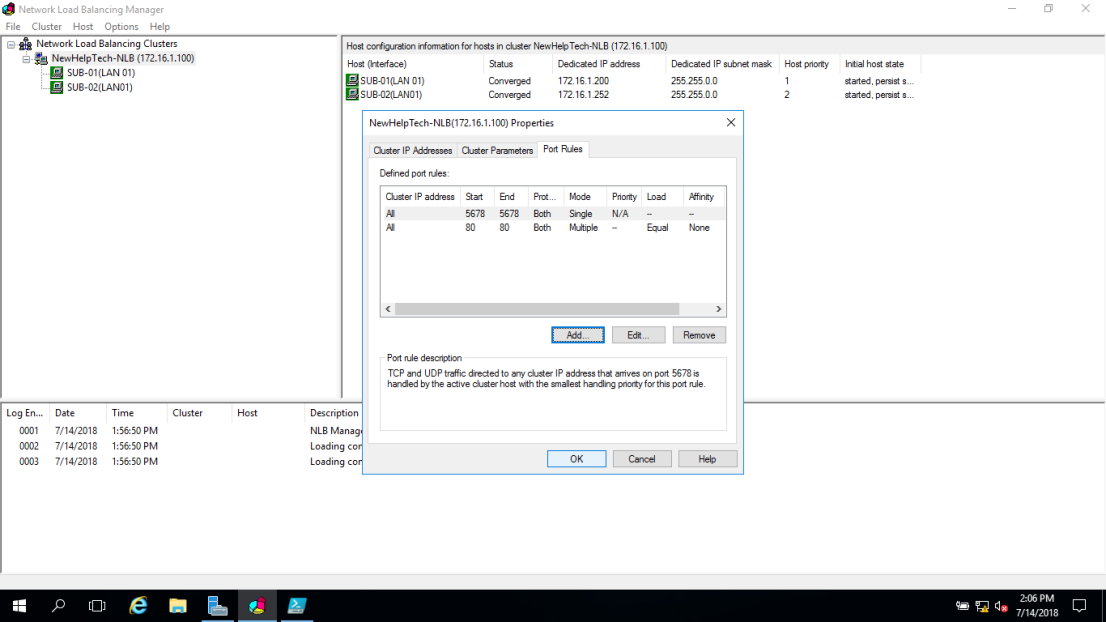
11 – In the Network Load Balancing Manager console, right-click SUB-01, and then click Host Properties

12 – On the Port Rules tab, click the port rule that has 5678 as the Start and End value, and then click Edit
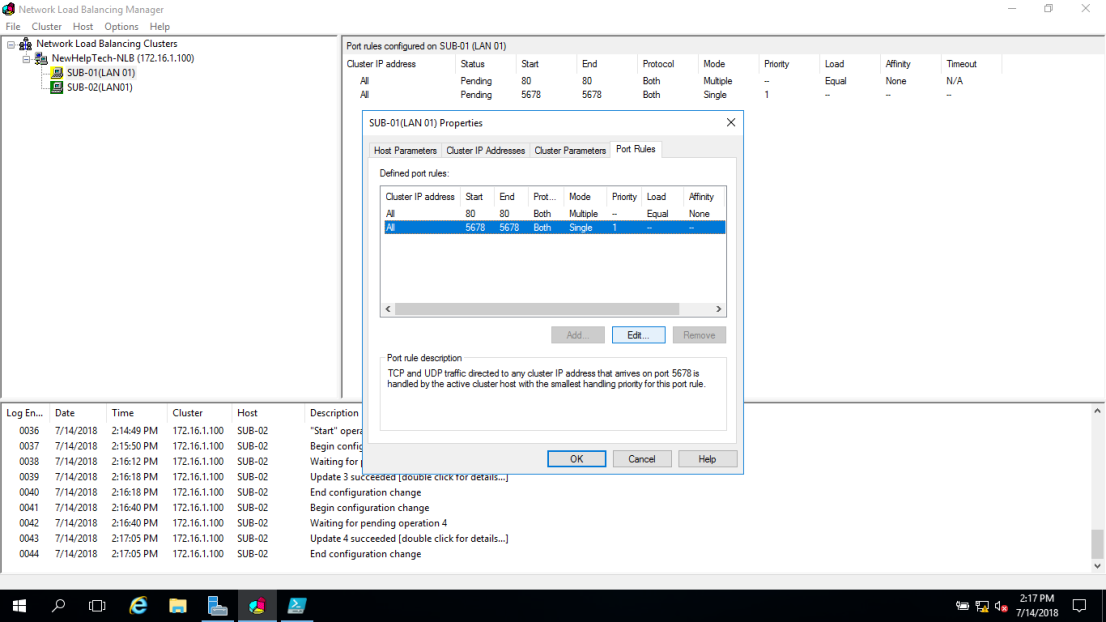
13 – Click the Handling priority value, and change it to 10 and click OK twice to close
Validate port rules
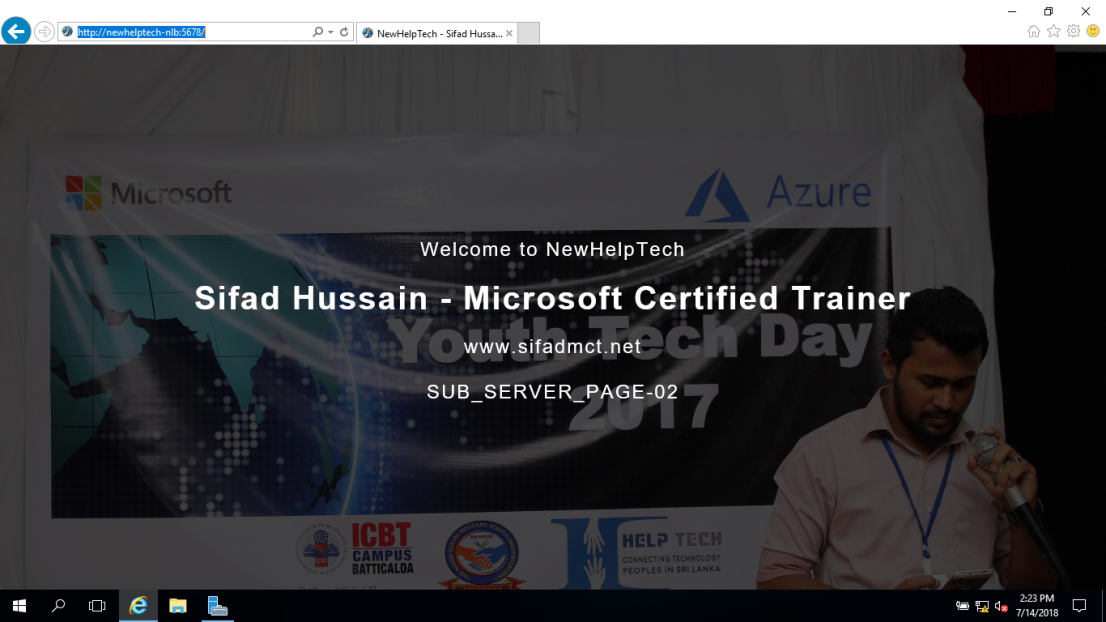
1 – To validate port rules, switch to DC Server, in IE type http://NewHelpTech-NLB:5678, and then Refresh the site few times and verify that you see static basic website
Manage host availability in the NLB cluster
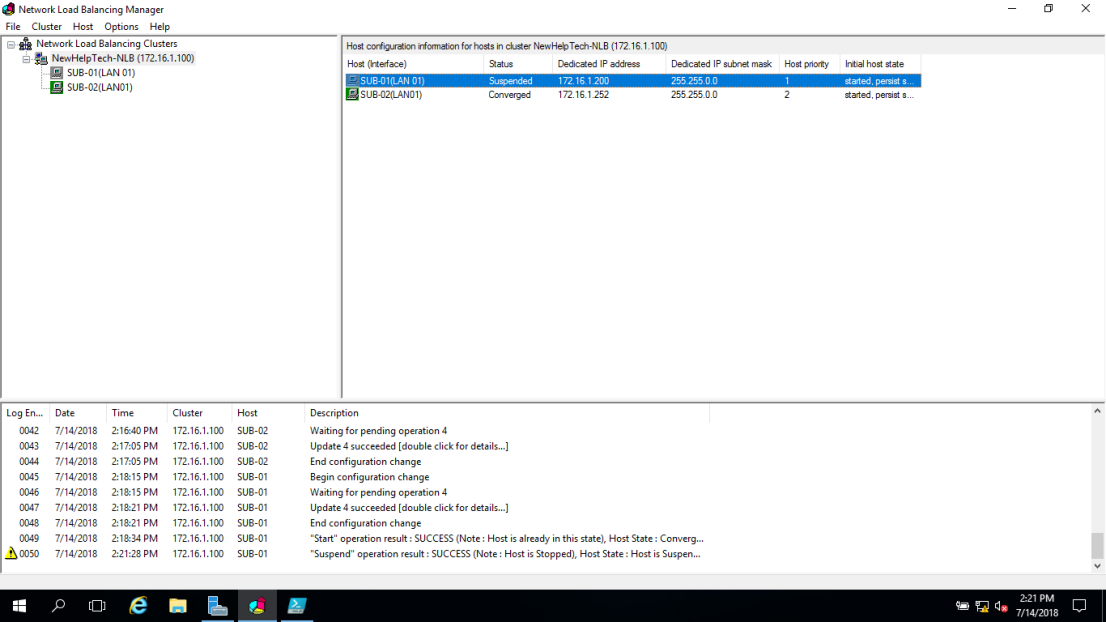
1 – Switch to the SUB-01 server, in the Network Load Balancing Manager console, right-click SUB-01 click Control Host, and then click Suspend
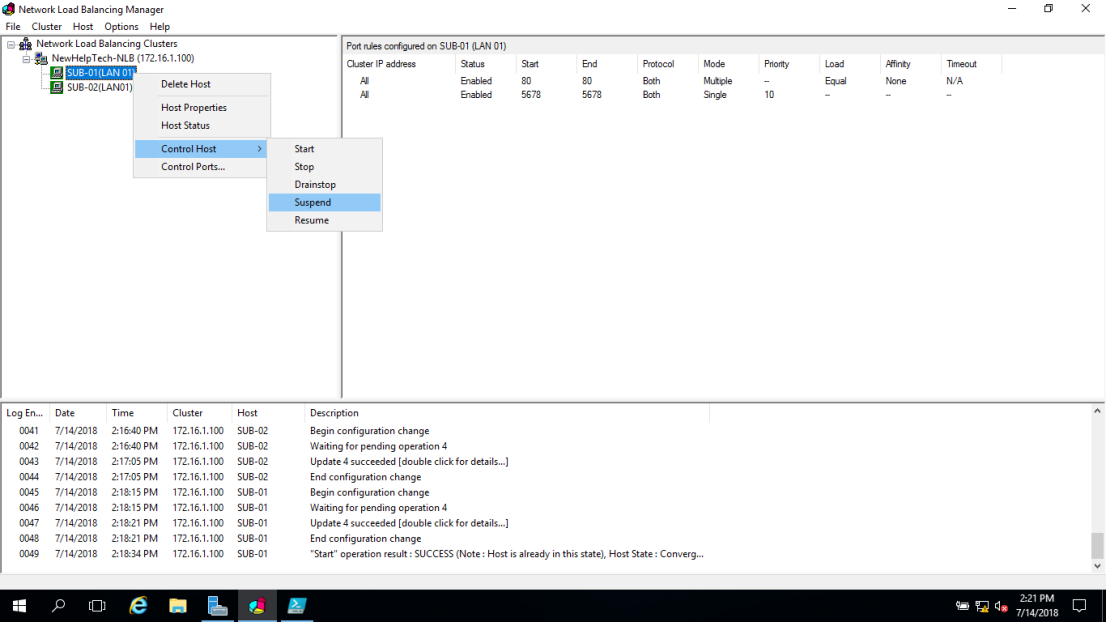
2 – Click the NewHelpTech-NLB node
#_# Verify that node SUB-01 displays as Suspended, and that node SUB-01 displays as Converged
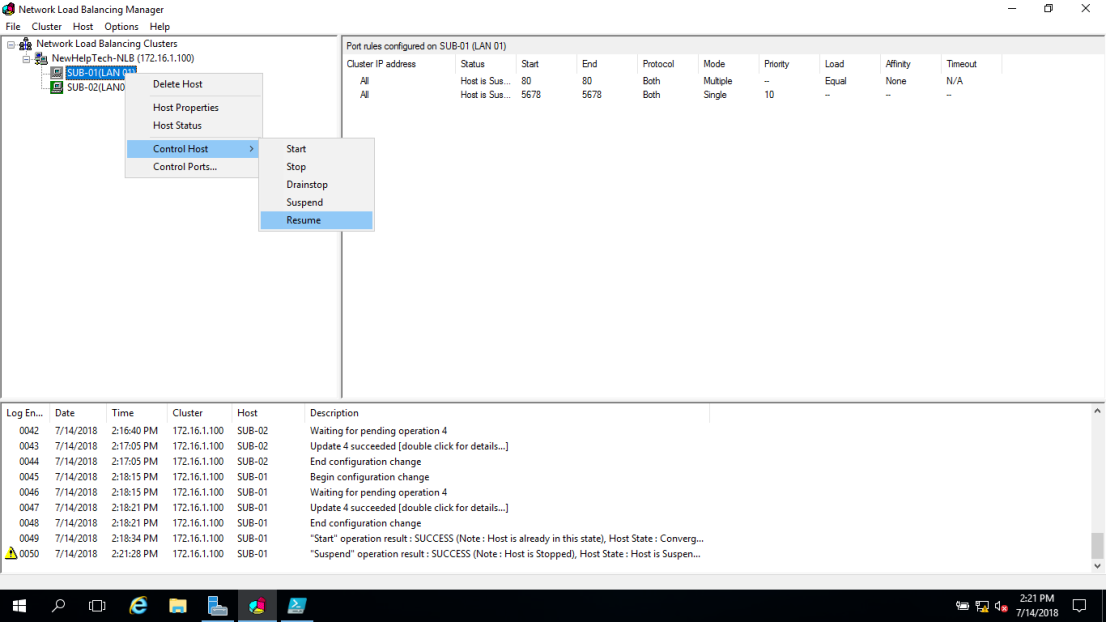
3 – Right-click SUB-01, click Control Host, and then click Resume
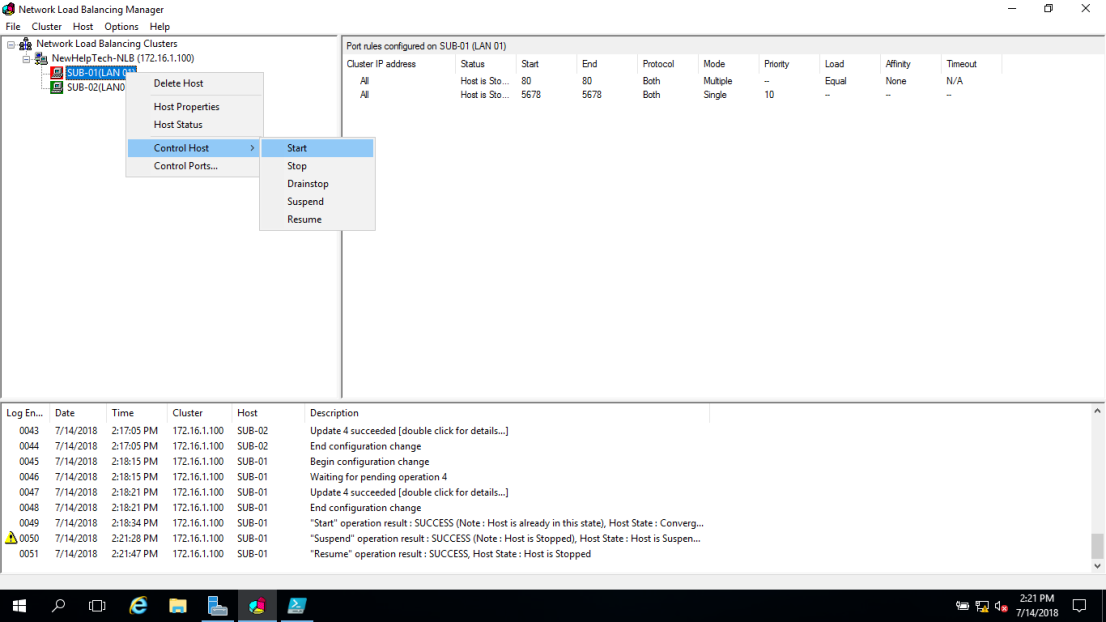
4 – Right-click SUB-01, click Control Host and then click Start
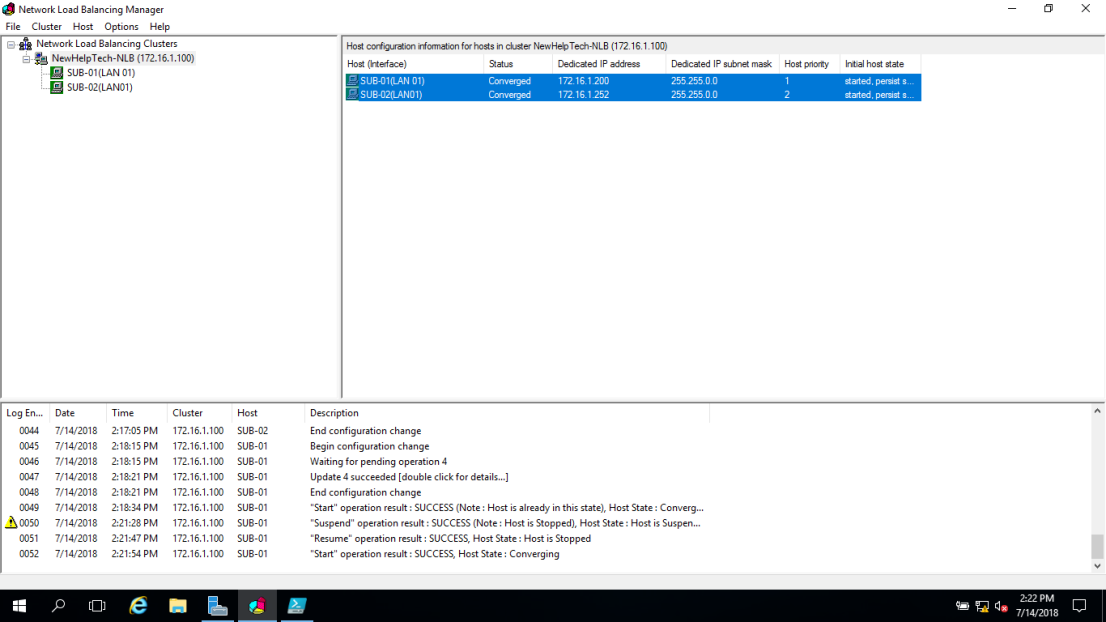
5 – Click the NewHelpTech-NLB node
#_# Verify that both nodes SUB-01 and SUB-02 now display as Converged. You might have to refresh the view


0 Comments