
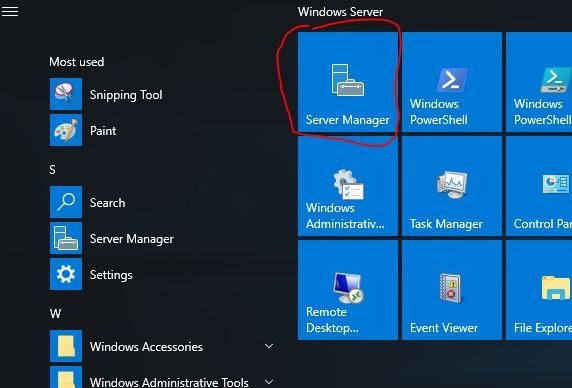
Step 1: Open Server Manager
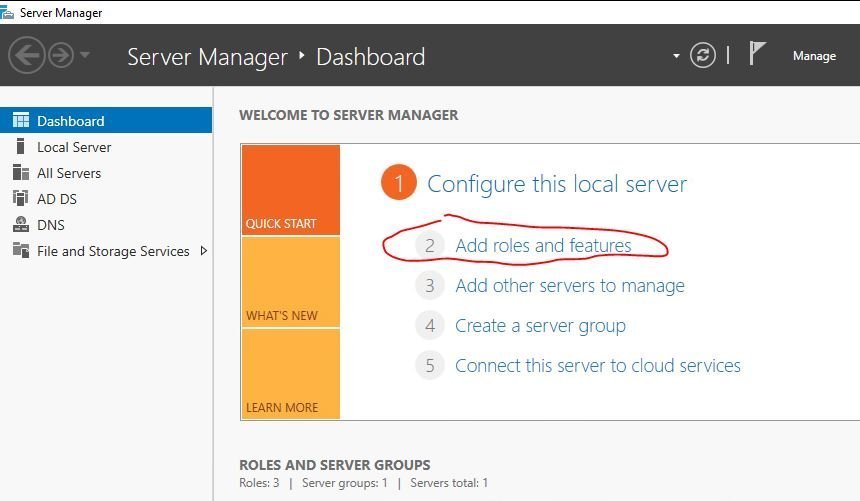
Step 2: Add Roles and Features
Now click on “add roles and features”
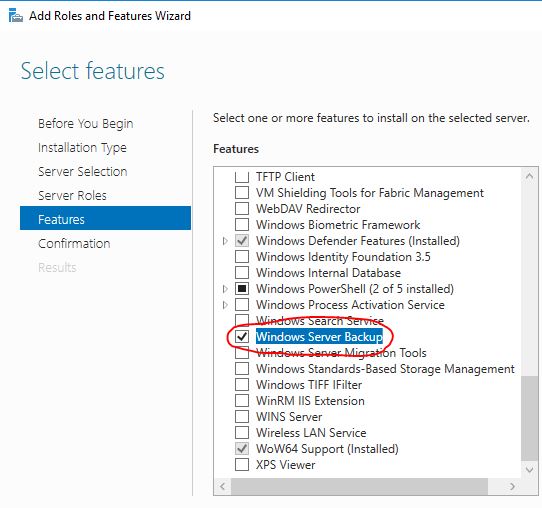
Step 3: Select Windows Server Backup
Now just click next a few times to get to the select features page. Select “Windows Server Backup” and click next.
On the next screen click install. When the install is complete click close.
That completes installing the Windows server backup utility.
The next step is to configure the backup.
How to Backup Active Directory (Full Server Backup)
I prefer to use the full backup option instead of the system state backup. This option allows you to easily restore if the operating system or Active Directory becomes corrupt.
It includes the system state so you can choose to restore the entire server or just the system state.
The steps for backing up just the system state are the same you will just choose custom instead of full server.
Here are the settings that will be configured for this backup:
- Daily Backup
- 1 full backup then 14 incremental backups – Windows server backup automatically handles the full and incremental backups no additional configuration is needed.
- The backup destination will be a volume mounted as a local disk. I’m using a SAN with replication to another datacenter for disaster recovery.
- My domain controllers are virtual running in a VMWare environment.
- The domain controller is Windows Server 2016
Step 1: Setup a Dedicated Volume for Backups
Important: When doing a full backup the disk cannot be larger than the one you are restoring to. So if the server you are backing up has a disk size of 50GB, the backup disk cannot be larger than this. The Windows backups are very efficient, the first backup is full then it will do incremental backups. I like to make the backup disk slightly smaller than the disk I’ll be backing up.

Step 2: Configure Windows Server Backup
Open the Windows Server Backup Utility
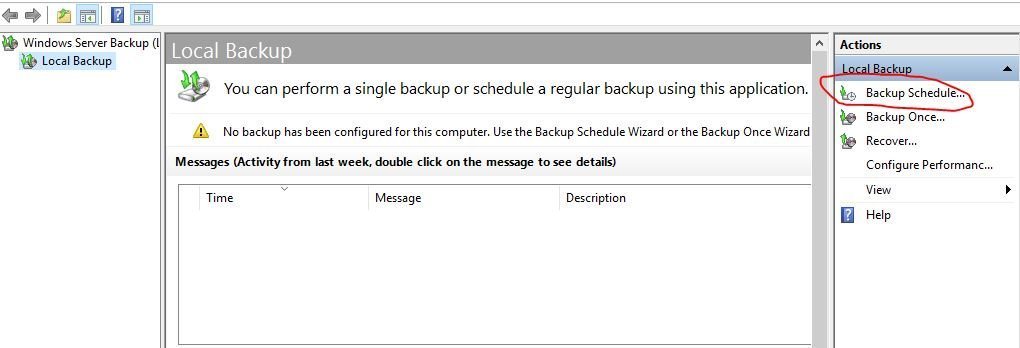
Click on “Backup Schedule” on the right-hand side
Click next on the Getting started page
Select “Full Server” and click next.
If you want to backup just the system state select “Custom”.
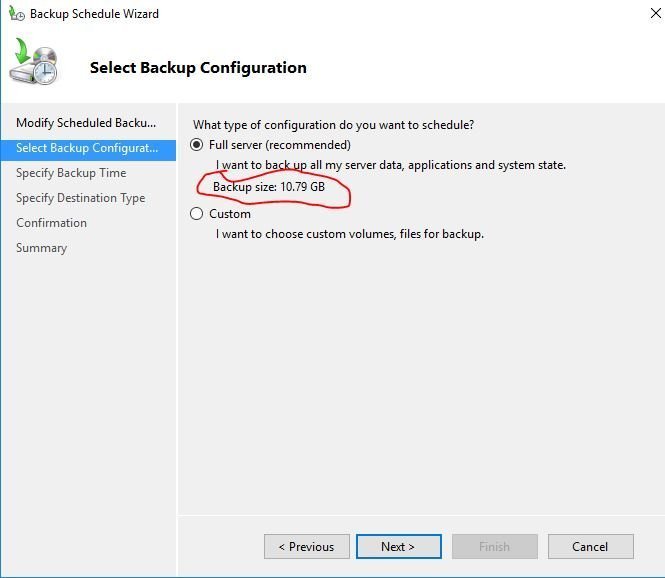
In the above screenshot, the backup configuration will tell you how large the backup size will be. Unless you have 3rd party programs and files on your domain controller the backup should be fairly small. After the first backup, it will do an incremental and only backup the changes.
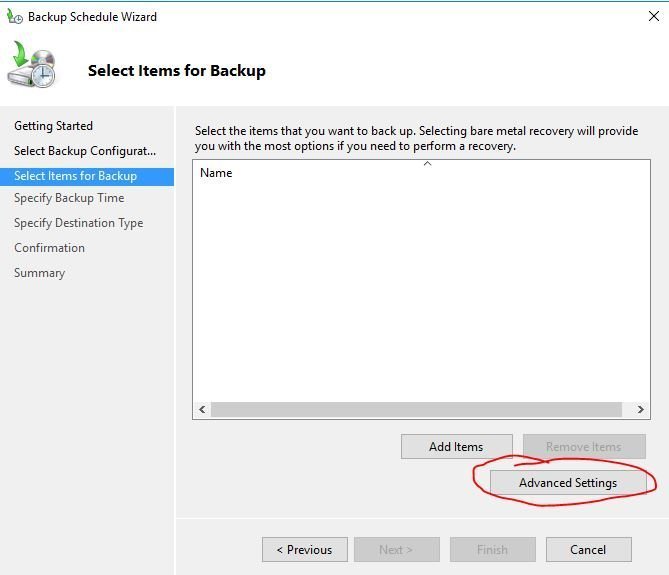
Click the “advanced settings” button
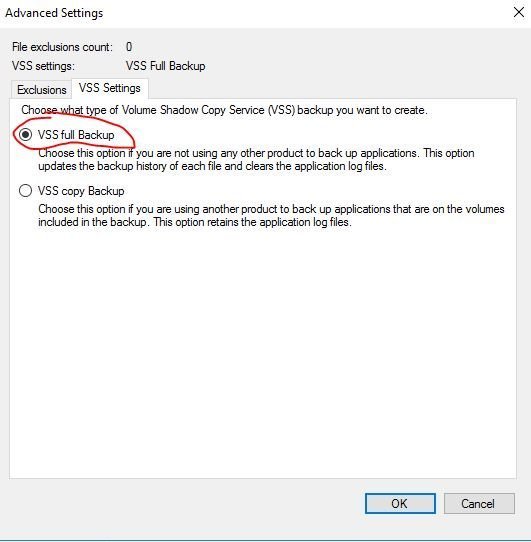
Click “VSS Settings” then select “VSS full backup”. Click OK
This is recommended if you are not using any other backup product to backup Active Directory.
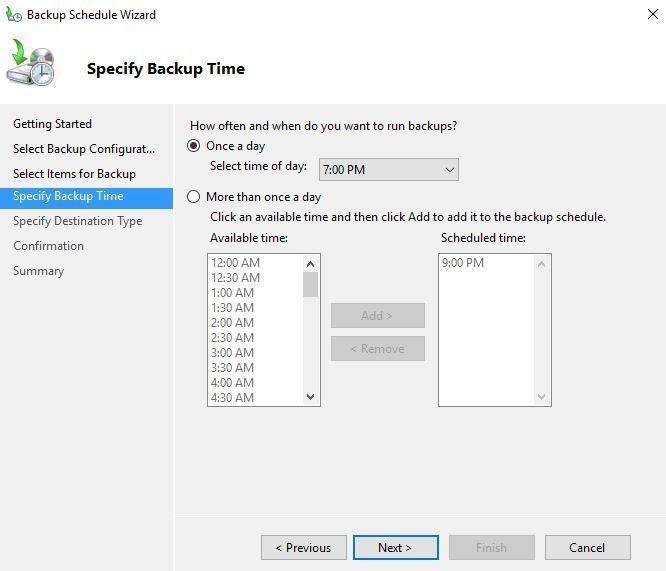
Configure the backup schedule that works best for you. In my environment, I configured a daily backup at 7:00 PM.
If you have a large environment with lots of AD changes you should consider twice a day backups.
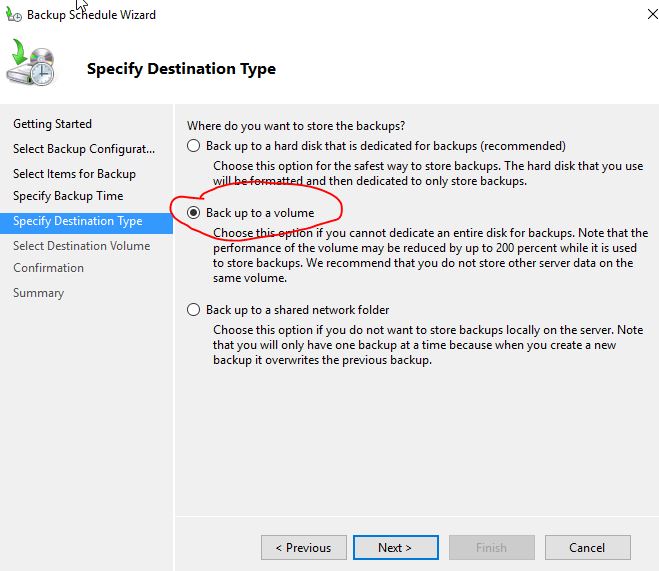
On the specify destination type screen choose “backup to a volume”. Then choose the volume that you configured from step 1.
DO NOT choose “Back up to a shared network folder” This option does not support incremental backups it will overwrite the backup each time.
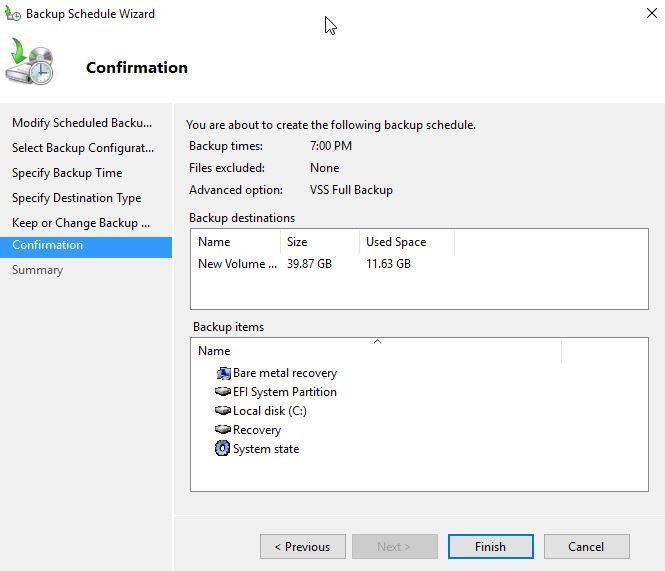
Confirm backup settings and click finish.
The backup configuration is complete but we need to change a few settings in the scheduled task that was created.
Task Scheduler Settings
Just type in “Task Scheduler” in the search bar and click the app.

Browse to Task Scheduler Library -> Microsoft -> Windows -> Backup
You will see the windows backup scheduled task.
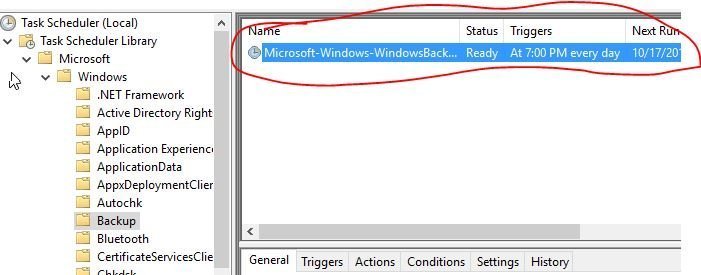
Double click on the task name to open it up.
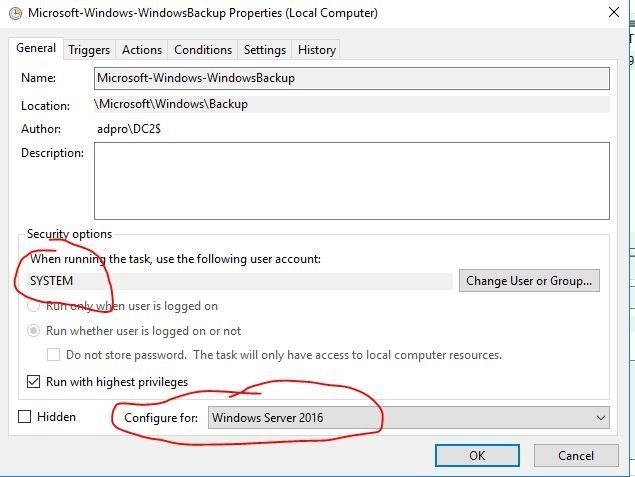
On the General screen, ensure the task is running as the SYSTEM account and change the configure for to the correct operating system. I’m running 2016 so that is what I have selected.
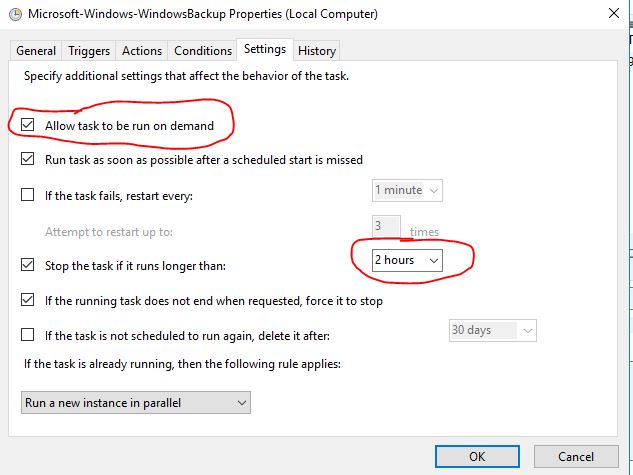
On the settings screen change the task to stop running if it runs longer than 2 hours. Also, check the box to allow the task to be run on demand.
Click OK. That completes the changes for the scheduled task.
If you want you could right click the task and run it. The backup process may cause a bit of CPU usage so you may need to wait.
The first backup will be a full backup. The next 14 backups will be incremental then it will do another full backup.
You can check the status of backups, disk space used and much more in the backup utility.

The backup configuration is complete, Active Directory will now backup on a daily basis (or whatever schedule you configured it for).
In the next section, I will show you how to easily monitor the backups.
Automate AD Backup Monitoring (Email Alerts)
In this section, I’ll show you how to get email notifications when the backup completes. This is a tested solution that I found from Microsoft and that I use in production.
To automate monitoring of the backups you will configure a scheduled task to trigger an action when event ID 4 has been logged.
Step 1: Setup PowerShell Script
The scheduled task will trigger a PowerShell script when event ID 4 is logged. The script will send an email message.
Copy the script below and paste it into a text file. Save it as AD-Backup-sucess.ps1
You need to change the from address, to address and the SMTP address.
$From = "dc1@yourdomain.com"
$To = "rallen@ad.activedirectorypro.com"
$Subject = "DC1 AD Backup SUCCESSFUL"
$Body = "DC1 daily backup successful. No further action is required"
$SMTPServer = "SMTP address"
$SMTPPort = "25"
Send-MailMessage -From $From -to $To -Subject $Subject -Body $Body -SmtpServer $SMTPServer -port $SMTPPort
Step 2: Setup Scheduled Task
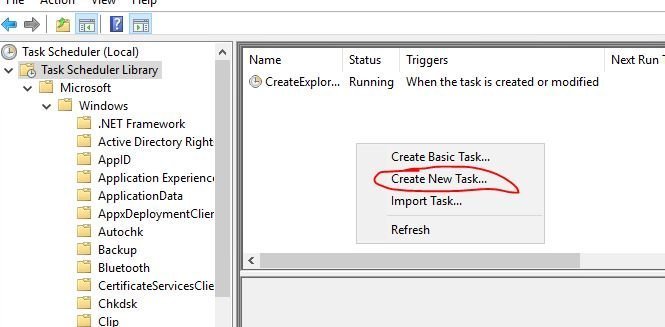
Open the scheduled task app, in the task scheduler library create a new task.
On the general screen set the following
- Name: AD Backup Success Notification
- Use the following account: SYSTEM
- Set to “Run whether user is logged on or not”
- Run with highest privileges
- Configure for: Choose your operating system

On the Triggers screen click on new and set the following:
- Begin the task: On an event
- Log: Microsoft-Windows-Backup/Operational
- Source: Backup
- Event ID: 4

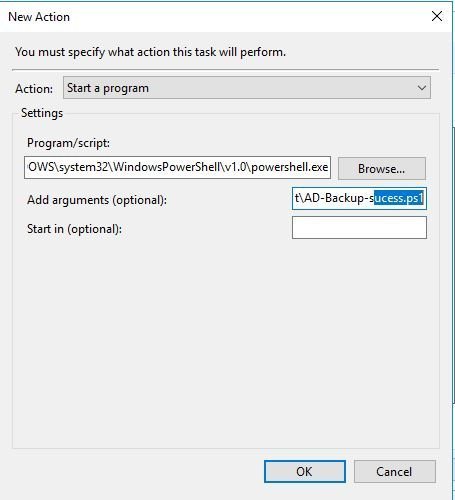
On the Actions screen click new and configure the following:
- Action: Start a program
- Program/script: C:\WINDOWS\system32\WindowsPowerShell\v1.0\powershell.exe
- Add arguments: Path to the script from step 1. Example c:\it\AD-Backup-sucess.ps1
Click ok and the task setup is complete.

Now when the backup completes you will receive an email notification.

Summary
Active Directory is one of the most critical components in a Windows environment. It seems like everything is dependent on Active Directory or DNS and if it crashes nothing works right or at all. I’ve worked with customers that had a complete domain controller crash (all of them) and literally everything was down. Fortunately, they had backups and was able to recover the domain controllers.
With all the ransomware going around and constant threats you never know what can happen so don’t rely on multiple domain controllers as your only method for AD Backups. You definitely should have multiple domain controllers but in addition, ensure you are running backups as well. Why would you not? I just showed you a way to back them up for FREE.
Stay tuned for my next guide on how to restore Active Directory from a backup.


1 Comments
How To Install Windows Server Backup >>>>> Download Now
ReplyDelete>>>>> Download Full
How To Install Windows Server Backup >>>>> Download LINK
>>>>> Download Now
How To Install Windows Server Backup >>>>> Download Full
>>>>> Download LINK dh