Installing and configuring a VPN server using Windows Server 2016 is easy way. By following the guidance in this article, a VPN server can be implemented in just a few minutes.
VPN provides secure access to organizations’ internal data and applications to clients and devices that are using the Internet.
To properly implement and support a VPN environment within your organization, you must understand how to select a suitable tunnelling protocol, configure VPN authentication, and configure the server role to support your chosen configuration.
For this demo purposes, i will be using 2 VM, and 1 Windows 10 client VM which is all running in Hyper-V.
Lets get started VPN configuration.
01 – lets verify the network configuration for VPN Server. (Please Refer to the Pictures)
1 – VPN Server Require 2 NIC :
- Ethernet 1 : LAN
- Ethernet 2 : Internet

Ethernet 1 : LAN

Ethernet 2 : Internet
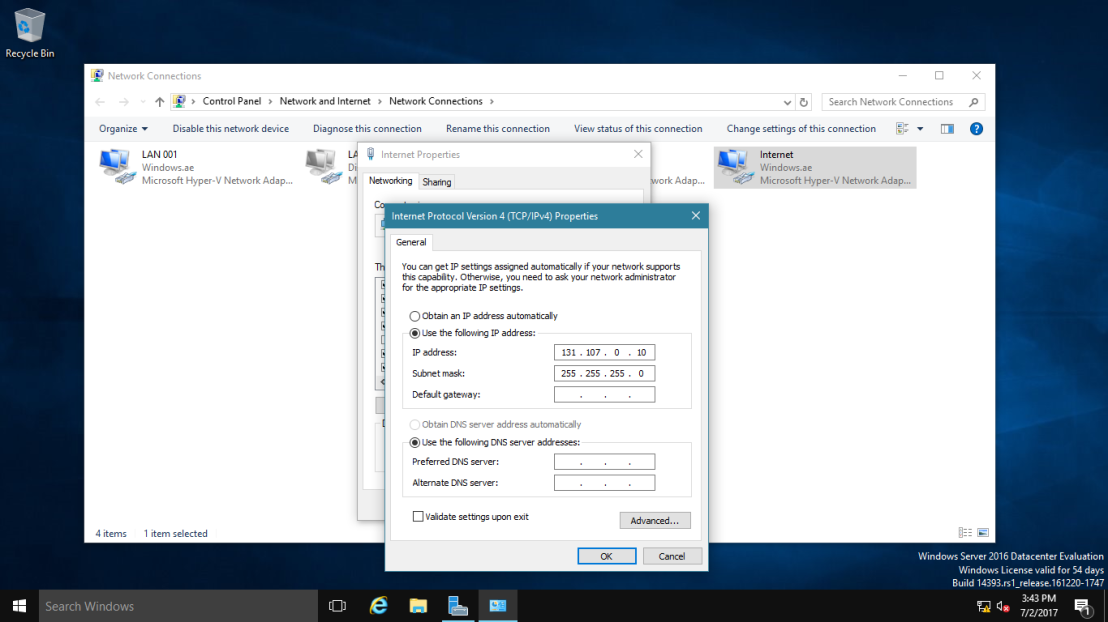
2 – Windows 10 Client.
- Require 1 NIC :
- Ethernet 1 : Internet

02 – Creating VPNUsers OU & User in Active Directory.
1 – Create a new OU – In the New Object – Organizational Unit dialog box, in the Name box, type VPNUsers, and then click OK.


2 – In the Active Directory Users and Computers console, expand Windows.ae, right-click VPNUsers OU, click New, and then click User.


3 – right-click user, Properties, Allow Access enabled for Remote Access to connect to your VPN Server. and Okay. (Please Refer to the Pictures)


03 – Installation
1 – open your Server Manager and click on Add Roles and Features.
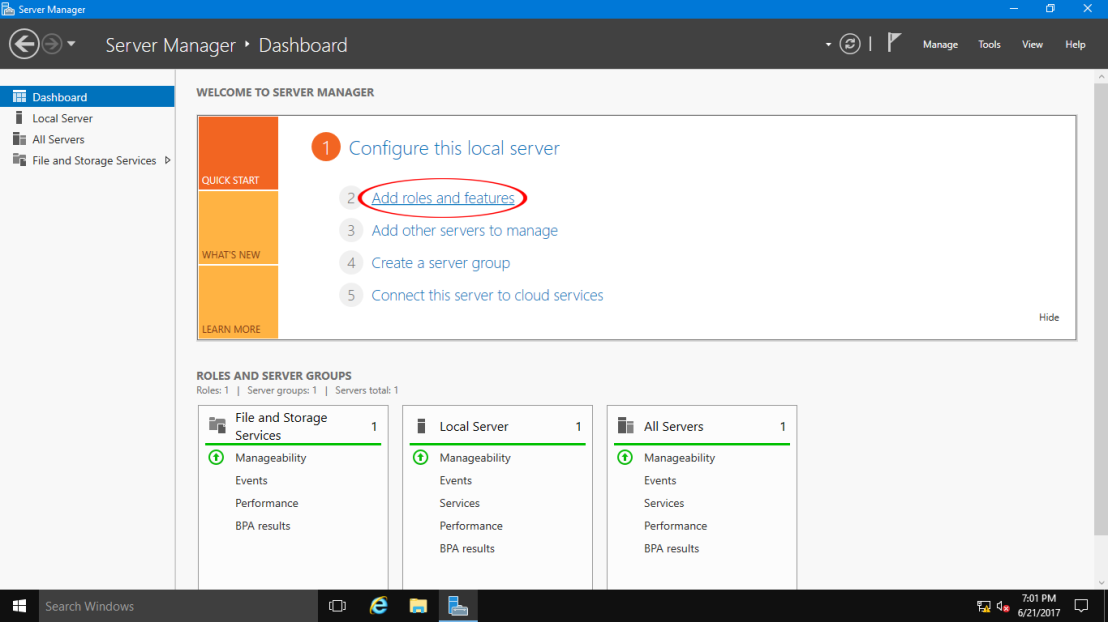
2 – click on Next.

3 – Now select Role-based or feature-based installation option and click on Next.

4 – Now select desired server you’d like to install Routing and Remote Access on.

5 – From the Roles lists select Remote Access and click on Next.

6 – Click Next, no additional features required at this point.

7 – Just click on Next.

8 – In next tab you need to select DirectAccess and VPN (RAS), Click Add Features in the popup window.


9 – On confirmation page click Install to begin.

10 – After installation process is finished, click on Open the Getting Started Wizard.

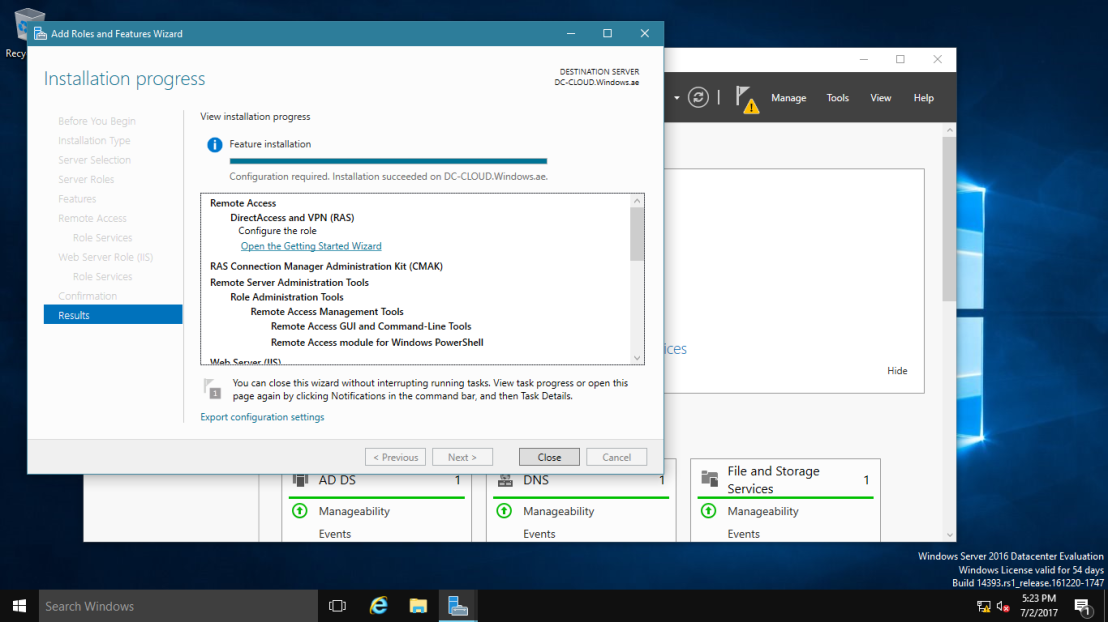
11 – In this tab press Deploy VPN only.

04 – Configuration
1 – Right click on your server and choose Configure and Enable Routing and Remote Access.

2 – Click on Next.

3 – On the new wizard select Remote Access (dial-up or VPN).

4 – On the next page select VPN.

5 – Here select network adapter that connects your server to the Internet.

6 – Here select network adapter that connects your server to the VPN Clients.
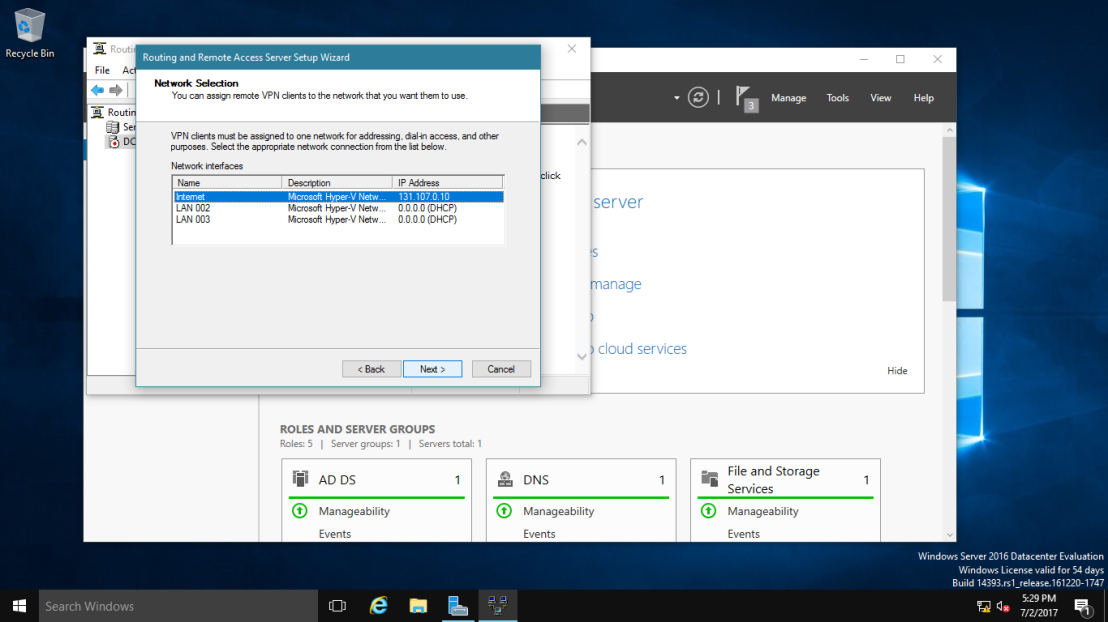
7 – Here you can choose the method of distribution for IP addresses – via DHCP or manually. Select the second way.

8 – In this tab press New.

9 – In popup window specify range of IP addresses, press OK, return to previous tab and click on Next.

10 – In this tab you can choose the method of authentification. Select Routing and Remote Access.

11 – Press Finish. and Click Okay, Now configuration is finished.


12 – Next, in the Routing and Remote Access console, expand DC-CLOUD, right-click ports, click Properties.

13 – Verify that 128 ports exist for SSTP, IKEv2, PPTP, and L2TP, then double-click WAN Miniport (SSTP). Maximum ports box, type 5, and then click OK, Routing and Remote Access message box, click Yes.

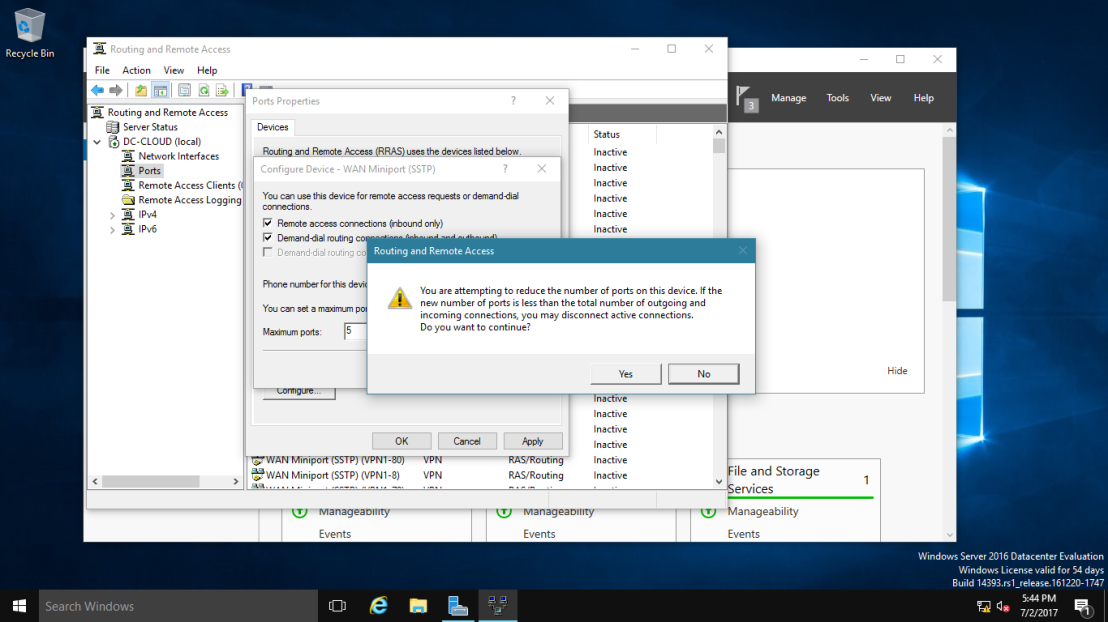
14 – Repeat the same step no:13 for IKEv2, PPTP, and L2TP, then click OK.

05 – Client Connectivity Testing
1 – On the Windows 10 client PC, open Network and Sharing Center, then click Set up a new connection or network.

2 – Next, on the Choose a connection option interface, click Connect to a workplace, and then click Next.

3 – On the How do you want to connect? interface, click Use my Internet connection (VPN).

4 – On the Connect to a Workplace interface, click I’ll set up an Internet connection later.

5 – In the Internet address box, type 131.107.0.10 (DC-CLOUD VPN Server IP Address).
— In the Destination name box, type NewHelpTech VPN connection, select Allow other people to use this connection checkbox, and then click Create. —

6 – Next, right click NewHelpTech VPN connection, and then click Connect.


7 – In the sign-in dialog box, type the domain user from VPNUsers OU Name Sifad and box, type Password, and then click OK.

8 – Verify that you are connected to Windows by using a PPTP connection, right click NewHelpTech VPN connection, and then click Status.

 Orait, that all for now, we’ve connected to NewHelpTech VPN connection successfully.

0 Comments